Invoicing in Xena
Here we explain the different ways you can create invoices in Xena.
Preparations
Every invoice starts as an order in Xena. Here's an overview of the different ways you can create an invoice:
- Via Orders (described in this guide)
- Via Subscription
- Via Mass Invoicing
- Via Pay on account
- As a credit note
In the Setup > Reports menu you can choose default layouts for your offers, invoices, order confirmations, etc. All these layouts can be customized with your logo and color theme.
Under Setup > Order Setup, on the 'Email' tab, you can enter the text you want to fill in the subject and body when a report is sent via email.
Prepare the order for invoicing
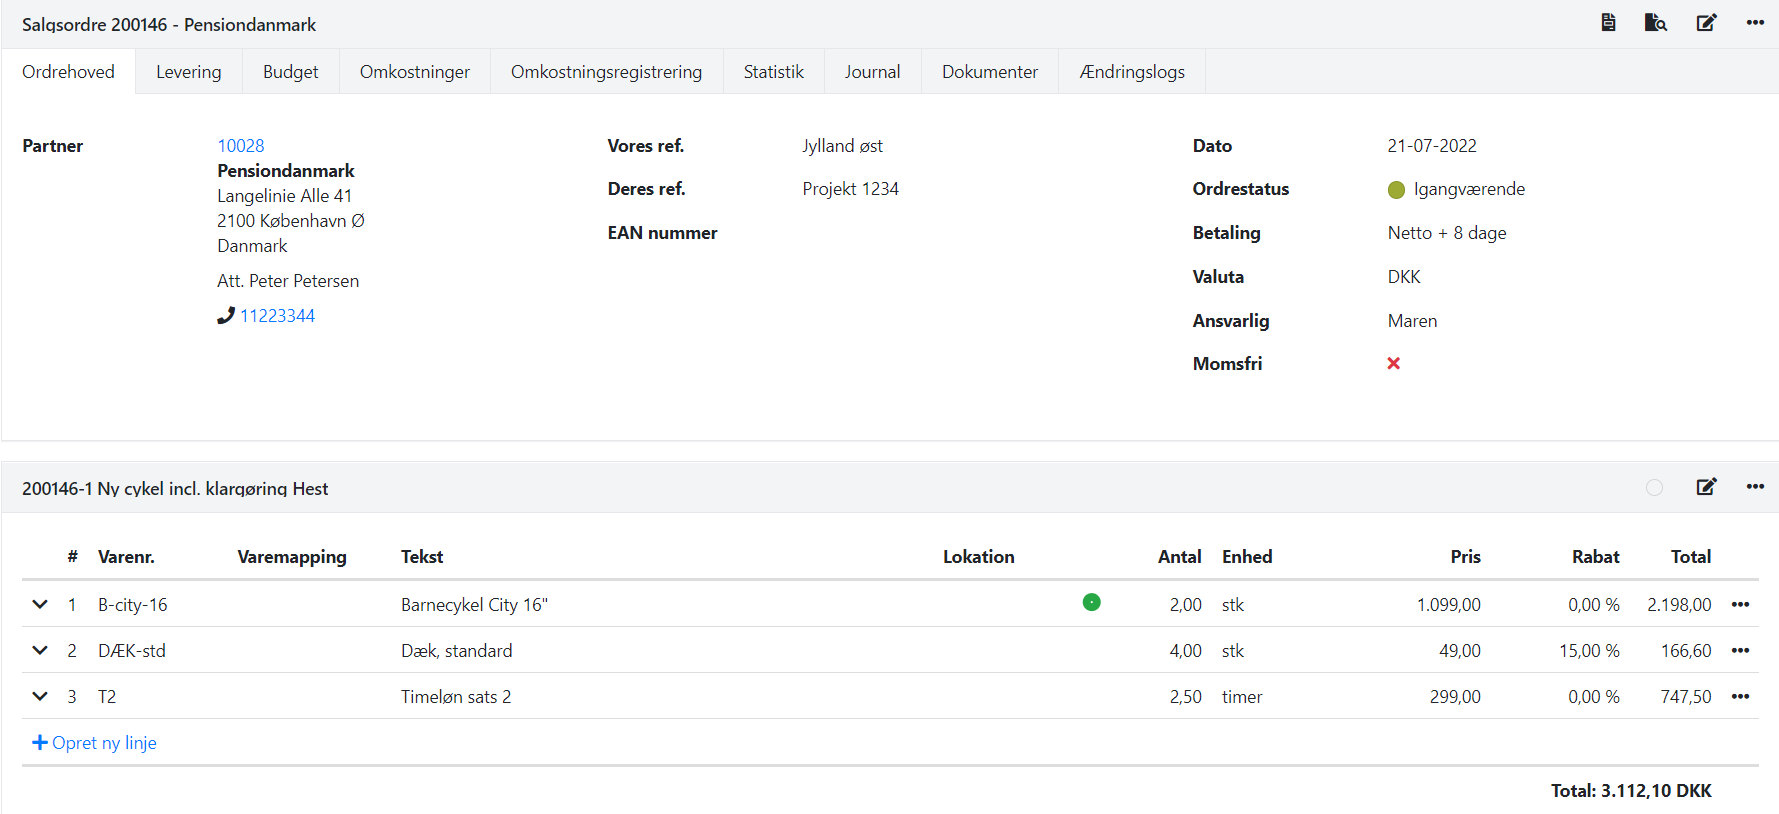
An invoice consists primarily of a recipient (Partner) to whom the invoice is sent and order lines, which are what is sold. An invoice generates revenue in your accounting through the items/services sold.
Before you start invoicing, it can be helpful to create article groups to categorize your sales. The actual articles can be created directly via the order.
Sales on the order are divided into tasks. For each task, you create order lines by clicking '+ Create New Line' or simply by pressing down to a new line. On the order line, you select article number, quantity, price, etc.
Before printing or sending an invoice, you can use the 'Proforma Invoice' button (the button with a black sheet of paper and a magnifying glass) to see how the invoice will look.

Perform Invoicing
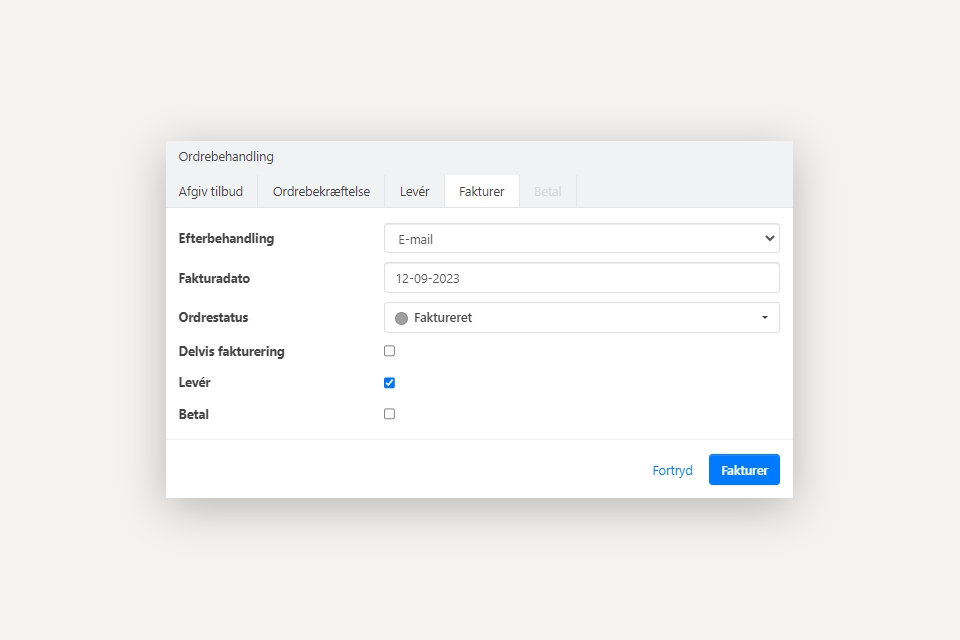
Once your order is ready for invoicing, click the 'Create Invoice' button at the top right or select 'Create Invoice' from the order menu (the three dots at the top right).
In the 'Post Process' field, you can choose how the invoice should be sent:
1. Print: This generates a popup with the invoice in PDF format
2. Email: This attaches the invoice as a PDF document in the email dialog
3. Electronic Invoice: This can be selected if electronic invoicing is enabled in your fiscal.
Next...
- Enter the desired invoice date
- Choose a new Order Status
- If you only want to invoice some of the tasks, you can select 'Partial Invoicing'
- If you use stock management, choose whether articles should be delivered simultaneously
- Choose whether the invoice should also be posted as paid

Resending an Invoice
If you need to resend an invoice, you can easily do so by following these steps:
- Start by either opening the order from which the invoice was generated or open the partner's profile
- Select the 'Documents' tab
- In the menu next to the invoice you want to resend, choose 'Email'
- This will open the regular email dialogue with the invoice as an attached file, ready to be sent
Alternatively, you can choose 'Download' if you want to download the PDF version of the invoice to your local computer. You can then send this PDF invoice to your customer through another method, such as attaching it to your own email client.

Explanation of Tabs on the Order
On an order, you have many tabs with the option to view and add additional data. Below is an example of the 'Delivery' tab. See a brief description of each tab below.

Delivery
Here, you can enter a different delivery address if it differs from the billing address. You can also specify the email address where the invoice should be sent.
Budget
You can enter a budget for your orders for later comparison with the actual numbers. Read more about budget here
Costs
This tab displays the posted costs on the order and also allows you to move costs to another order or transfer costs to invoicing.
Cost Registration
Here, you can directly enter costs related to the order. These costs can also be entered and approved through Cost registration.
Statistics
This tab displays key figures for the order, providing you with a financial overview, both before and after invoicing. Explanation of the statistics figures can be found here.
Journal
This is where you find all accounting events related to the order with links to open the voucher.
Documents
his tab displays the documents associated with the order. Here, you can resend documents and create document folders for organizing documents related to the current order.
Audit trails
This tab shows who has edited, added, or deleted something on the order, giving you a full history of all changes.
Log of Emails to Partner
hen you send a document to a partner via email, and the document is sent to an email address created on the partner, a log is automatically generated. You can view the log by opening the partner, finding the 'Contact' box, and selecting the 'Log' tab.
Next to each log entry, a status icon for email sending is displayed. Learn more about logs in this guide.
- Updated