Pay on account including final invoicing
If a fixed price has been agreed upon for a customer task that you wish to invoice progressively, you can follow this guide.
Prepare the order for on-account invoicing
On the sales order, create at least one task with the total amount for the work.
Enter a task description. This description is printed next to the on-account amount on the invoice.
Add at least one line to the task with a price.
If you want multiple lines printed on the on-account invoice, create multiple tasks each with their own description and amount.
Tasks where Total amount is 0.00, and tasks already invoiced in the regular way, are not included in on-account invoicing.
⚠️ Note: Do not create regular invoices for tasks you are in the process of on-account invoicing. If you need to create a regular invoice on the order (e.g. for additional work), create a separate task for this, or better yet, create a new order.
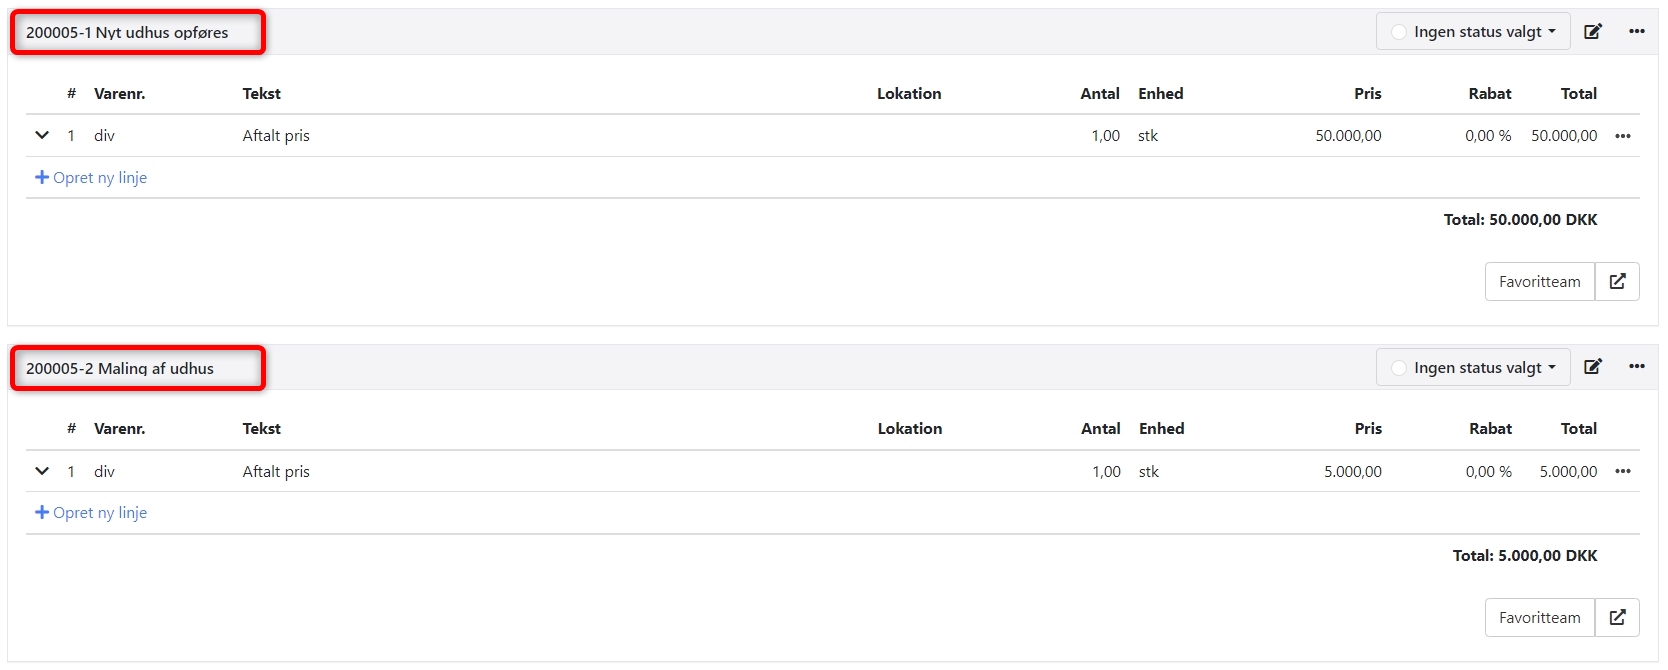
In the example below, the customer has ordered two tasks to be invoiced with separate amounts:
New outbuilding construction totalling DKK 50,000 and
Painting of outbuilding totalling DKK 5,000.
Create an on-account invoice
On the order, open the menu in the top right corner (the three dots) and select On-account invoicing.
In the upper part of the screen you select WHAT you want to invoice; in the lower half you select HOW you want to invoice.
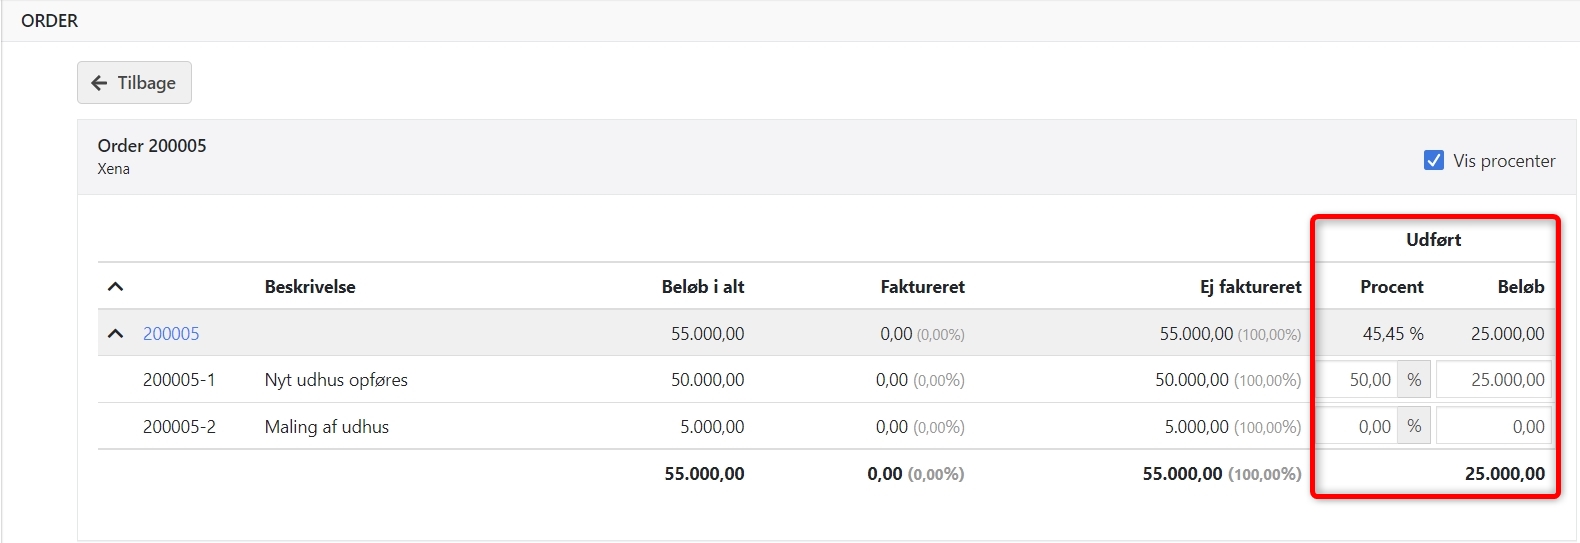
Select what to invoice
Enter the degree of completion, either as a percentage or in amount.
You cannot enter less than previously invoiced. Either leave the completed value as is, or increase it.
If a line has been invoiced at 100%, you cannot change the completed percentage/amount.
You cannot deselect tasks, as they are all part of the total sum and part of the previously invoiced amount. Both figures are printed on the on-account invoice.
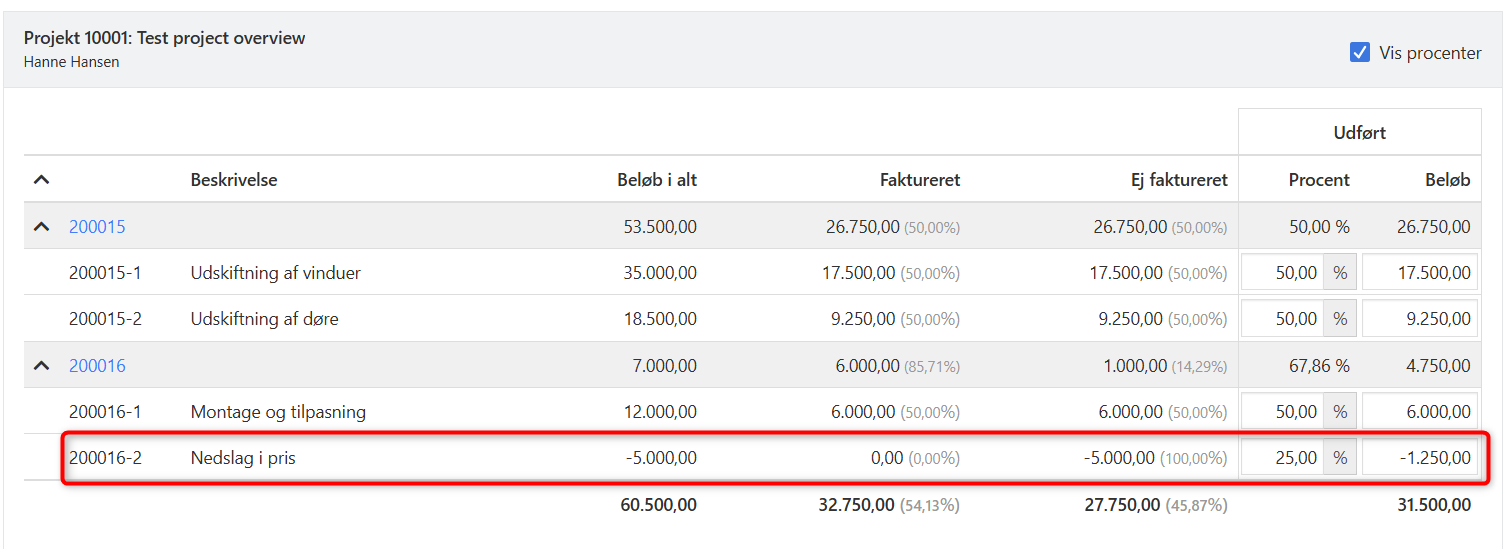
Tasks with negative amounts can now also be included. If the selected lines result in a negative total, a credit note is automatically created instead of an invoice.
⚠️ Note: Be careful about removing tasks from the order after you have created the first on-account invoice. Removing tasks will affect the total amounts printed on the next on-account invoice.
Select how to invoice
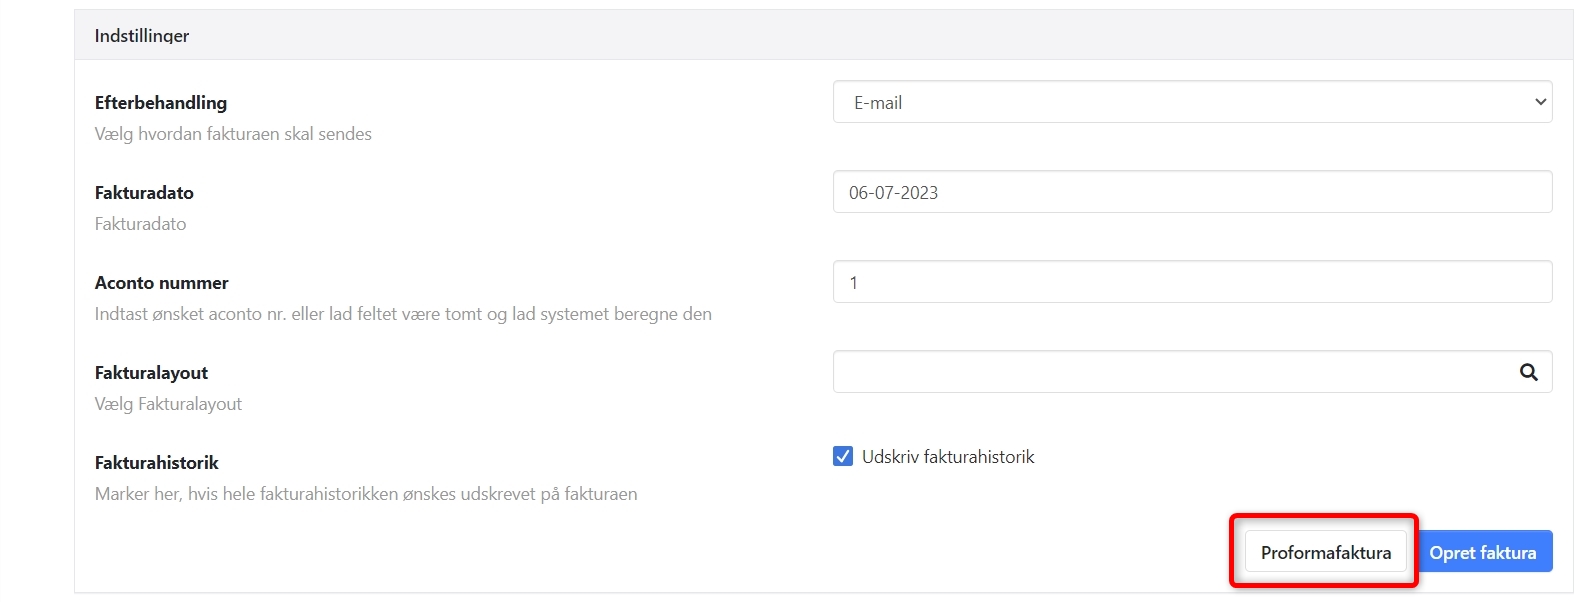
In the lower part of the screen you have the following settings:
Post-processing: Select whether the invoice should be printed or sent by email.
Invoice date: Enter the desired invoice date.
On-account number: Here you can override the next number.
Invoice layout: If you have a customised report, you can select it here.
Invoice history: Print the full invoice history, or only the total amount previously invoiced.
Final invoice: Can only be selected when all orders/tasks are completed at 100%. See the description of final invoicing at the bottom of this guide.
Click Pro forma invoice to preview the invoice with the selected settings.
⚠️ Note: It is important to review the pro forma invoice until you are completely sure the amounts are correct, as a posted on-account invoice cannot be reversed!
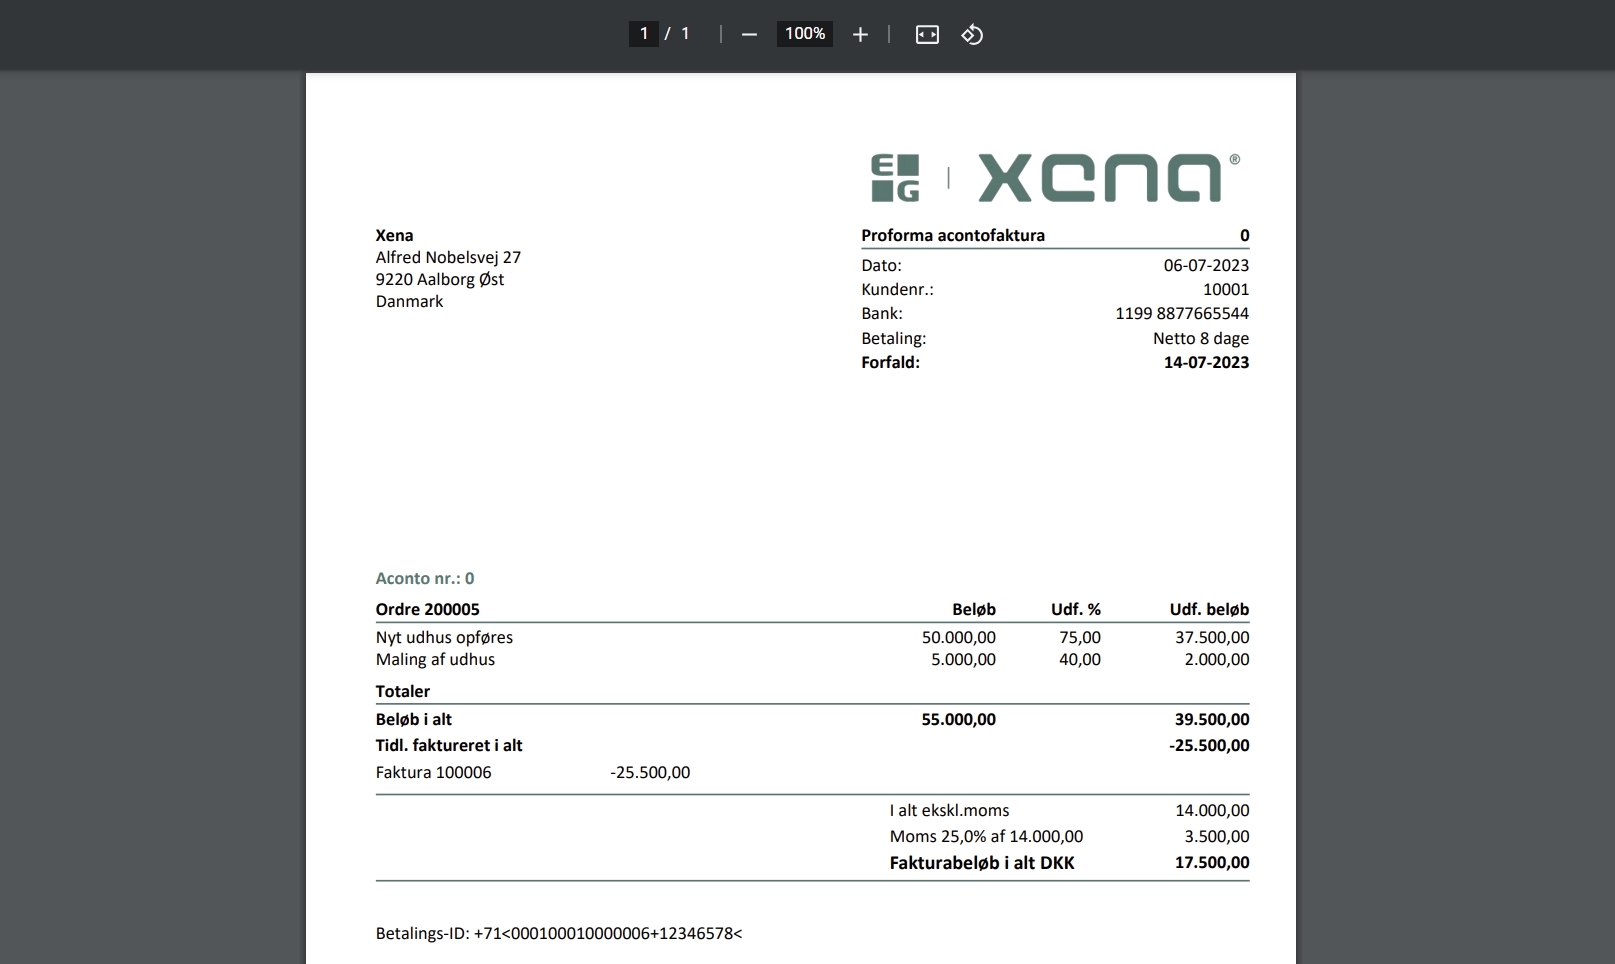
Below is an example of the totals printed on the on-account invoice:
Total amount = Combined total for orders/tasks (excluding those invoiced directly via the order).
Total completed amount = A sum of all entered percentages/amounts.
Total previously invoiced = Total amount previously on-account invoiced.
The net amount is calculated as Completed amount minus previously invoiced.
Posting the on-account invoice
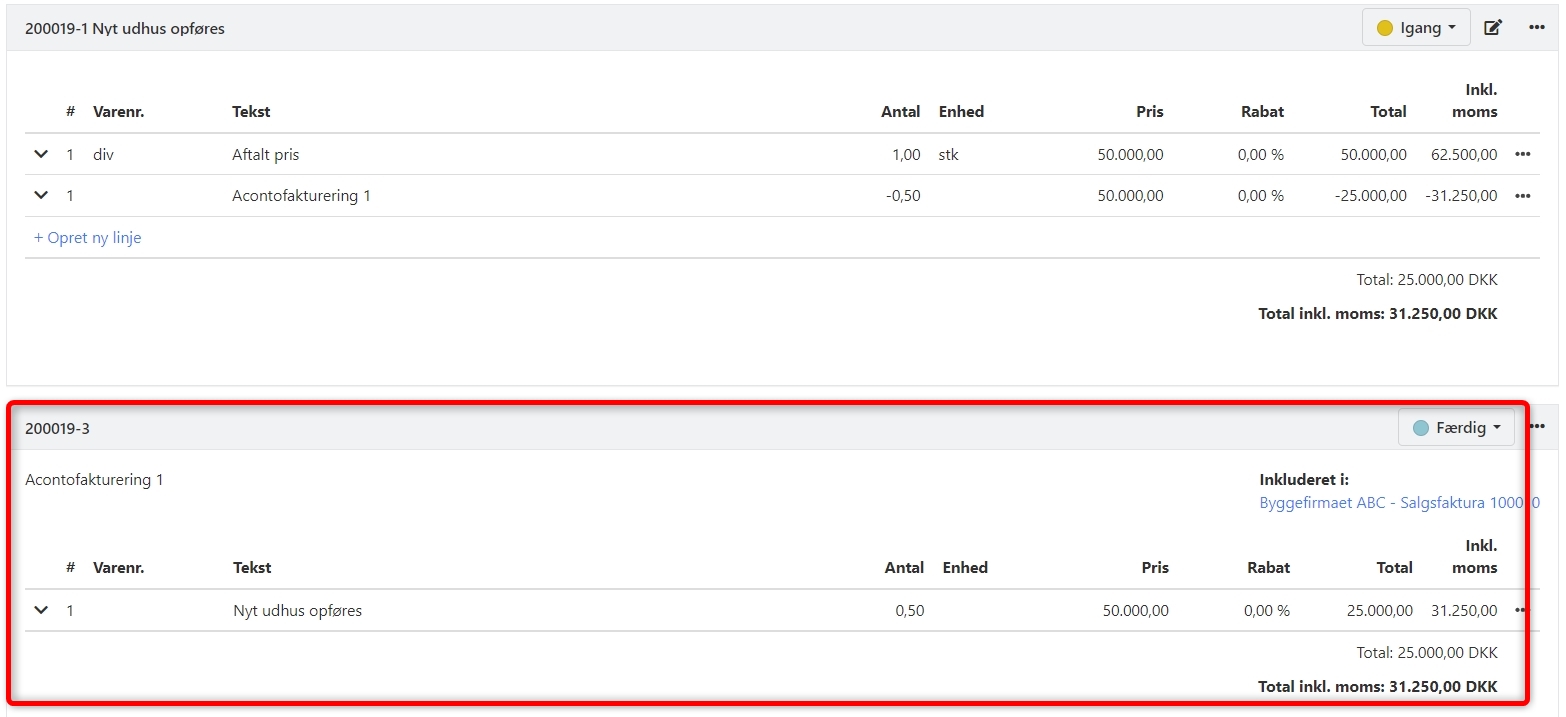
Once the on-account invoice has been created, all on-account invoiced tasks have had a new line added with the invoiced amount – with a minus sign. The balance on the task is therefore the amount remaining to be invoiced.
A new task is also automatically created at the bottom, containing all the invoiced partial amounts. The invoiced amounts are posted to the revenue account On-account invoicing.
Final invoice
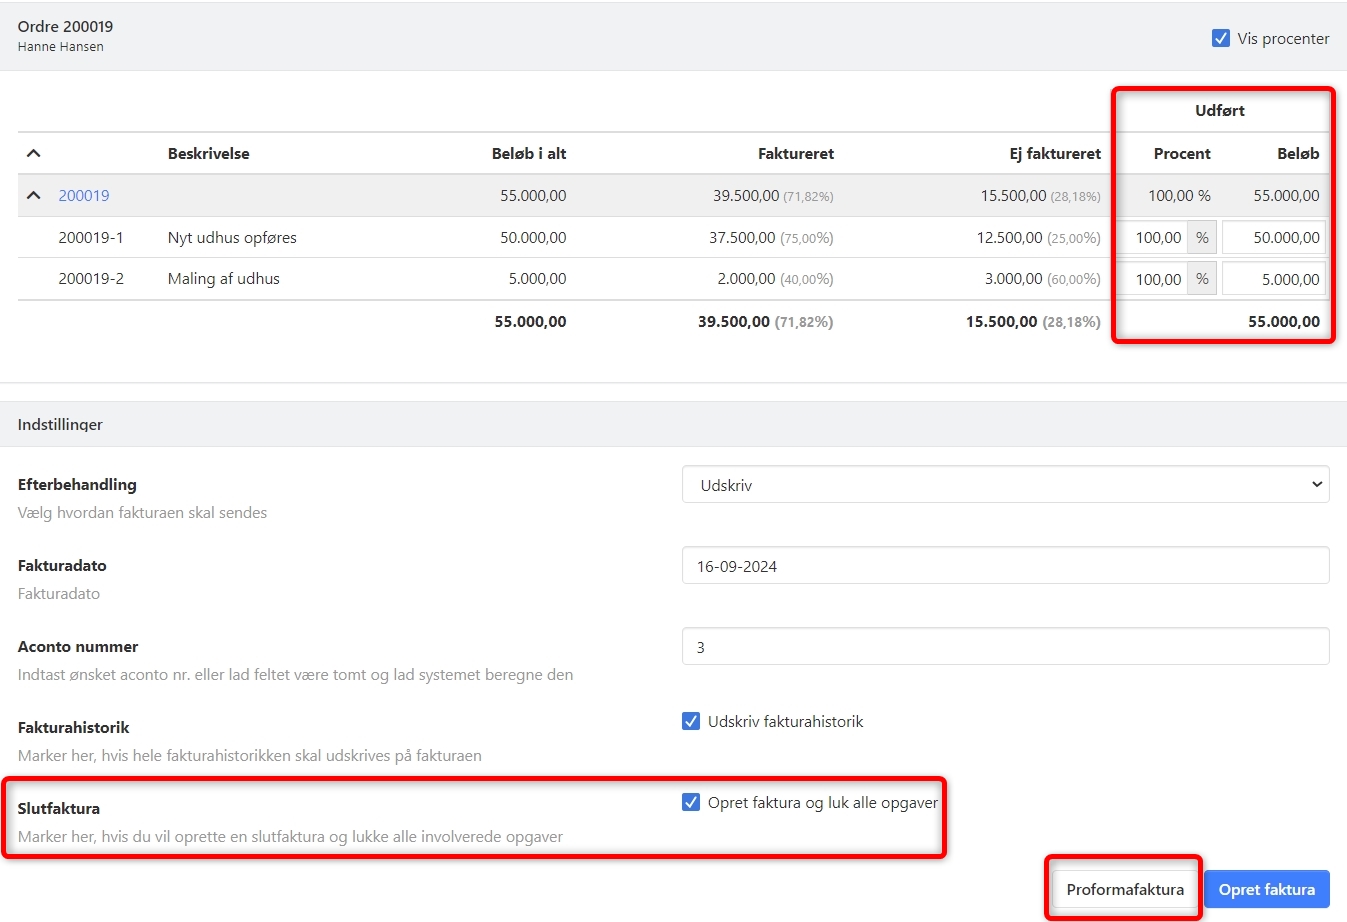
When the work is complete and you need to send the final invoice to the customer, set Completed to 100% for all lines in On-account invoicing.
Once all lines are set to 100% completed, you can tick the box at the bottom to create a Final invoice.
⚠️ Note: It is important to review the pro forma invoice before creating the final invoice, as a posted final invoice cannot be reversed!
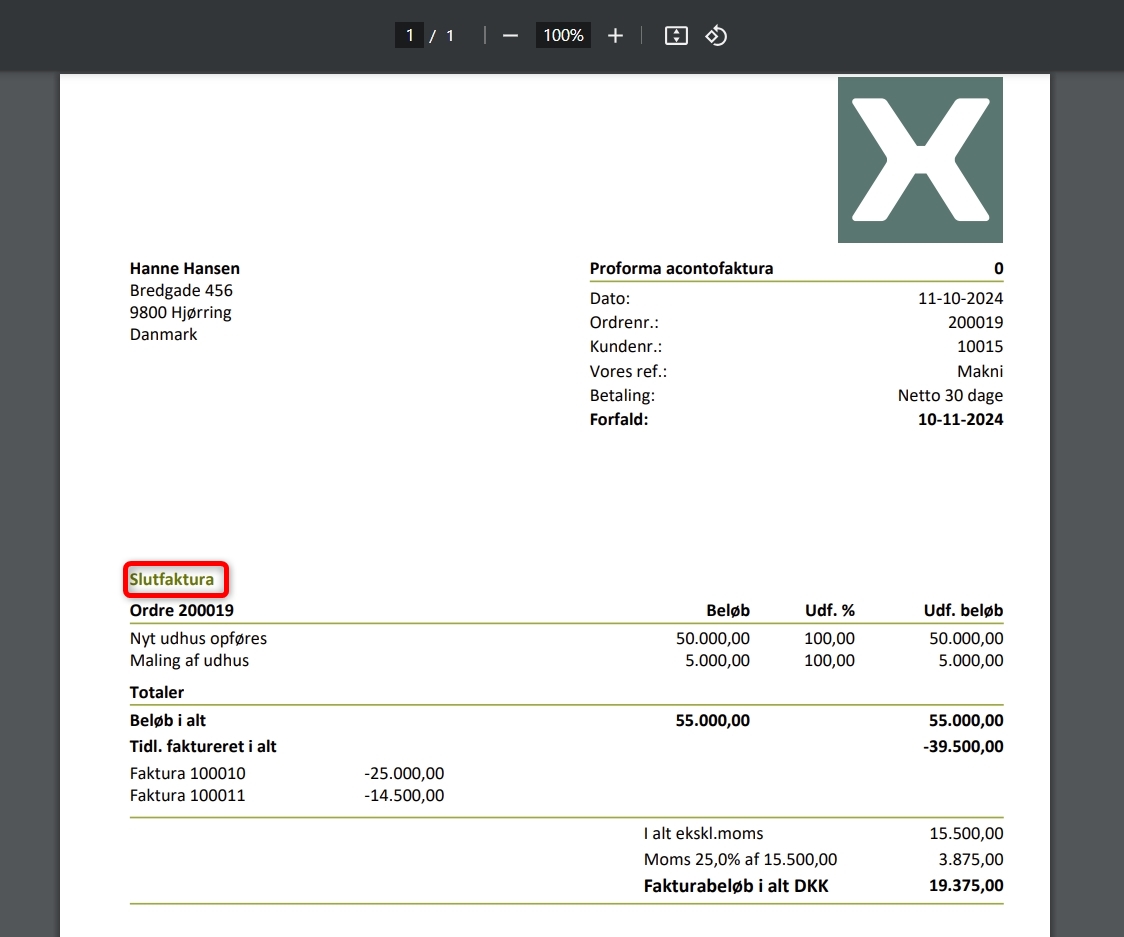
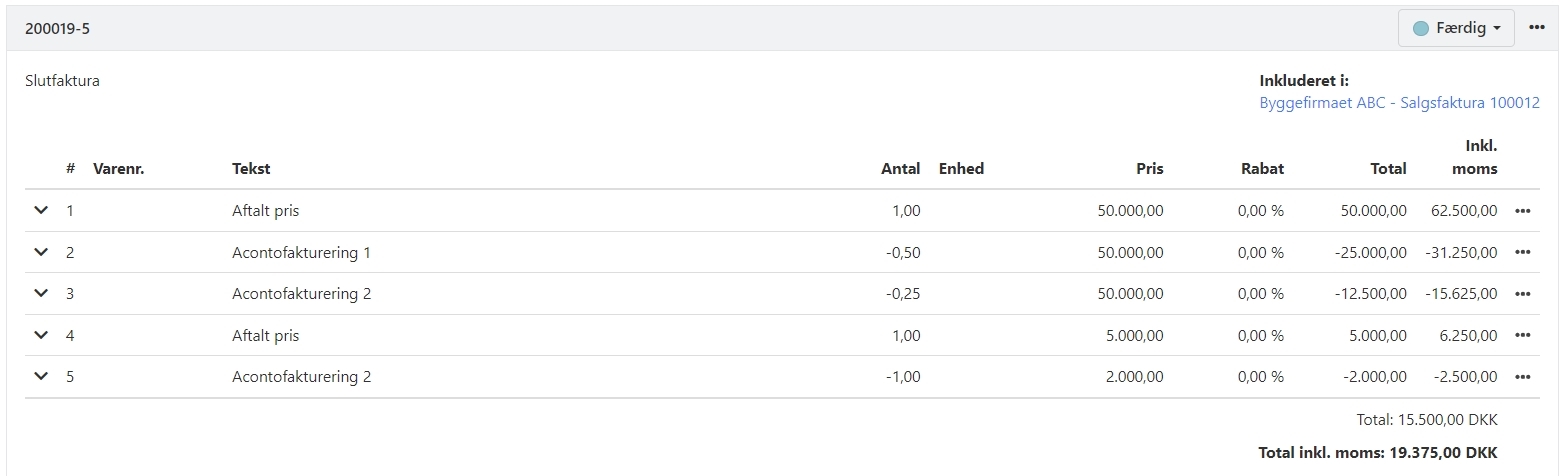
Below is an example of a final invoice.
Posting the final invoice
Once the final invoice has been created, all on-account invoiced tasks have had a new line added with the invoiced amount – with a minus sign. The balance on the tasks is now 0.00, and they are all marked as invoiced and can no longer be edited.
In the same way, the order is also marked as invoiced, and the order status is set to the one with the highest index (typically Invoiced).
In connection with the final invoice, a new task is also created at the bottom of the order, containing all lines from the invoiced tasks, including the previously on-account invoiced amounts.
The previously on-account invoiced amounts are reversed on the revenue account On-account invoicing, so that this now nets to zero for the order. The revenue is instead posted to the respective revenue accounts from the original lines.
On-account invoicing via project
Instead of creating the on-account invoice via an order, you can choose to create a project, link the project to the order, and then create the on-account invoice via the project.
➡️ Read more about on-account invoicing via project
- Updated