Project Invoicing
An easy way to invoice on a project basis, whether it is a regular invoice or a pay-on-account invoice you want to send.
When working with projects, you have the option to invoice at the project level in Xena. You can easily generate both regular invoices and Pay-on-account invoices based on the associated orders within a project.
Invoice
Here's how you create an invoice through a project in Xena:
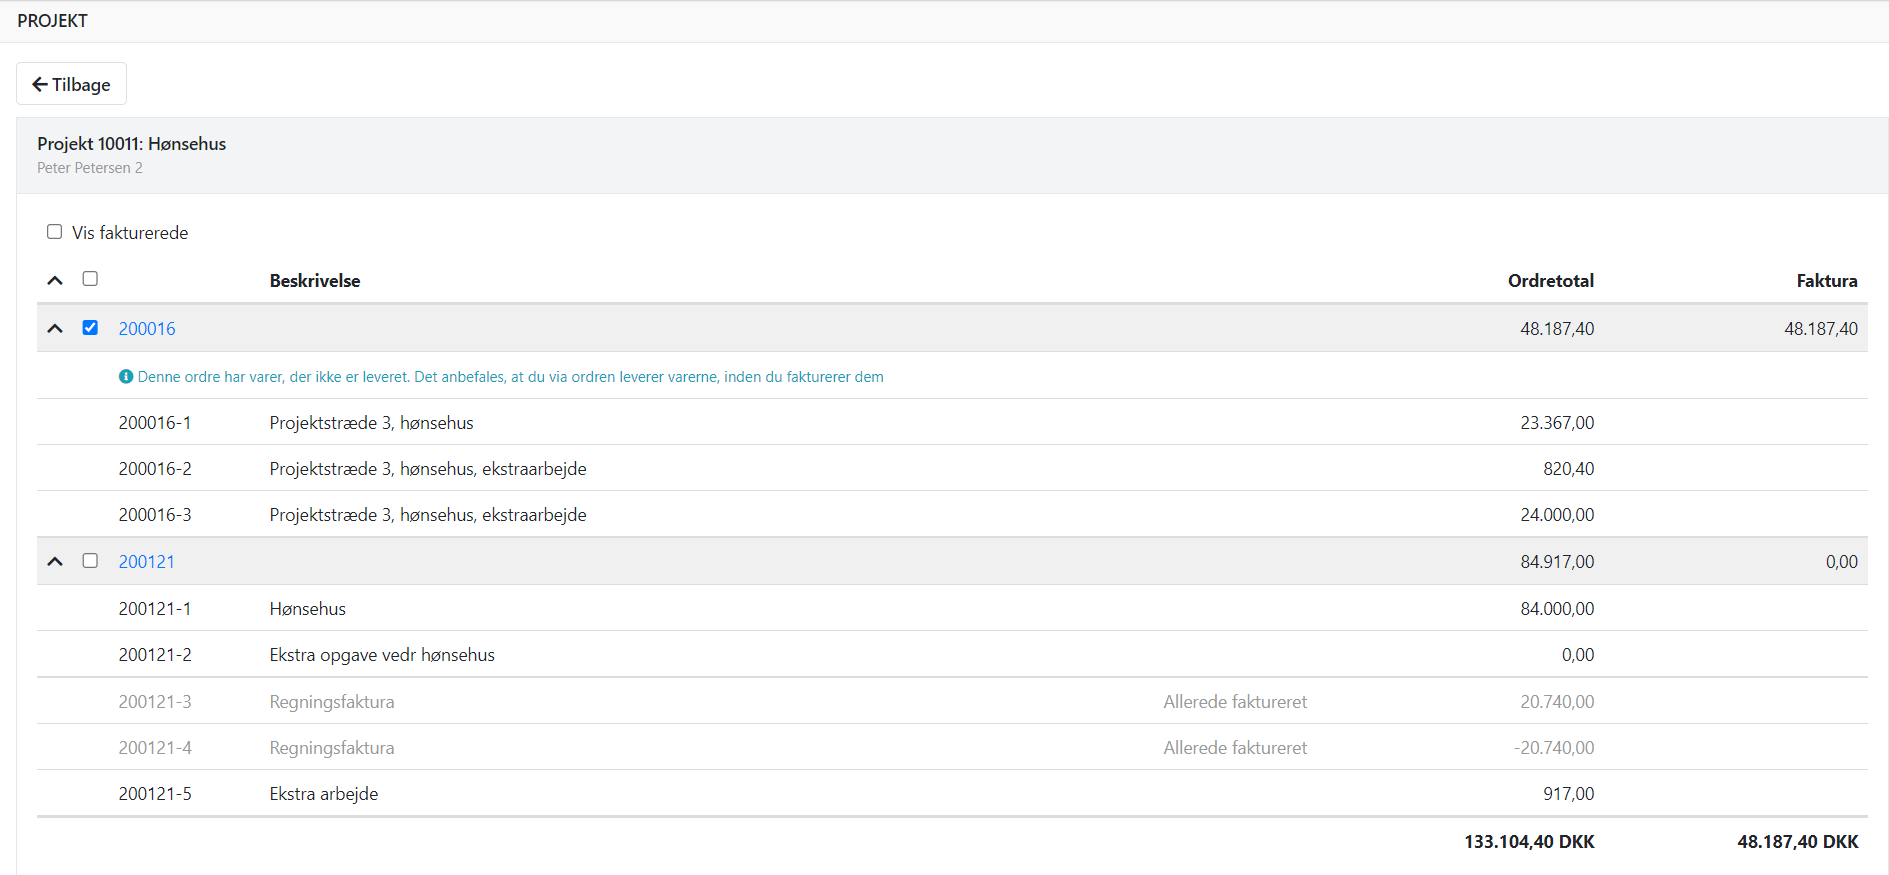
- On the project, select Create > Invoice at the bottom
- In the top part of the screen, you can:
- Choose to view the orders that have already been invoiced
- You can only select orders with at least one open task
- If an order contains items with stock management, it is recommended to deliver the articles before invoicing.
- Select the orders you want to invoice; they will be combined into one invoice.
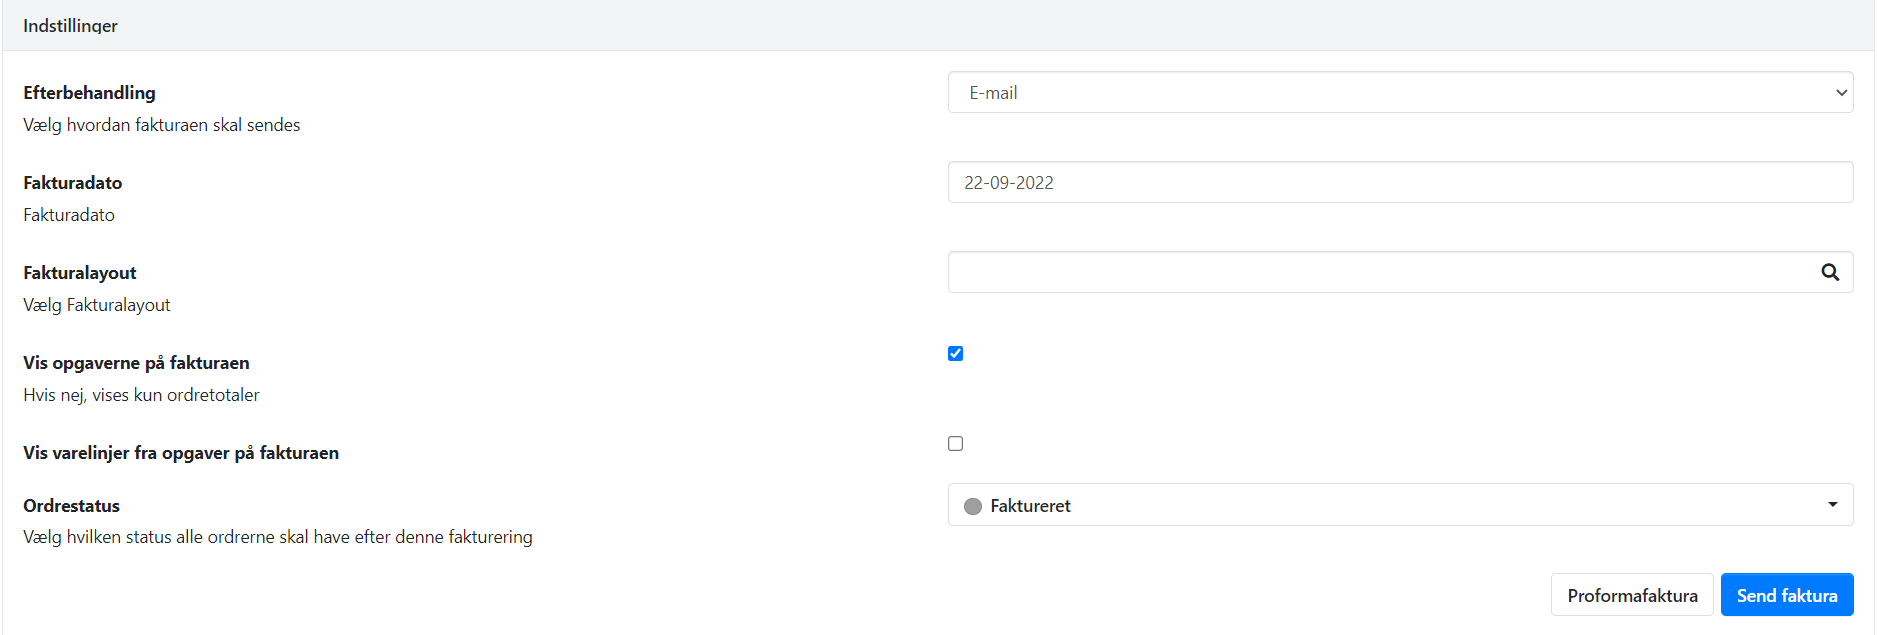
At the bottom of the screen, you have these settings:
- After processing: Choose whether the invoice should be printed or sent via email
- Invoice date: Enter the desired invoice date
- Invoice layout: If you have a customized report for project invoicing,you can select an invoice layout
- Show tasks on the invoice: If selected, a section will be printed for each order, showing the description/subtotal for all tasks (see the example below)
- Show lines on the invoice: If selected, all lines for each task will also be printed on the invoice
- Order status: Choose a new status for the orders after invoicing
Press the 'Proforma Invoice' button to preview the invoice with the selected settings.
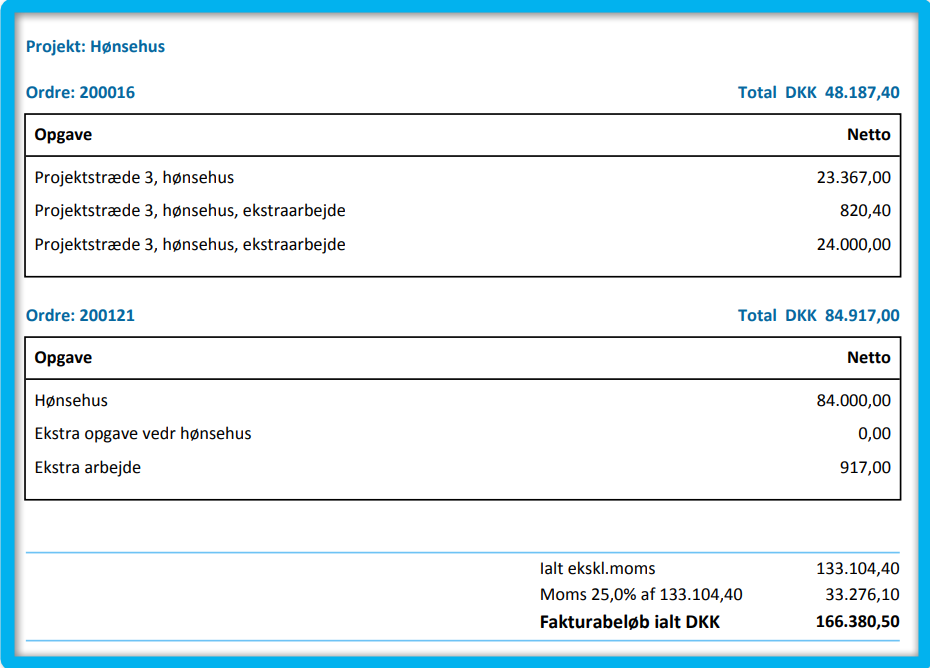
Here's an example of a project invoice where I chose to display the tasks:
Pay on account invoice
When you select Create > Pay on Account Invoice from the project, you will first get an overview of the orders linked to the project. Here, you can create pay on account invoices across multiple orders.
Order Level / Task Level
You can choose between two levels on the screen. Regardless of the level you choose, the pay on account invoice will always be printed at the task level. We recommend using the same level for all pay on account invoicing within the same project.
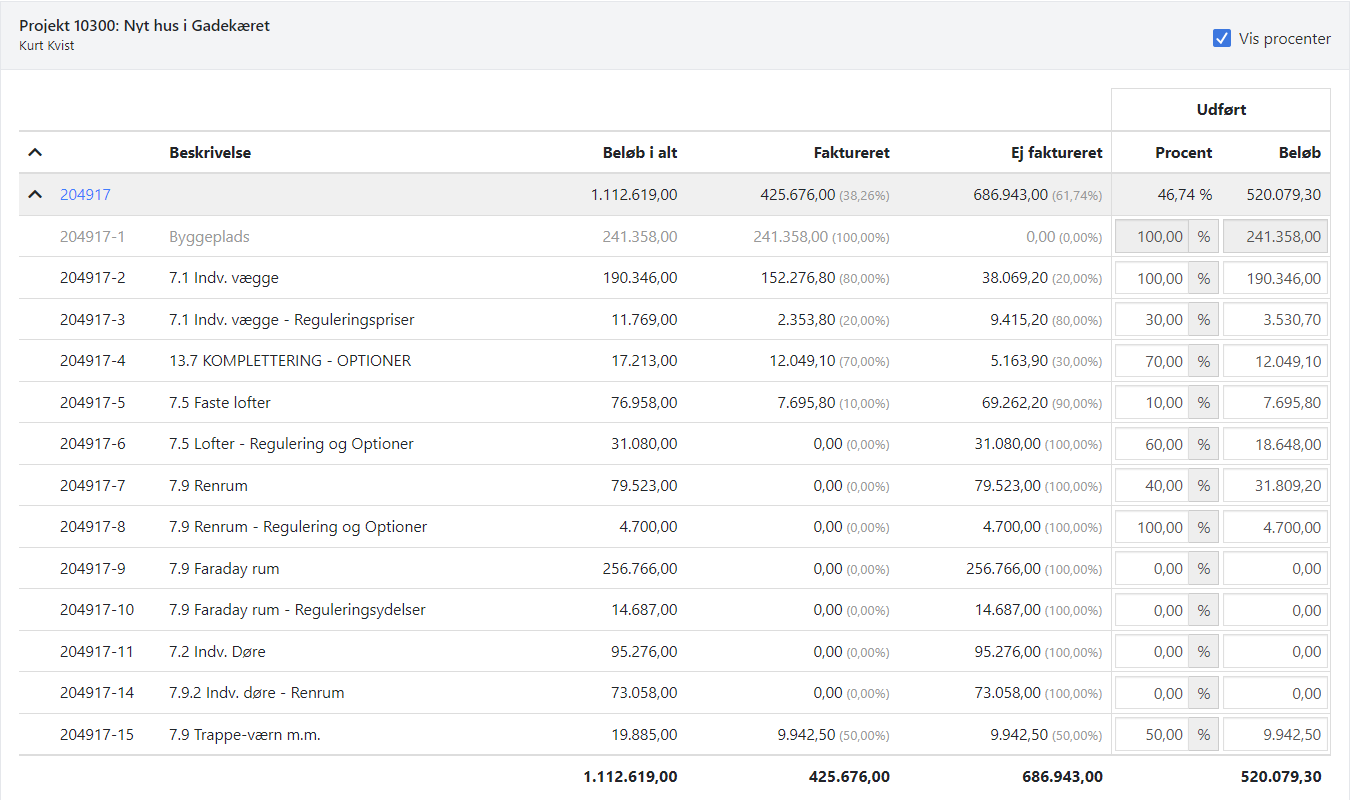
- Order Level = Enter a Completion Percentage that applies to ALL tasks in the order. At this level, it is not possible to enter amounts.
- Task Level = Enter the Completion Percentage or Completed Amount per task.
Choose what to invoice
Enter the completion rate, either as a percentage or in currency.
- You must not enter less than what was previously invoiced. Either leave the completion as it is, or increase it.
- If a line has been invoiced 100%, you cannot change the completion percentage/amount.
- You cannot deselect tasks, as they are all part of the total amount and part of the previously invoiced amount. Both of these key figures will be printed on the pay on account invoice.
If a task has been invoiced directly through the order, you cannot enter a completion percentage/amount, as the task is then closed. Tasks with a total amount of 0.00 will NOT be included in the pay on account invoice.
In general, you should be cautious about removing tasks from the order after the first pay on account invoice has been created. Removing tasks will affect the total amounts printed on the next pay on account invoice.
Choose how you want to invoice
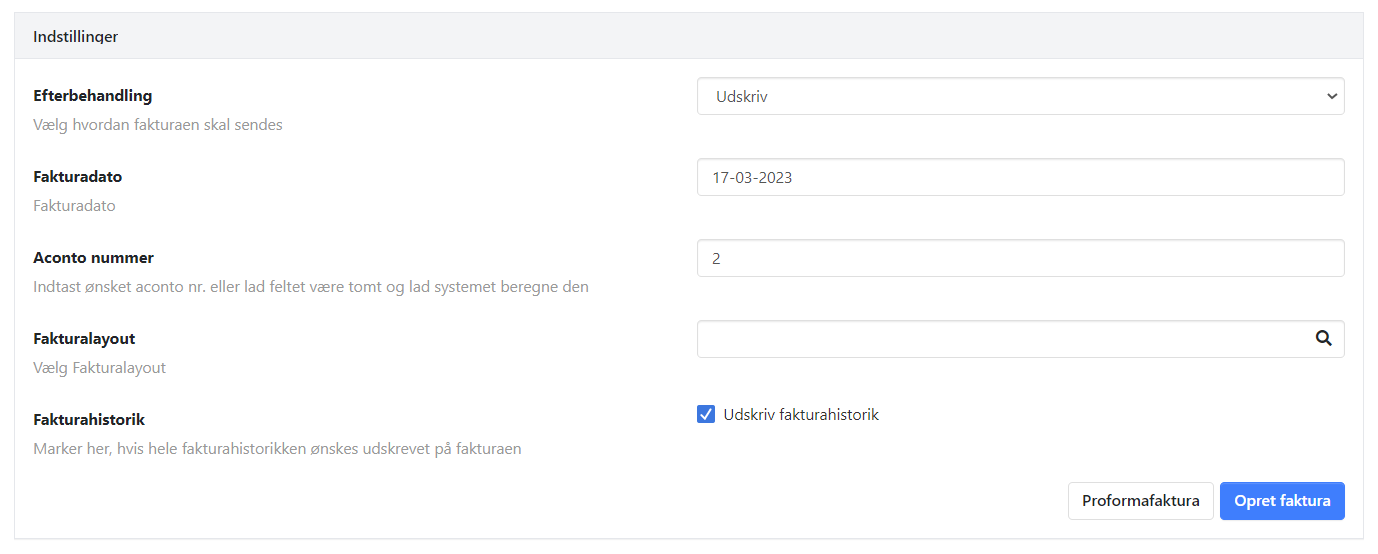
At the bottom of the screen, you have these settings:
- Post-processing: Choose whether the invoice should be printed or sent via email
- Invoice date: Enter the desired invoice date
- Pay on account number: Here, you can override the next number
- Invoice layout: If you have a custom report, you can select it here
- Invoice history: Choose to print the entire invoice history, or only the total amount for previously invoiced amounts
- Final invoice: Can only be selected when all orders/tasks are 100% complete. See the description of final invoicing at the bottom of this guide.
Press the 'Proforma Invoice' button to preview the invoice with the selected settings.
It is important to review the proforma invoice until you are completely sure that the entered amounts are correct, as a posted pay on account invoice cannot be undone!
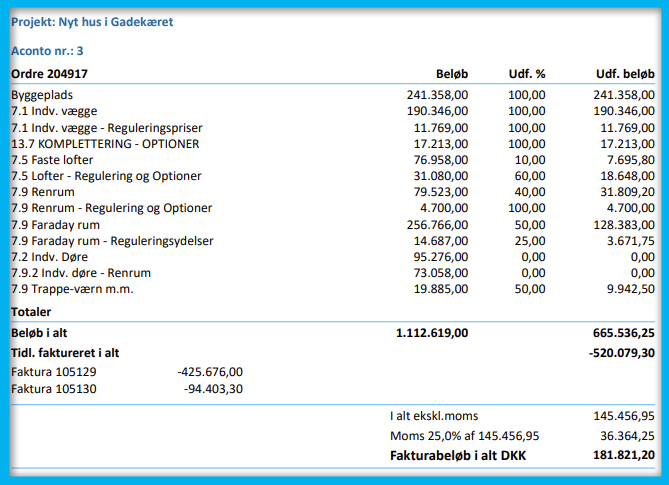
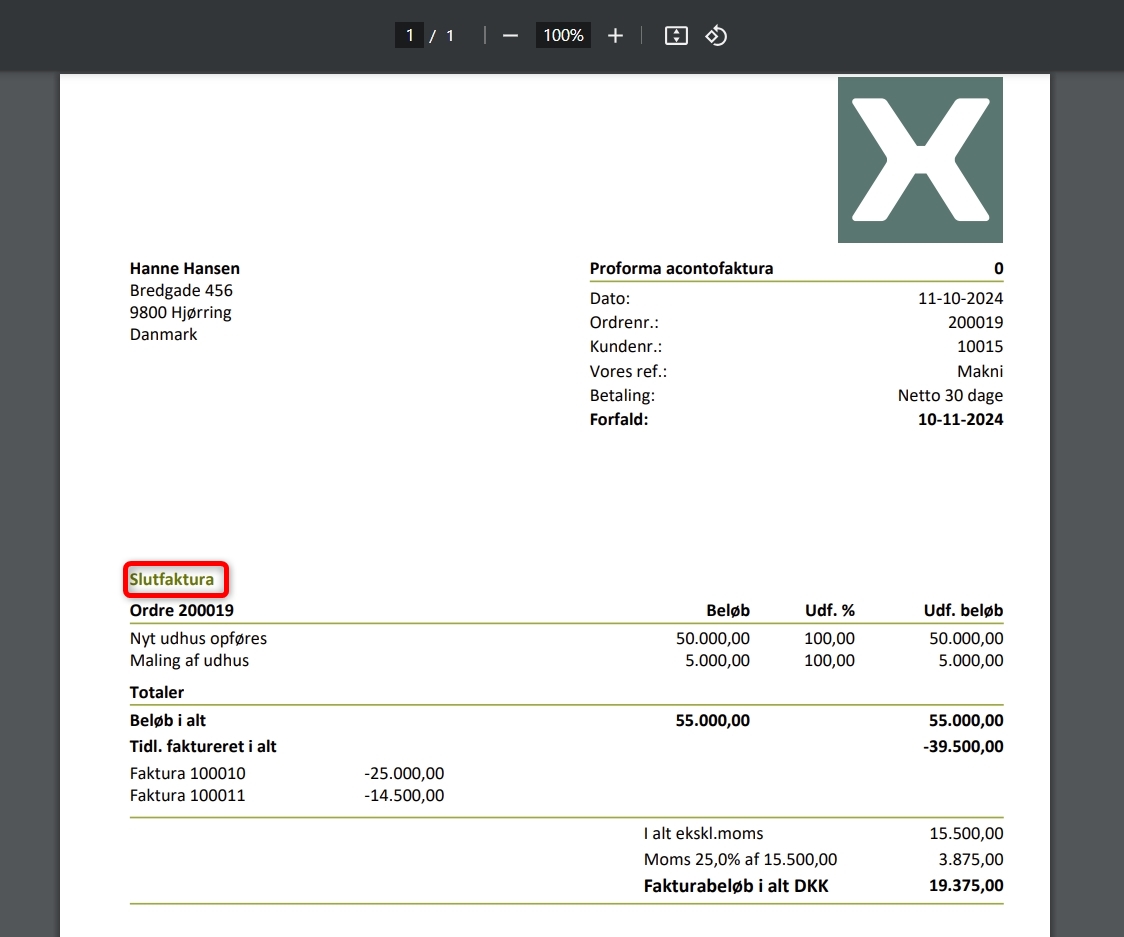
Below is an example of the totals printed on the Pay-on-account invoice:
- Total Amount = Total sum of orders/tasks (excluding those invoiced directly through the order)
- Completed Amount Total = Sum of all entered percentages/amounts
- Previously Invoiced Total = Total amount previously invoiced on Pay-on-account invoices
Net amount is calculated as Completed Amount minus Previously Invoiced.
Bookkeeping of pay on account invoice
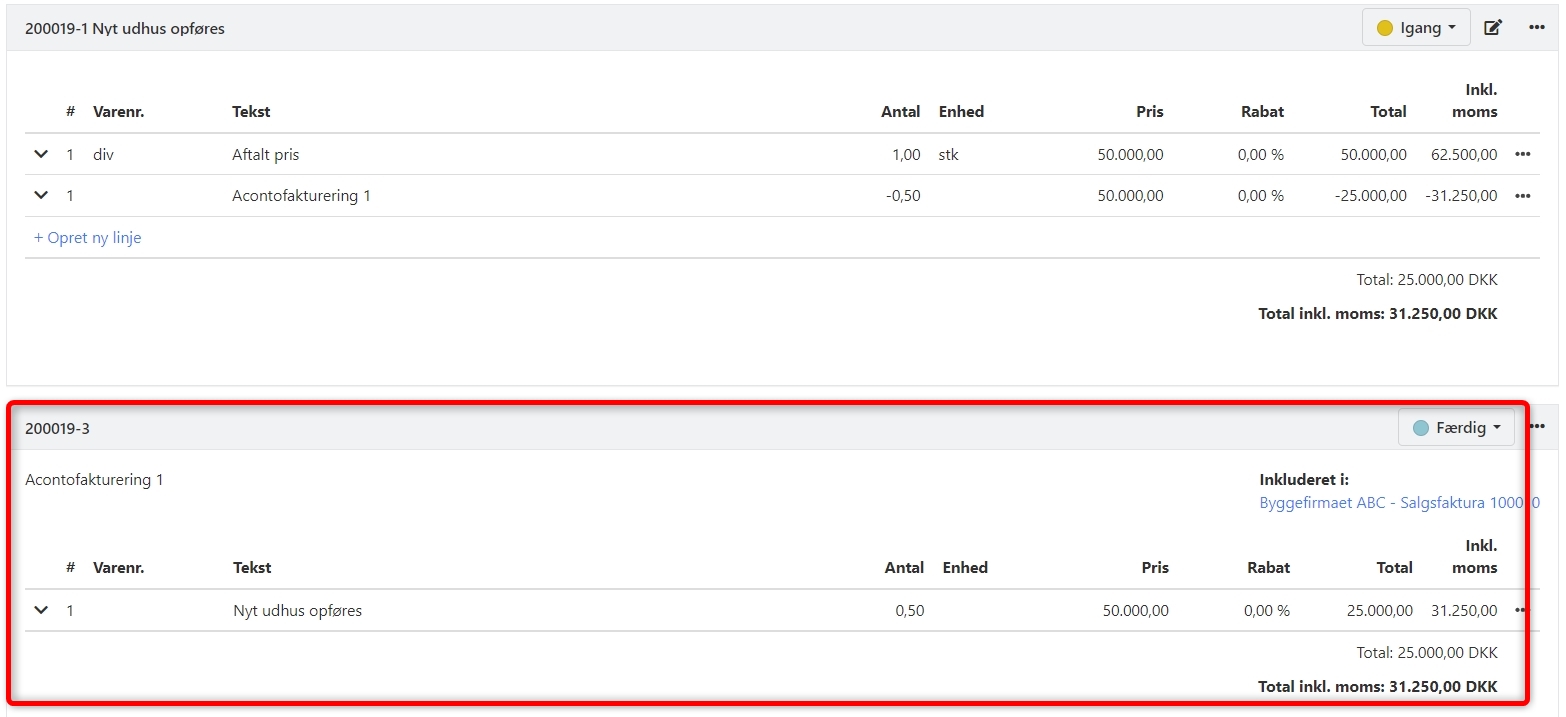
When the pay on account invoice is generated, all tasks that have been invoiced on account will have a new line added showing the amount that has been invoiced, marked with a minus sign. The balance on the task is therefore the amount remaining to be invoiced.
A new task is also automatically created at the bottom of each order, which contains all the invoiced partial amounts. The invoiced amounts are posted to the revenue account 'Pay on Account'.
Final Invoice
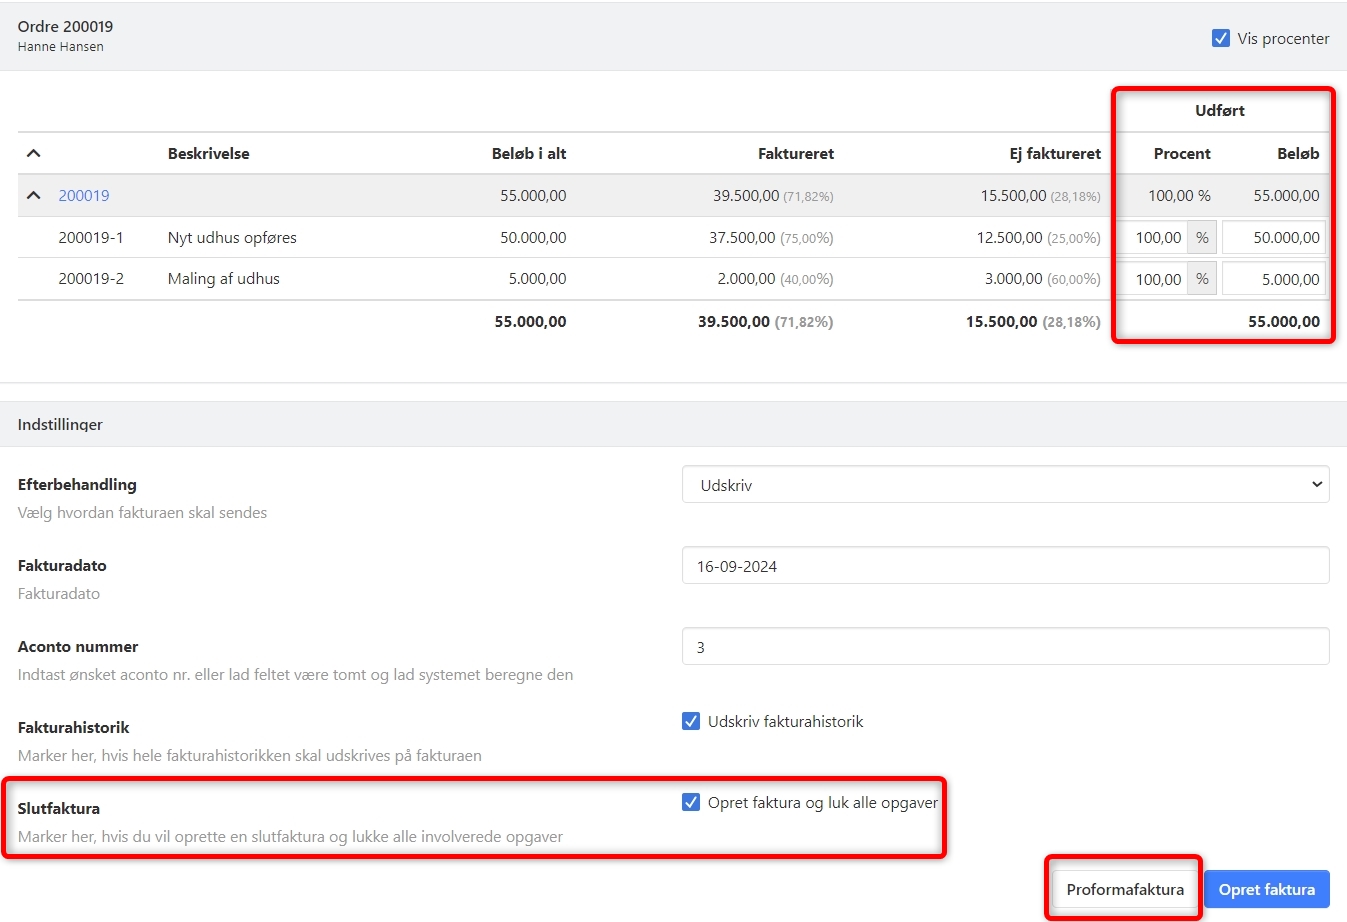
When the work is completed and you need to send the final invoice to the customer, you must set Completed to 100% for all lines in Pay on Account Invoicing.
Once all lines are set to 100% complete, you can check the box at the bottom indicating that you want to create a Final Invoice.
It is important to review the proforma invoice before generating the final invoice, as a posted final invoice cannot be undone!
Example
Below you can see an example of a final invoice.
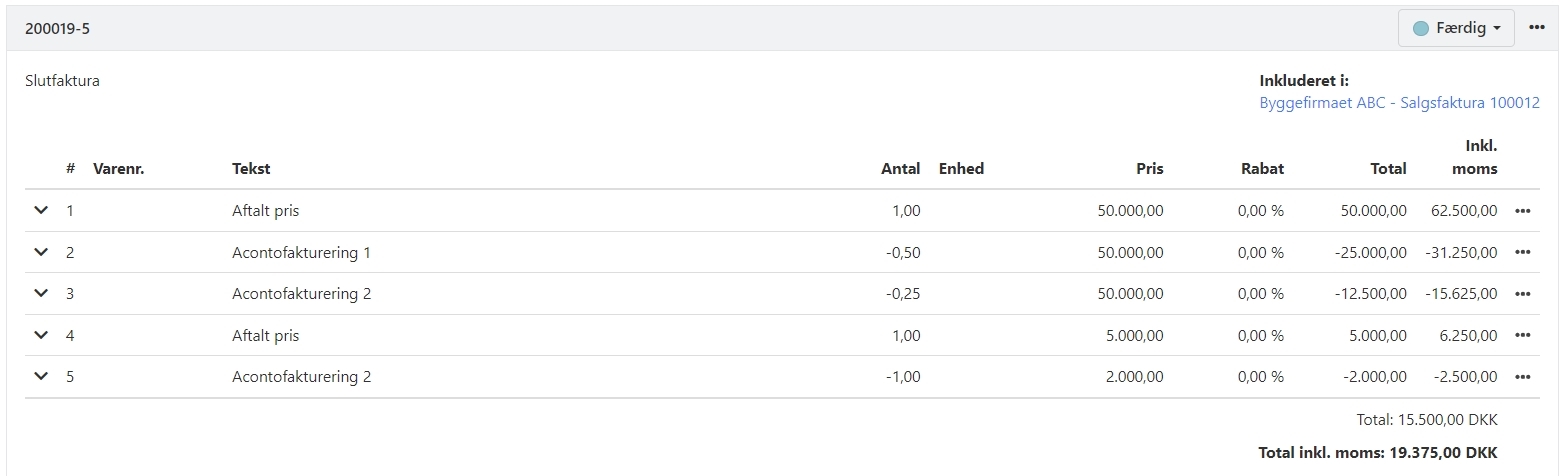
Posting the Final Invoice
Once the final invoice is generated, all tasks that were invoiced on account will have a new line added showing the amount that has been invoiced, marked with a minus sign. The balance on the tasks is now 0.00, and they are all marked as invoiced and can no longer be edited.
Similarly, each order is also marked as invoiced, and the order status is set to the highest index (typically 'Invoiced').
In connection with the final invoice, a new task is also created at the bottom of each order, which contains all lines from the invoiced tasks, including the previously invoiced amounts on account.
The previously invoiced amounts on account are reversed in the revenue account 'Pay on Account', bringing it to zero for the order. The revenue is now instead posted to the respective revenue accounts from the original lines.
To also mark the project as completed, you need to manually open the project and enter the desired completion date in the 'Closed Date' field.
- Updated