Cost registration for orders
In the Cost Registration menu, you can register both product consumption and hourly consumption.
The EG Pro+ app includes cost registration and can be installed via the Xena App Store. This guide assumes that the app is installed in your fiscal.
➡️ Use the App Store
You can find the project ledger for registering order costs under the menu Project > Cost Registration.
If you want to create additional project ledgers, you can do so via the menu Setup > Project Setup > Project Ledgers. If you use the EG Go app for registering articles and time, these will always be transferred to the Standard ledger.
Cost registration
Here are the most important fields to fill in:
Type: Choose between Standard (articles and other) or Employee
Cost type: You can link an article group to each cost type and enter a default margin percentage used for calculating sales prices
➡️ Cost types and cost type groupsEmployee: For type Employee, you must also select an employee, which defines cost price/sales price among other things
➡️ Setting up pricesActivity type: For type Employee, you must also select an activity type, from which article number and other important details are retrieved
➡️ Calendar setupArticle: The article number is retrieved from the selected activity type. On other line types, you can select an article or leave the field empty
Order task: Select the task the registration should be posted to. When you select a task, the name of the order responsible is shown below. Click the link to open the associated order.
You cannot search for orders where an associated project has a closed date
The tasks you see in the list depend on their status and whether they are set up to be shown in posting
➡️ Tasks on an orderIf you cannot find a task for the reasons mentioned, you can always register the cost directly on the order under the Cost Registration tab
Cost price: Retrieved from the article or entered manually if the article does not have a cost price
Sales price: Retrieved from the article or calculated from the cost price + the margin percentage from the selected cost type
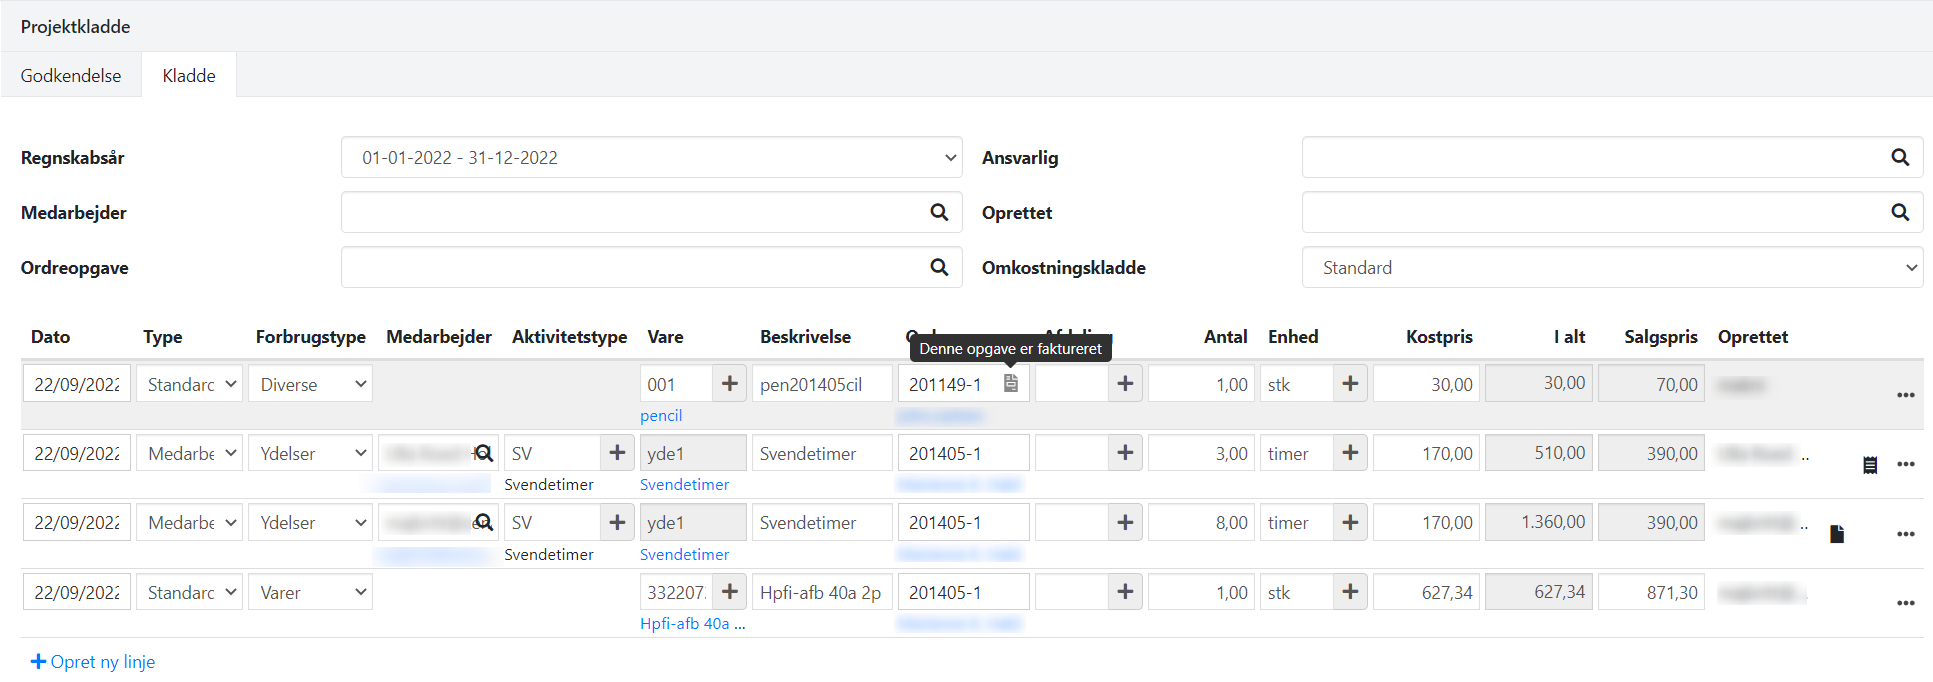
See example of registrations below:
Line 1 shows how it is indicated that the selected task has been invoiced
Line 2 shows that a note has been entered. Click the icon to view or edit the note
Line 3 shows that a document has been attached. Click the icon to see a thumbnail of the document
Keyboard shortcuts in the ledger
Delete line = Ctrl + minus key
Insert line = Ctrl + plus key
Delete multiple lines
You can delete multiple lines at once via the Delete lines button at the bottom of the ledger. Before deleting, you can apply a filter if you only want to delete a selection — only the lines shown in your filtered view are deleted.
Optionally filter the list so only the desired lines are shown
Click Delete lines
Confirm the deletion — you will see the number of lines that will be permanently deleted
If the receipt function is enabled in your fiscal, the deletion also takes into account lines that have not yet been receipted.
➡️ Read about the Receipts for time registrations function

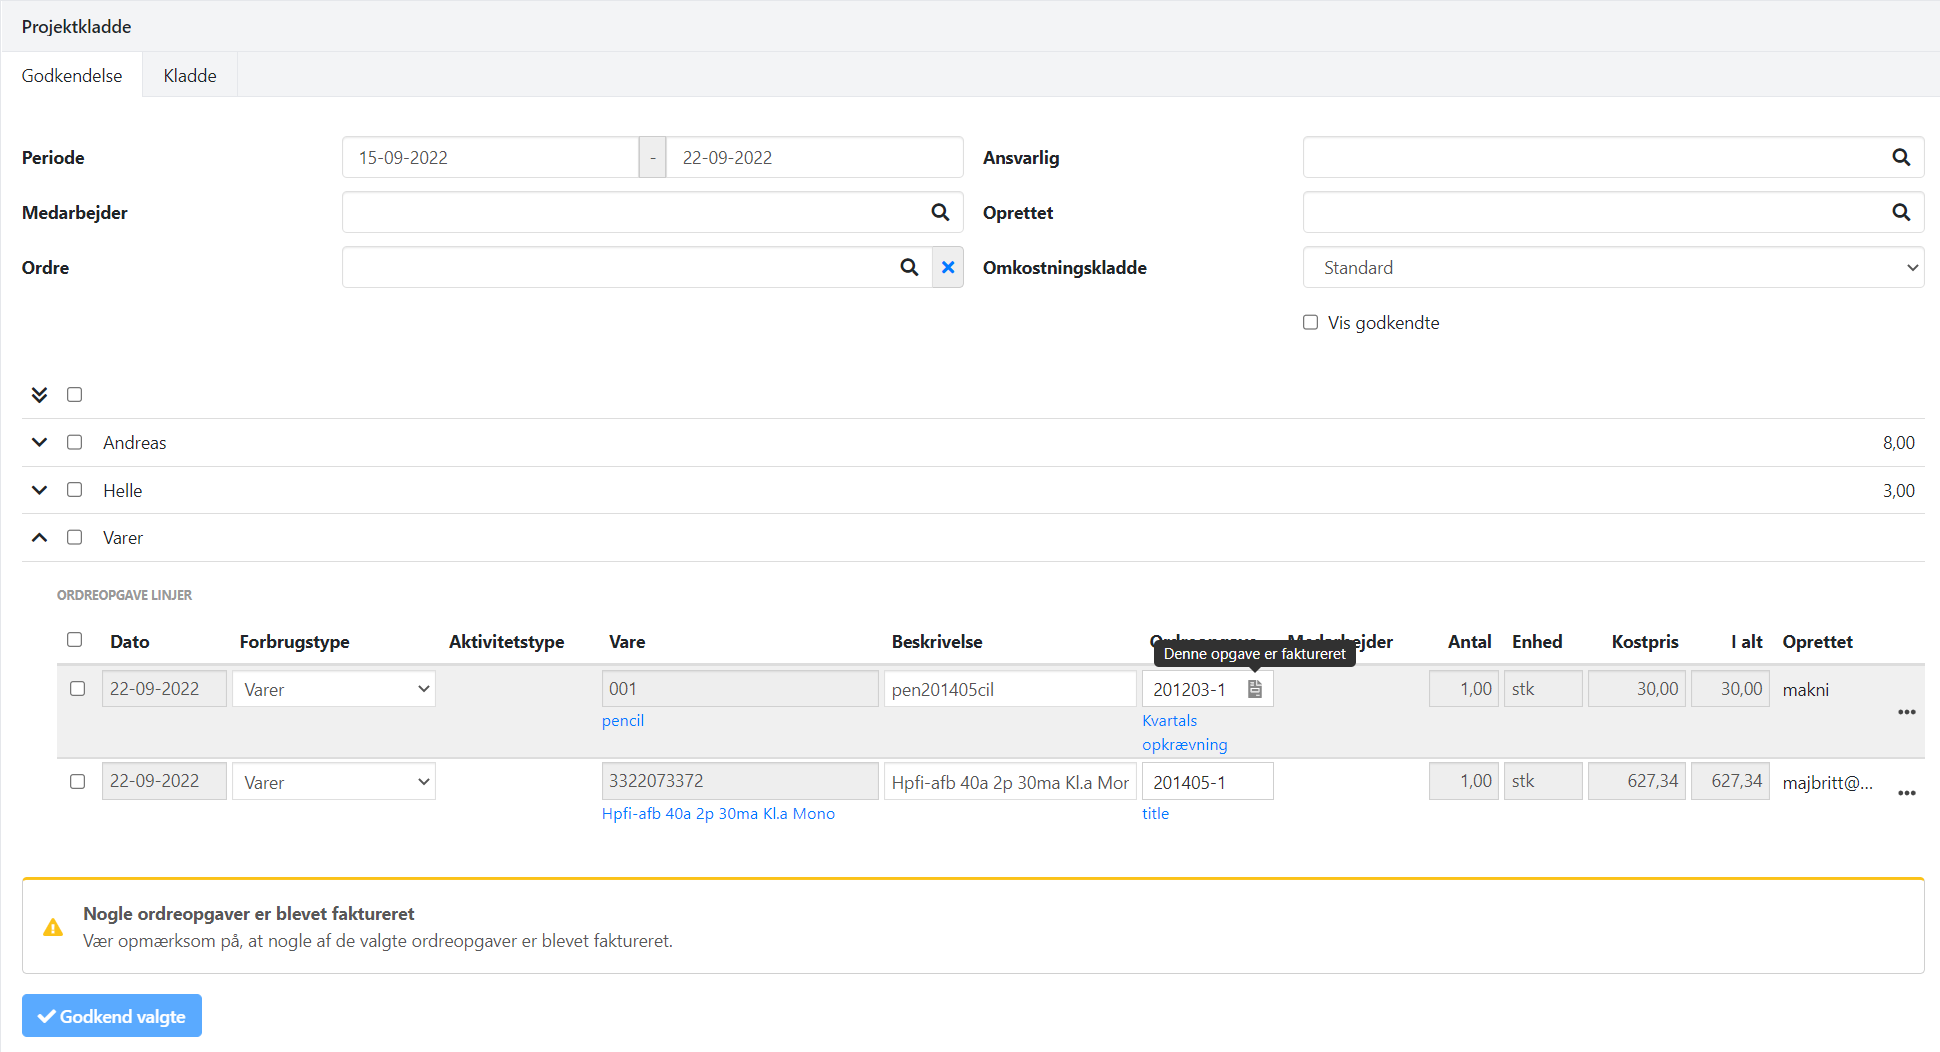
Approve registrations
All costs must be approved before they are finally registered on the orders. This is done via the Approval tab.
Under the approval rules, you can enable or disable whether costs must be approved by the order responsible, and you can select a user who can always approve — e.g. as a backup during holidays or other absence. If the fiscal is set to require approval by the order responsible, you can only approve lines for your own orders.
➡️ Setting up approval rules
During approval, only a few fields can be edited. Other fields must be edited via the Ledger tab.
Period
By default, the last 14 days are shown, but you can select a longer period. If you select a period of 14 days or less, you can also see previously approved registrations and the total number of hours per employee for the last 14 days.
Reconciliation
To reconcile the number of hours per employee, you can print the Employee Costs report, found under the menu Reports > Project. This report also shows unapproved registrations. If you print the report as PDF, a total per employee is shown.
Filter
At the top, you can apply filters, e.g. for a specific employee, so you only approve hours for one employee at a time. You can also select the user in the Created field instead — this shows all registrations made by that user, both hours and articles. You can also select a specific order to only approve registrations for that order.
Approve
Note that costs may have been registered on a task that has already been invoiced. In that case, a warning is shown at the bottom. You can see if the task is invoiced by looking for a small icon in the order task field.
Select the registrations you want to approve and click Approve selected.
Costs are now visible on the orders
Once the registrations are approved, they are included in the order's statistics. The costs can be seen on the order under the Costs tab, and from there they can be transferred directly to invoice lines.
➡️ Order statistics
Read more about this invoicing method in the guide on cost-based invoicing.
➡️ Cost-based invoicing
In the project reports, you can find various reports that show order costs in detail and as key figures.
➡️ Project reports
- Updated