Setting up users with EG Go for mobile time registration
With the EG Go application, your employees can register time and articles for your orders, all through a mobile device. Please note that your monthly subscription will increase upon installing this app.
The EG Pro+ app includes the project module and can be installed via the Xena App Store. This guide assumes that the app is installed in your fiscal. We also recommend installing EG Go and EG Log, so they can be added to employees right away when they are invited in step 2.
➡️ Use the App Store
1: General setup
In the menu, go to Time > Calendar Setup. These settings are the foundation for time registration and calendar planning.
➡️ Calendar setup
We recommend that you as a minimum review the setup of activity types. Activity types are the codes employees can register on in EG Go. A number of standard activity types have been created, but you are free to create, delete, or edit more.
2: Invite employee
To get access to the EG Go app, the employee must be invited to the fiscal as a user. You therefore need each employee's email address. It can be the employee's personal email address, if they do not have a company email address.
Note: The email address serves as the user's login to the system and cannot be changed afterwards. Make sure it is correct when the user is invited. If an employee's email address needs to be changed, the old user/email address must be deleted, and a new user must be invited into the company with the new email address.
Go to Setup > Company > Users. Click the Invite user button.
Enter the employee's email address
If the employee should only use the EG Go/Log app, select the Employee role
Select the EG Go and/or EG Log app
Accept terms and conditions
Click the Invite button
If you have not added the EG Go and/or EG Log app before inviting the users, you can always add them later via the App Store.
➡️ Add users to an existing app
3: User activation
After you have invited the employee, they will receive an email with a link to activate the user and create their desired password.
Once the user is activated and logged in to Xena, they can click the profile icon in the top right corner and select User profile for further profile setup.
➡️ Language and other personal settings
4: Setting up the EG Go/Log apps
This part of the setup concerns what users should have access to in the EG Go and EG Log apps.
Open the menu Time > EG Go Setup.
For each item, you first configure the settings on the Company tab. On the Employee tab, you can then override the general settings.
Review the setup carefully per item to make sure your users have access to the correct data and functions in the apps.
➡️ EG Go settings
5: User setup
Once the user is invited and activated, you can continue with further setup of the user. Go to Setup > Company > Users. Click on the employee's user to open the associated partner, which represents the employee in the company.
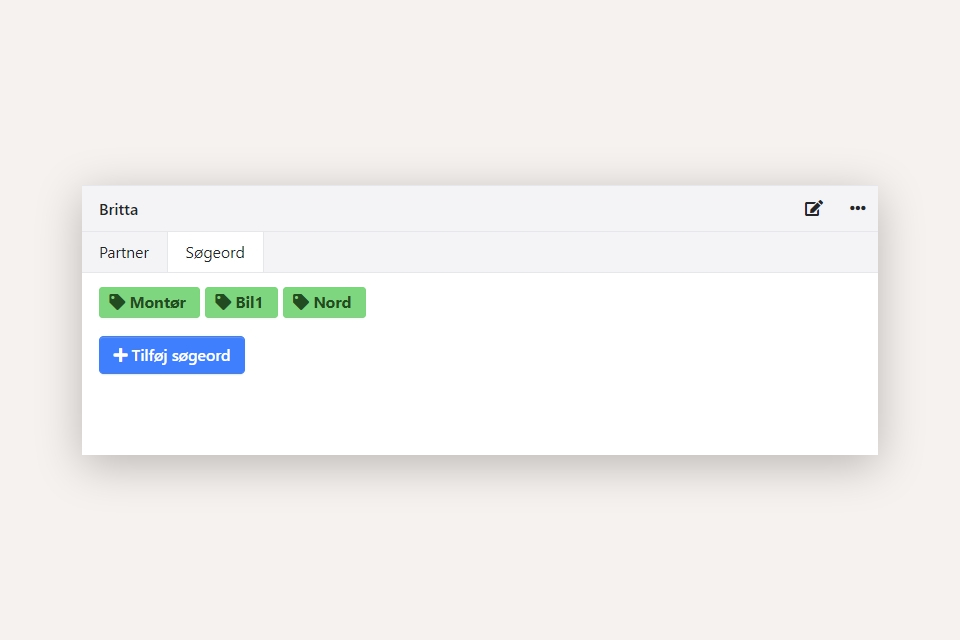
Tags
At the top of the partner, you will find the Tags tab. Here you can enter/select tags that are used e.g. for filtering employees in the calendar. Tags can be e.g. professional group or qualification.
➡️ Read more about tags
Note: All employees are shown in the calendar by default. Using the filter in the calendar, you can deselect the users you do not want shown. Alternatively, you can use tags on employees for easier filtering.
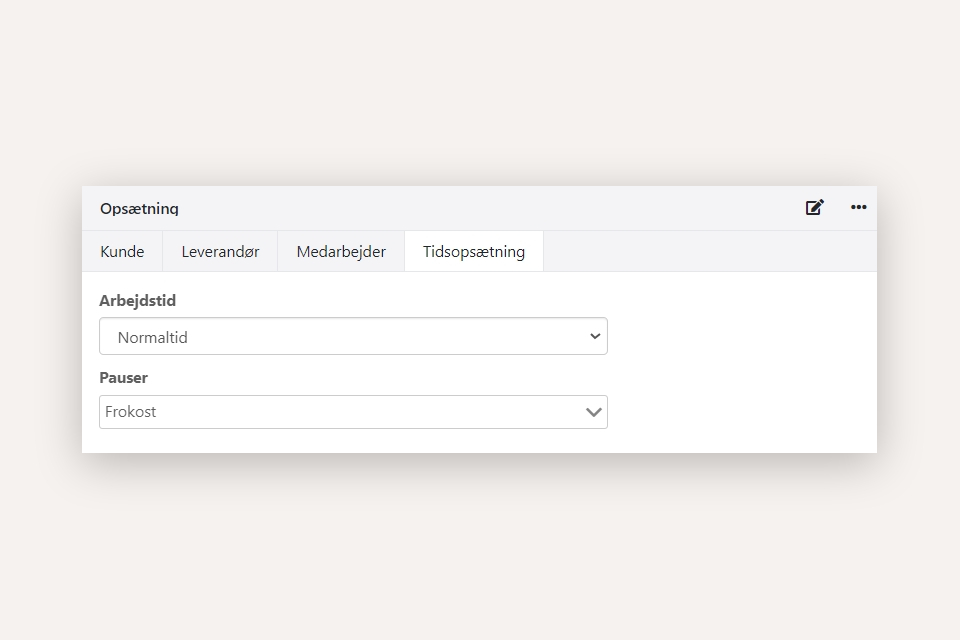
Working hours and breaks
Scroll down to the Setup section and select the Time Setup tab. Here you can select working hours and breaks for the employee. These are the ones you created earlier under Calendar Setup.
Cost/sales prices for activity types
You can create cost prices and sales prices per user, so the correct rates are used depending on which activity type is registered on. Start by going to Setup > Calendar Setup. Click the Activity Types tab.
Click the article number linked to the activity type (the article number is shown on the far right)
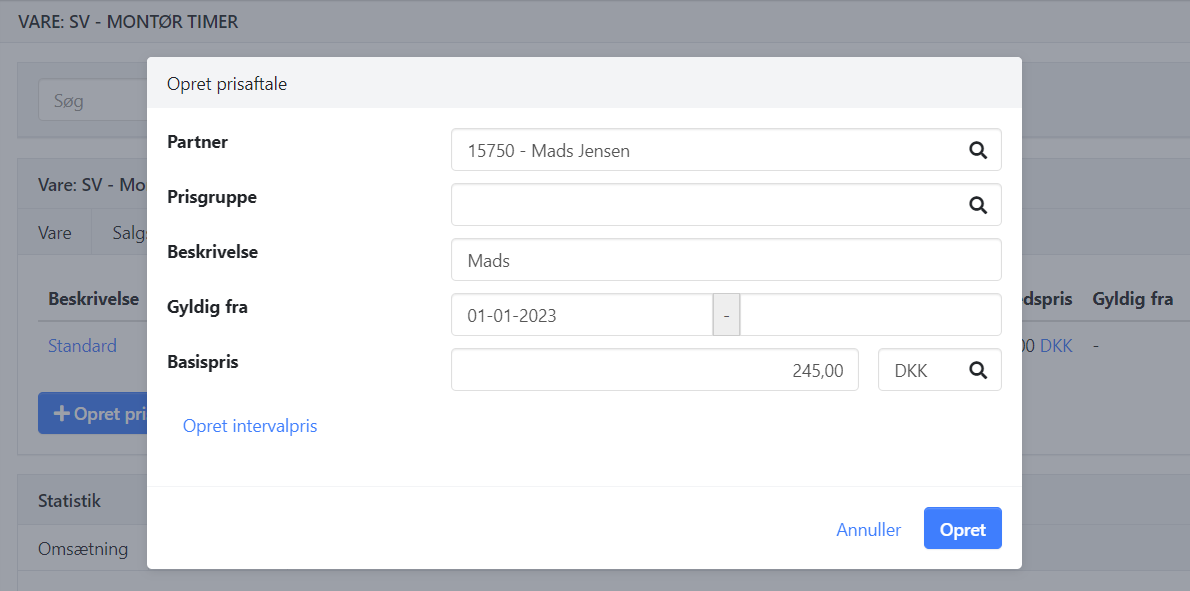
On the article, select the Purchase Prices tab and click the Create price agreement button
In the partner field, select the user (type the employee's name for quick search)
Optionally enter a start date for the rate — this can be useful if the employee moves to a higher pay grade on a specific date
Enter the cost price, incl. costs for covering e.g. holiday pay, tools, work clothing, etc.
Sales prices per employee are entered in the same way, just on the Sales Prices tab. If all employees have the same sales price, you only need to enter one sales price without selecting a partner
If you need to change the rate for an employee, you can either create a new price agreement with a start date for the new rate, or edit the existing one on the day of the price change.
Shortcut to cost prices (pay rates) per user
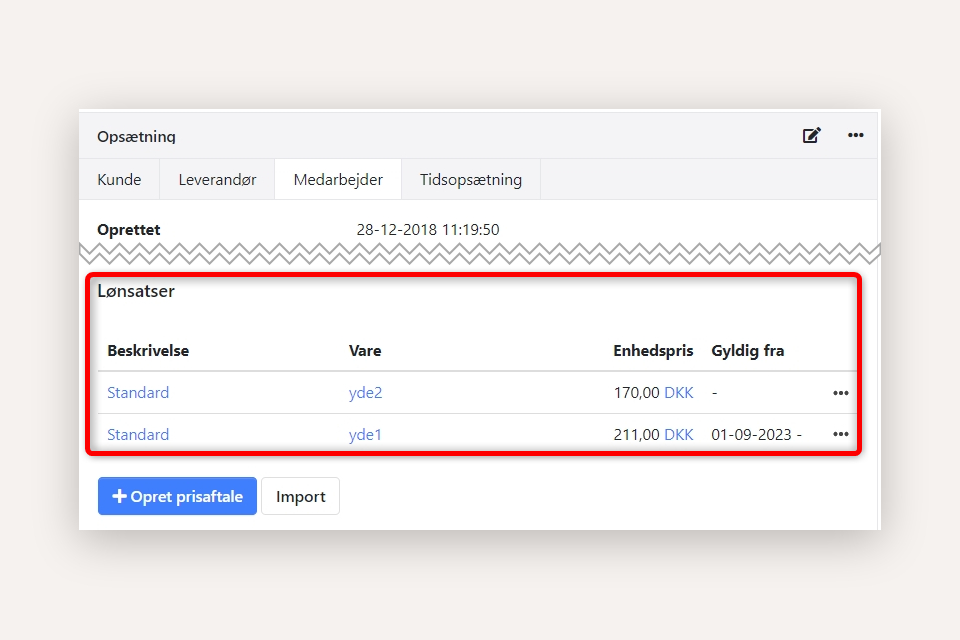
If you want to check cost prices for a specific employee, you can also view them via the user's partner. In the Setup section, select the Employee tab.
At the bottom of the setup, all rates created for the selected user are shown. Here you can also edit, create, and delete.
6: Start using EG Go and EG Log
You and your other users are now ready to start using EG Go. You log in to EG Go via a Chrome browser at go.xena.dk. If using a mobile device, we also recommend using Chrome.
➡️ Browser recommendation for EG Go
Other guides related to time registration and calendar planning:
➡️ Planning in the calendar
➡️ Approving hours
➡️ Setting up quality assurance forms
- Updated