Create your own quality assurance forms
This guide walks you through the setup and creation of your own quality assurance forms for use in Xena as well as EG Go and Log.
The Quality Assurance app is installed through the Xena App Store. This guide assumes it's installed in your account and added to your user.
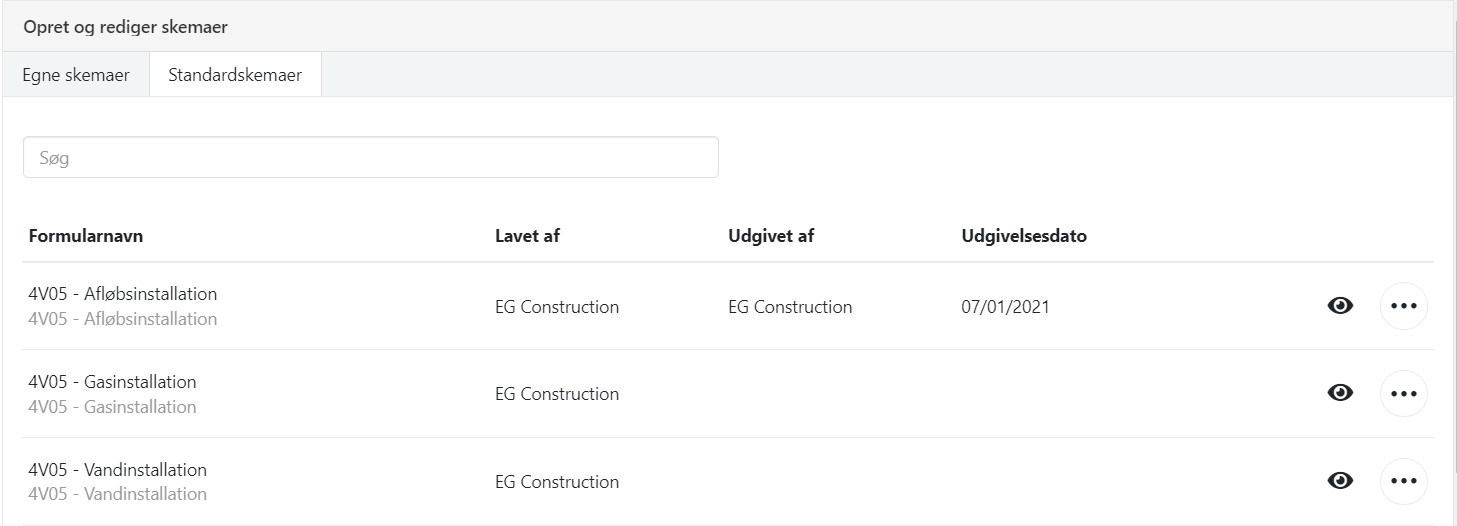
You open the app through the menu Project > Quality assurance forms. Here, you'll see two tabs:
- Standard Forms: This tab displays all the standard forms that come with the module. You can use these as they are or copy and customize them to your needs.
- Own Forms: These are user-customized forms that can be copied from standard forms or created from scratch.
Only published forms can be used in your orders and in the EG Log app.
Creating forms
Open the menu Project > Quality assurance forms. You have the following options to create a form:
- You can create a new form from scratch:
- Click the 'Create Form' button.
- You can create a copy of a form you've created, and then edit it:
- Select the 'Own forms' tab.
- Click the menu (the three dots) next to the form you want to copy.
- Choose 'Copy'.
- A form identical to the original is created at the bottom.
- You can create a copy of a standard form and then edit it:
- Select the 'Standard Forms' tab.
- Click the menu (the three dots) next to the form you want to copy to your own forms.
- Choose 'Copy'.
- A form identical to the standard form is now created in the 'Own forms' tab.
Be aware that all changes are automatically saved as you work. Therefore, there's no 'Save' button on the screens.
Note: The QA form title must not contain dot.
Form Information
At the top of the form, you'll find Title, Description, and Job Types. You can edit/add these as desired.
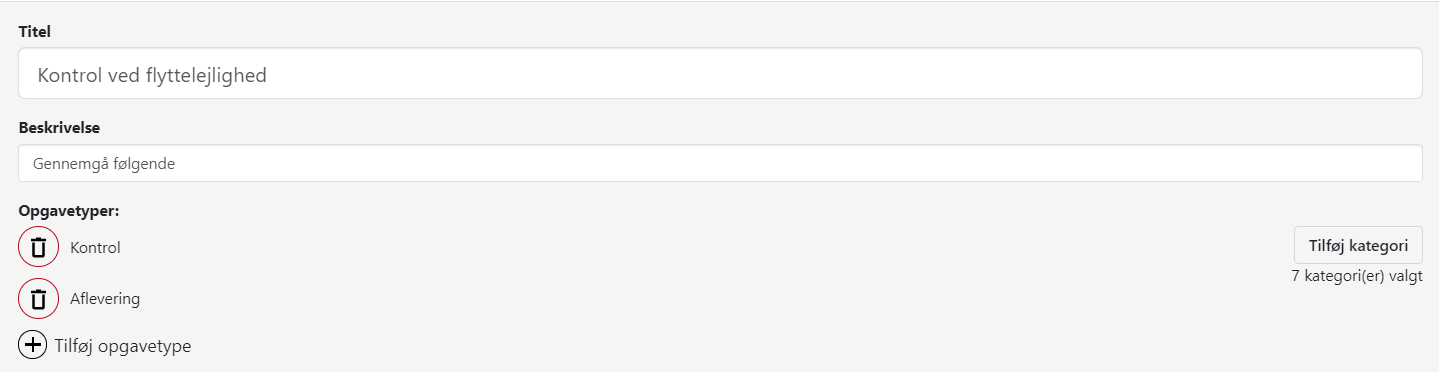
Categories
You must select the categories the form will be associated with. Categories allow you to control which employees have access to which forms.
- Click the 'Add Category' button.
- Choose from the categories provided with the module or create your own.
Learn more about categories and how to create them in the 'Quality assurance Form Categories' section later in this guide.

Items on the form
Now you're ready to build the form with the desired items. Items consist of sections and questions related to the sections.
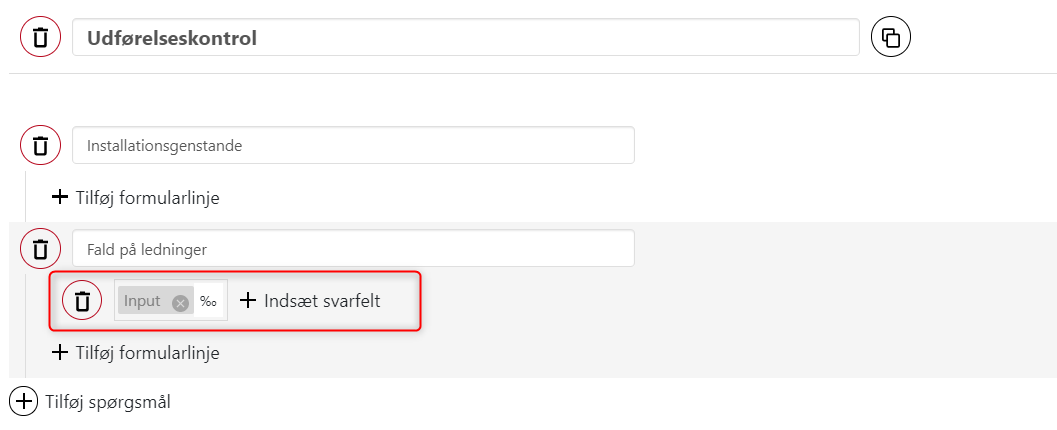
Sections
Create the first section and enter a description for it (heading). In this example, it's called Execution Control.
Questions
Under each section, create questions that can be marked as Completed Yes/No when filling out the form.
In this example, we see 2 questions: Installation Objects and Wire Fall.
Form Line
For each question, you can choose to add a Form Line. A form line is an extra input field for a question where you need more detailed information than just Completed Yes/No.
In the example below, we show an input field where the employee can note a percentage of wire fall.
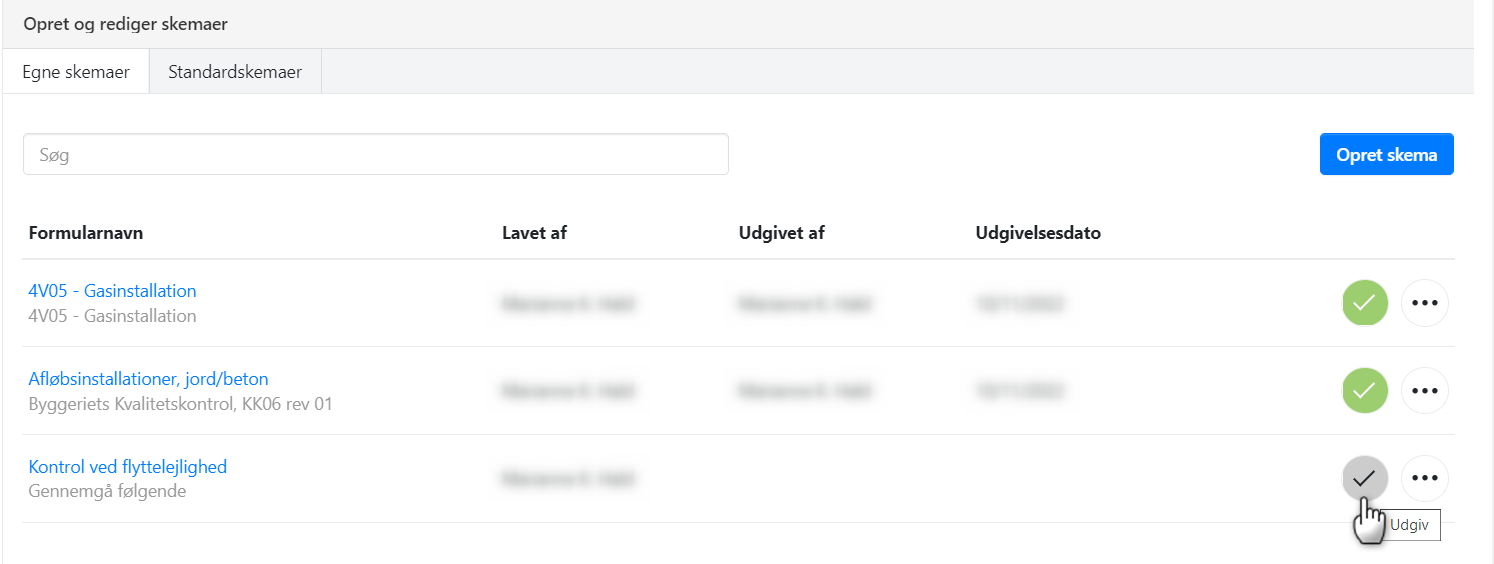
Publish Form for Use
A form can only be used once it's published. This means while you're building a form, it's a draft. Once you've finalized it, you can publish it.
On the 'Own forms' tab, click the checkbox to publish it. Now the circle changes to green, and the form saves who published it and when.
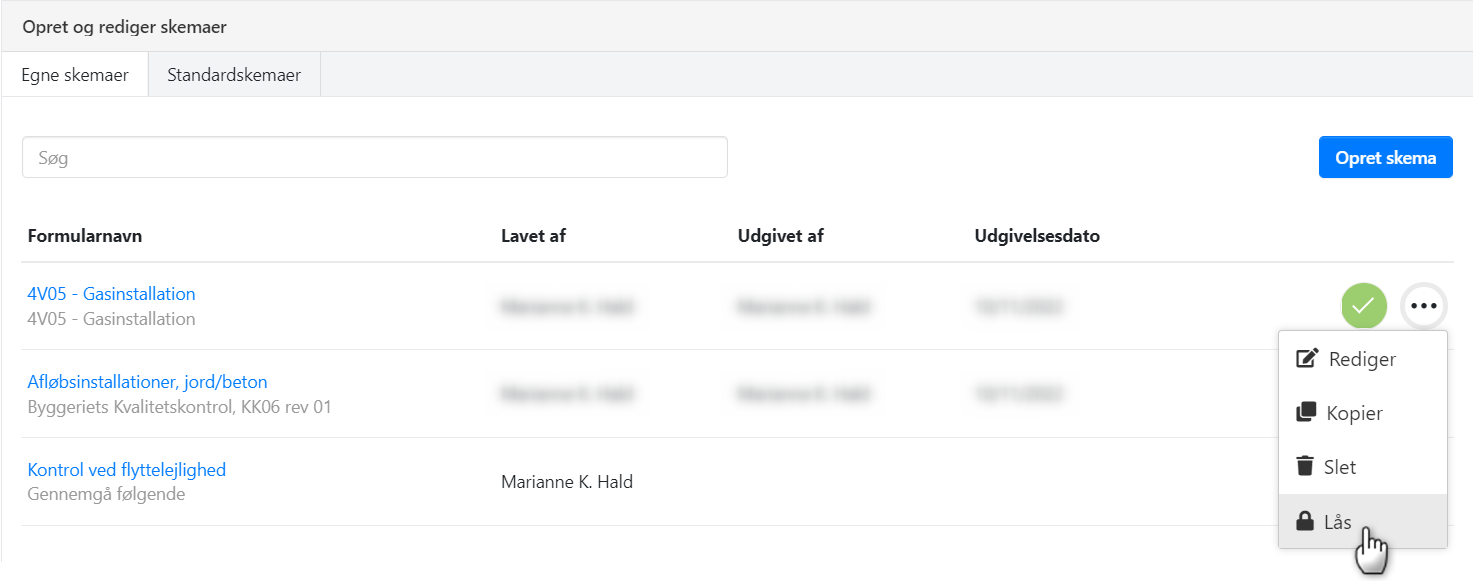
Lock Form for Editing
You can lock your Own forms from further editing when you're completely sure you're done editing.
Keep in mind that unlocking the form is not possible. If you need to make changes, you'll have to remove the publication and create a copy that you can edit.
Module Setup
Go to the menu Time > EG Go Setup. Here you'll find 3 points related to Quality assurance forms (mentioned as QA forms here).
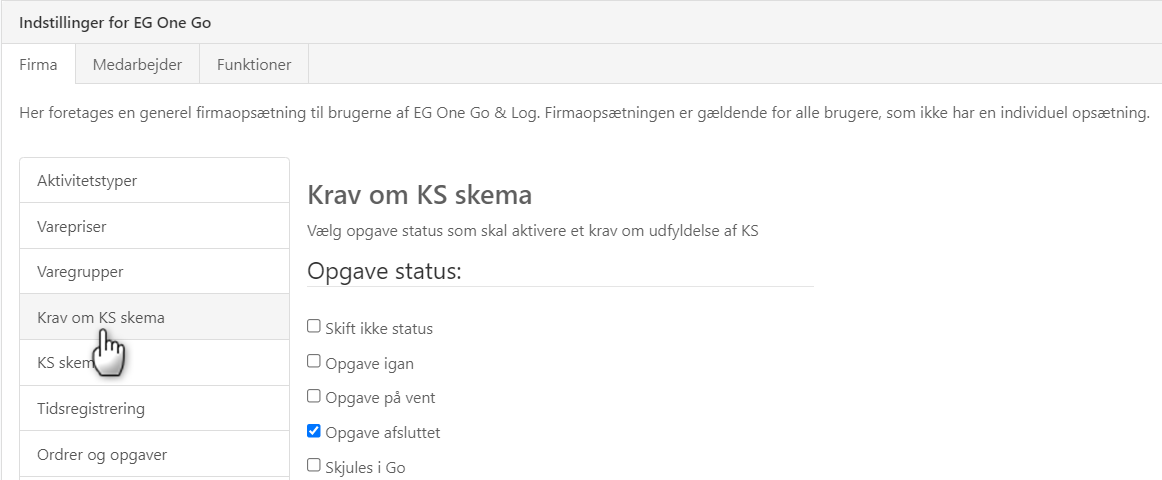
1 Requiring QA form
On all your tasks, you can require a QA form. In this setup, you choose when to check if the required QA form is filled out.
For instance, if you mark 'Task Completed' here, it means that you can't change a task's order status to 'Task Completed' unless the required QA forms for the task are filled out.
If you haven't marked any task statuses, the check won't be done automatically, and you'll need to manually verify your tasks if the required forms are filled out.
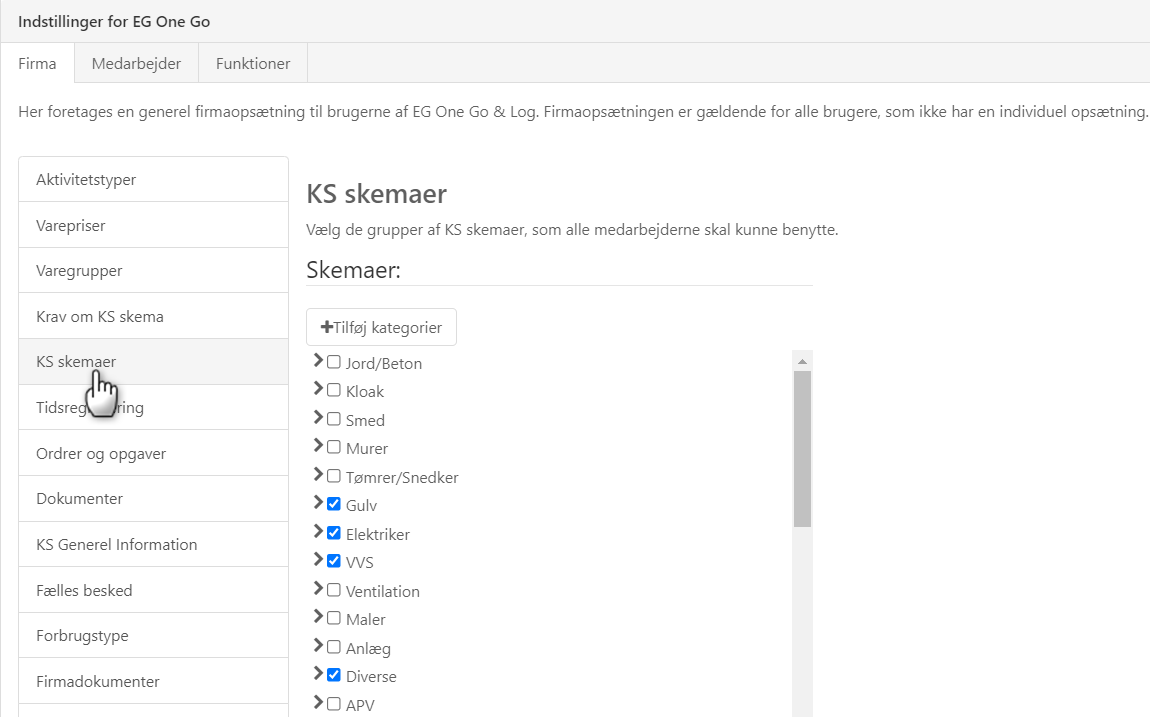
2 QA forms (categories)
Here you choose the categories/subcategories of QA forms that can be used in your company. It's important to mark ALL relevant categories for your company, and you must select at least the categories you've chosen for the forms you've published.
You can also create your own categories by clicking the 'Add Category' button. Once the category is created, you can subsequently select it for your own forms.
If you've selected a category on a QA form that's not marked here, the form won't be visible on your orders or in EG Go.
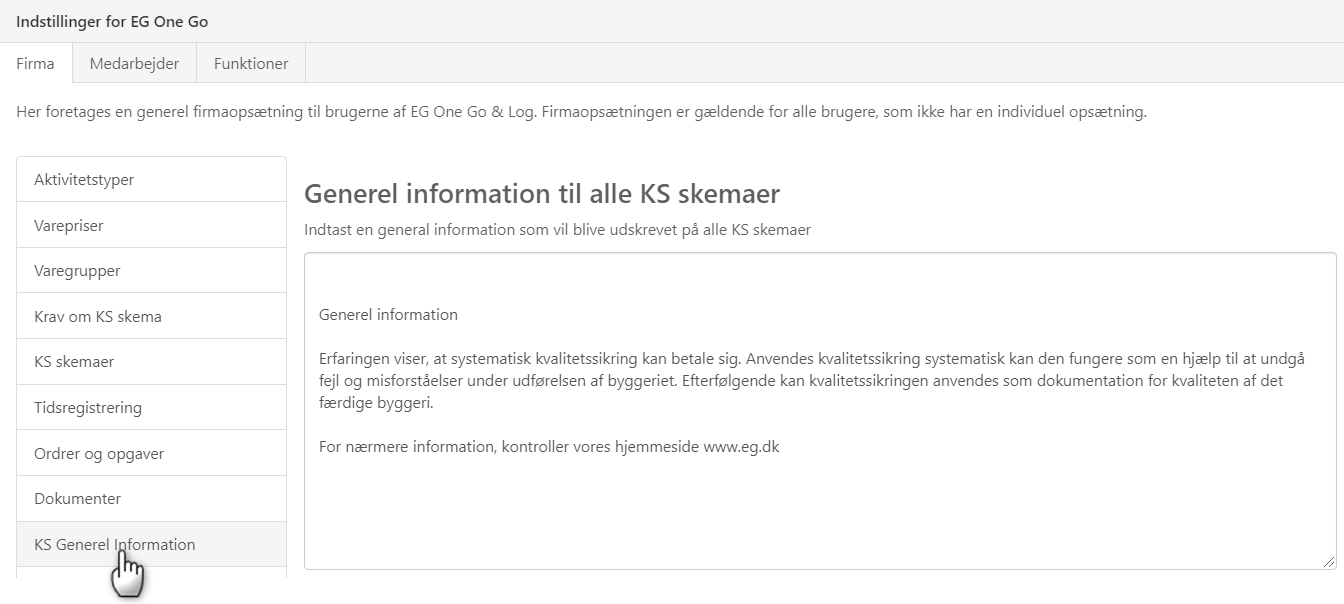
3 QA General Information
Here you can enter a standard text that you want to appear on the front page of your QA forms.
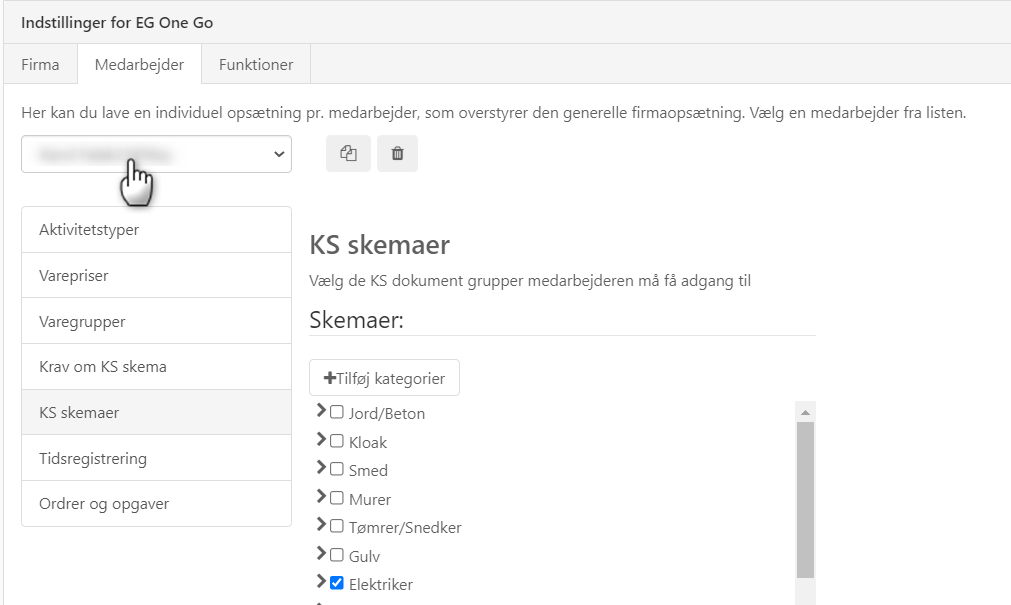
Override Setup per Employee
First, set up the general configuration on the 'Company' tab. Then, you can make individual setups for each employee on the 'Employee' tab:
- Select an employee.
- Edit the setup for this employee for 'Requiring QA form' and 'QA forms'.
For example, you could have multiple different professional groups employed, where masons need access to forms related to masonry work and carpenters need access to forms related to carpentry work.
At the same time, both groups of employees can have access to a range of other QA forms relevant to both professional groups.
This is useful, as the employee is only presented with the QA forms specifically related to their job functions.
- Updated