Archive
In the Archive, you can import master data from your previous accounting system, making it available in Xena.
The Archive helps you efficiently transfer the necessary data without filling your new fiscal system with unnecessary information.
The import makes it easier to create new customers and suppliers by using previous data as suggestions. This saves time and minimizes manual entry.
It is not always advisable to import all old data into your new fiscal system. By using the Archive in Xena, you can choose which data you want to import, keeping your new fiscal system organized.
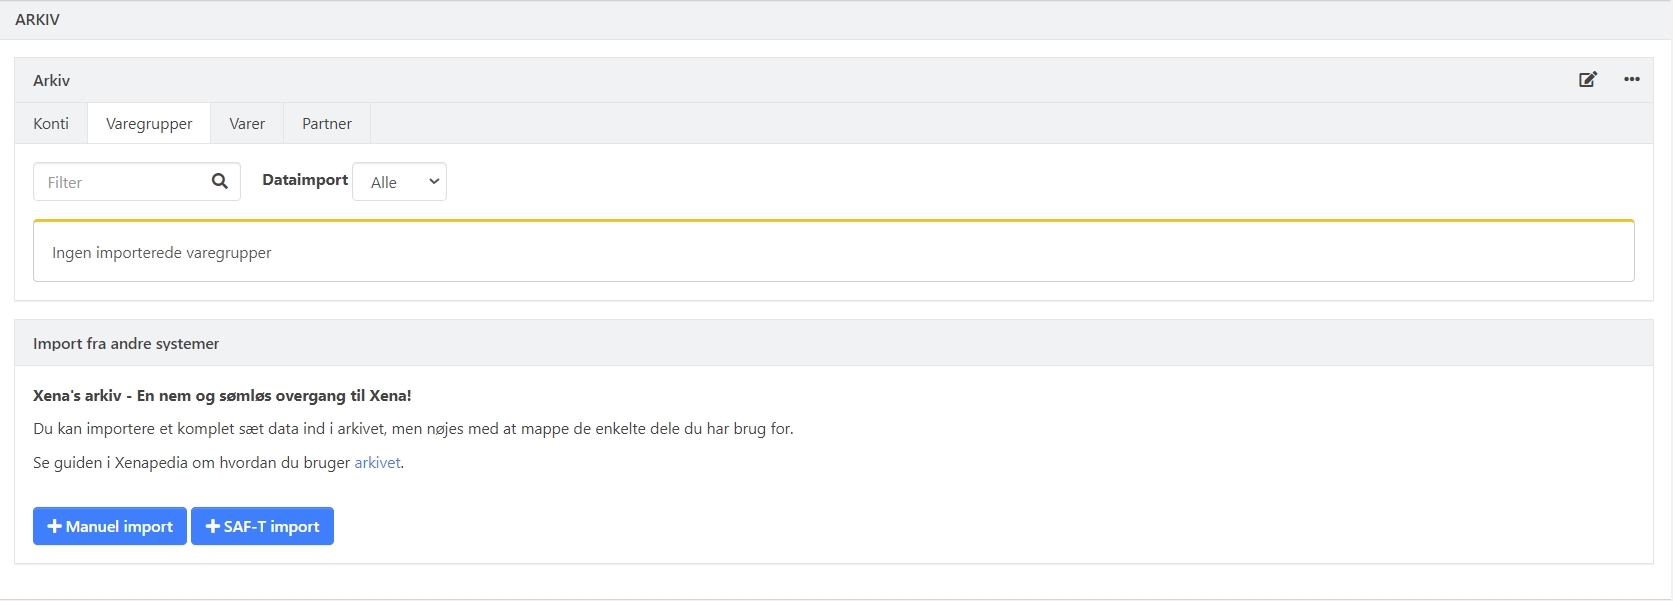
Access the Archive
You can find the Archive in the menu under Setup > Import/Export Data > Archive.
The Archive does not affect your active accounting system, so you can work with the data without risking any changes to your accounting.
Manual Import
Use the Manual Import function to transfer data from a CSV file. If your data is in Excel, save the file as a CSV file. Be aware that Excel can sometimes change the formatting of numbers and dates, so make sure to double-check before importing.
You can import the following data:
- Chart of Accounts
- Articles (if the article file includes article groups, these are created automatically)
- Article Groups
- Customers
- Suppliers
Important Information:
- When importing the Chart of Accounts, avoid importing headers and summary accounts. Xena has fixed financial groups that are automatically assigned to the imported accounts.
- If you only want to import articles, you can import them directly into Xena without using the Archive.
- For customers and suppliers, it is recommended to import them in two separate processes to keep track of the data.
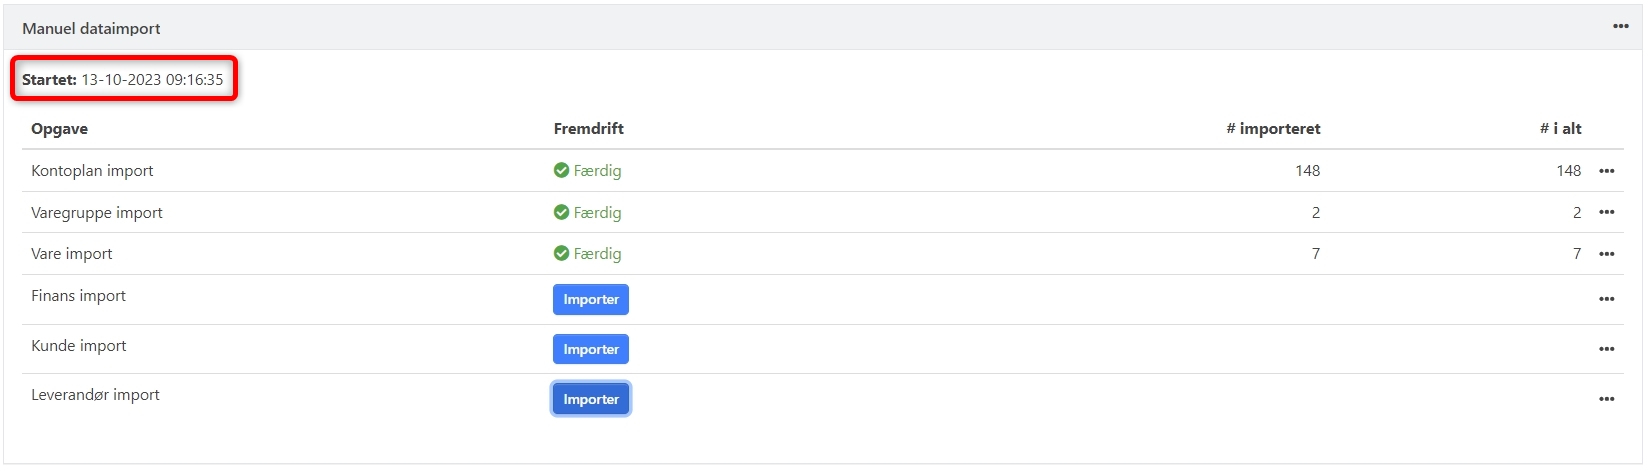
Using Manual Import
- Create the Import: Click on Manual Import. A box with a start date/time will be created.
- Select Data: Click on Import next to the data type you want to import.
- Choose File: Select the CSV file you wish to import. Choose the format and any other relevant settings.
- Assign Columns: Match the columns in your file with the relevant fields in Xena. Check the preview at the bottom to ensure everything is correct.
- Start Import: If everything looks good, click on Start Import.

Once the import is finished, the status will show Done next to each of the imported data types in the list.
SAF-T Import
The SAF-T function allows you to import data from a SAF-T XML file. This file contains master data and accounting data. In the current version, we only import the data found in the Header. We plan to expand the feature to allow more data to be imported in the future.

Using the Imported Data
All the imported data will be shown at the top of the Archive under the following tabs:
- Accounts
- Article Groups
- Articles
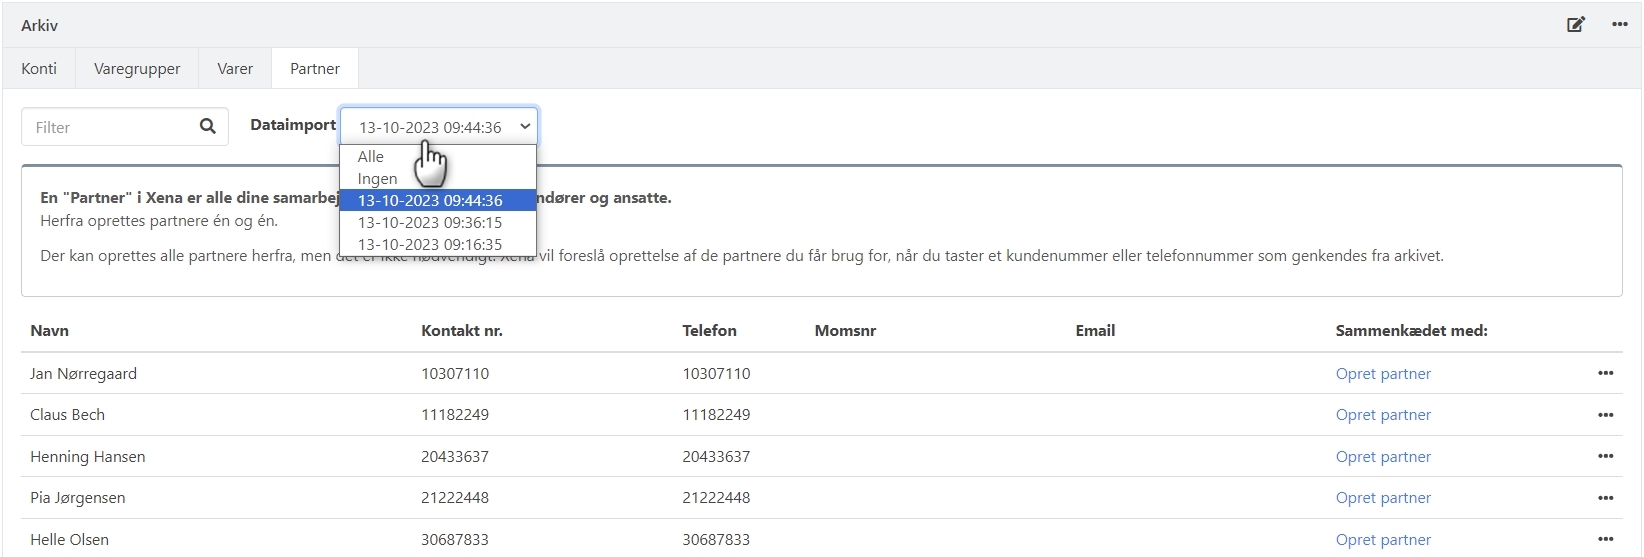
- Partners
For each tab, you can filter the data by the different import processes. If you have imported customers and suppliers separately, you can filter these in the Partners tab.
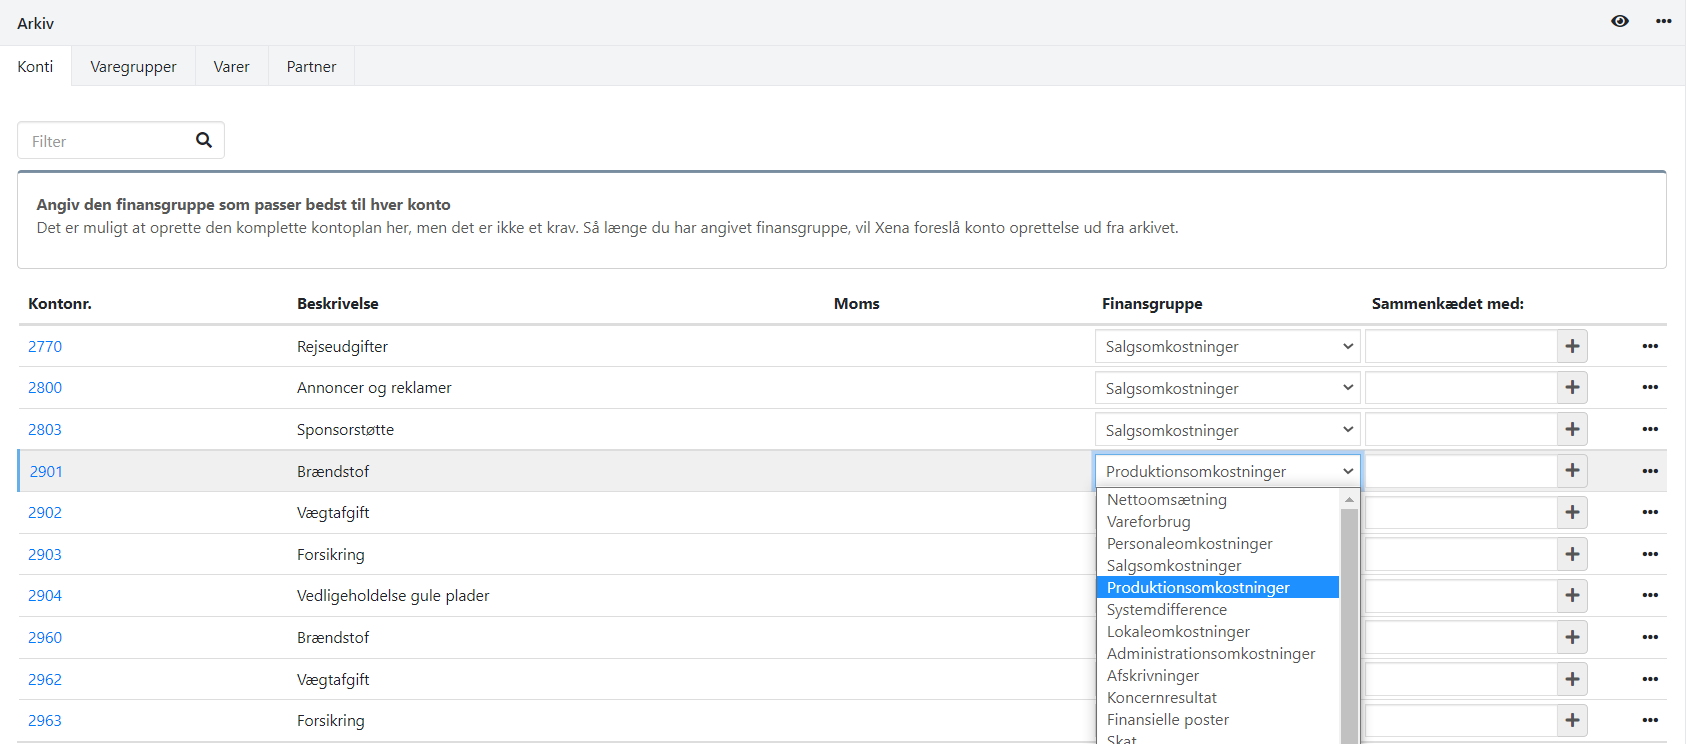
Ledger accounts tab
This tab shows all the imported financial accounts. To use the chart of accounts in the archive as suggestions later on, you need to assign each account to a financial group.
- Select Edit (click the pencil icon in the top right corner)
- Assign a Financial Group to each account
- You can now link the account to an existing account or create a new financial account:
- Enter the account number in the Linked with field
- If the account does not exist, click the plus icon to create it
- Fill in the dialog with the required information, and remember to select a VAT code if applicable
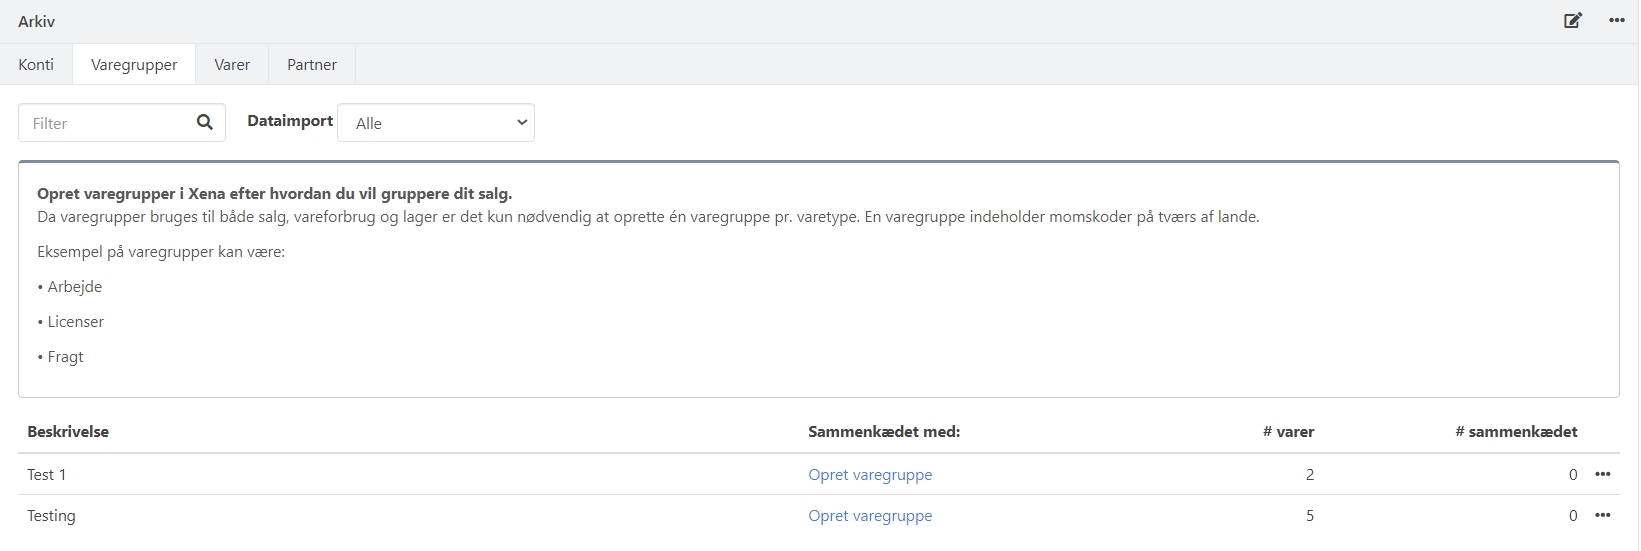
Article Groups tab
In the Article Groups tab, you can create the necessary article groups in your fiscal system. Once the article group is created, you can easily create all the related articles in the group with just a few clicks:
- Click the menu (three dots) next to each group
- Select Link all articles
Articles tab
Here, you can create imported articles one by one. If you have many articles, it is much faster to create them from the Article Groups tab, as described above.

Partner Tab
In the Partners tab, you can create customers and suppliers. Xena will suggest creating them based on the imported data if recognized. For example, if you search for a previous customer number and it is recognized from the archive, Xena will suggest creating the customer with the imported data from the Archive.
Note that you can apply filters to distinguish between customers and suppliers if they were imported via two different processes.
Deleting Data in the Archive
Next to each imported data type, you can choose Reset, which will delete that specific data type from the Archive.
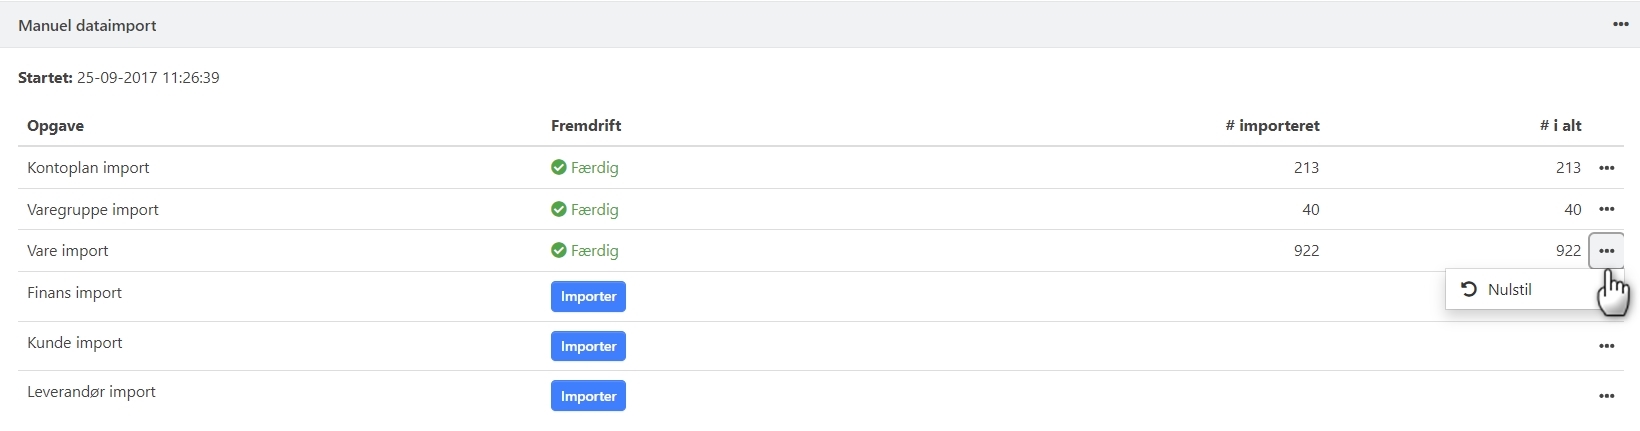
You can also delete all imported data for a given import process. Click the menu at the top of the import box and select Delete. All data associated with that process will be deleted.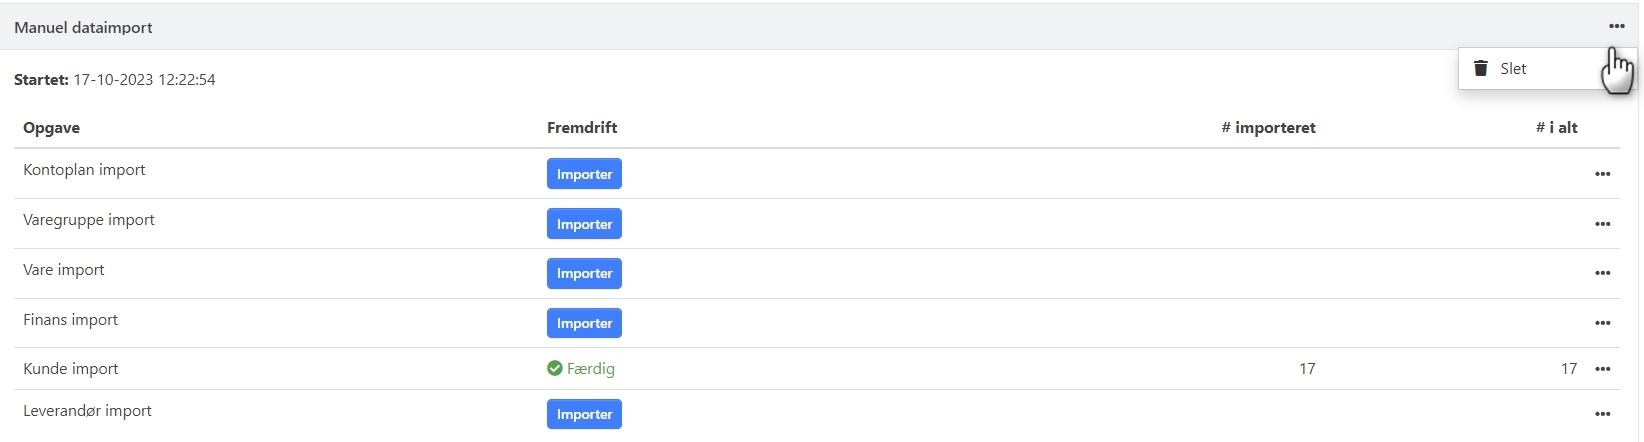
If you have data that is not linked to an import process (imported before October 2023), you can delete this data through the menu at the top right of the screen.

- Updated