Using the Inbox
The inbox in Xena handles all types of documents you want to store in your accounting system.
The inbox in Xena is an efficient and user-friendly tool for managing documents in your accounting system. Here, you can easily store and manage supplier invoices, receipts, images, and other relevant attachments.
How to send documents to the inbox
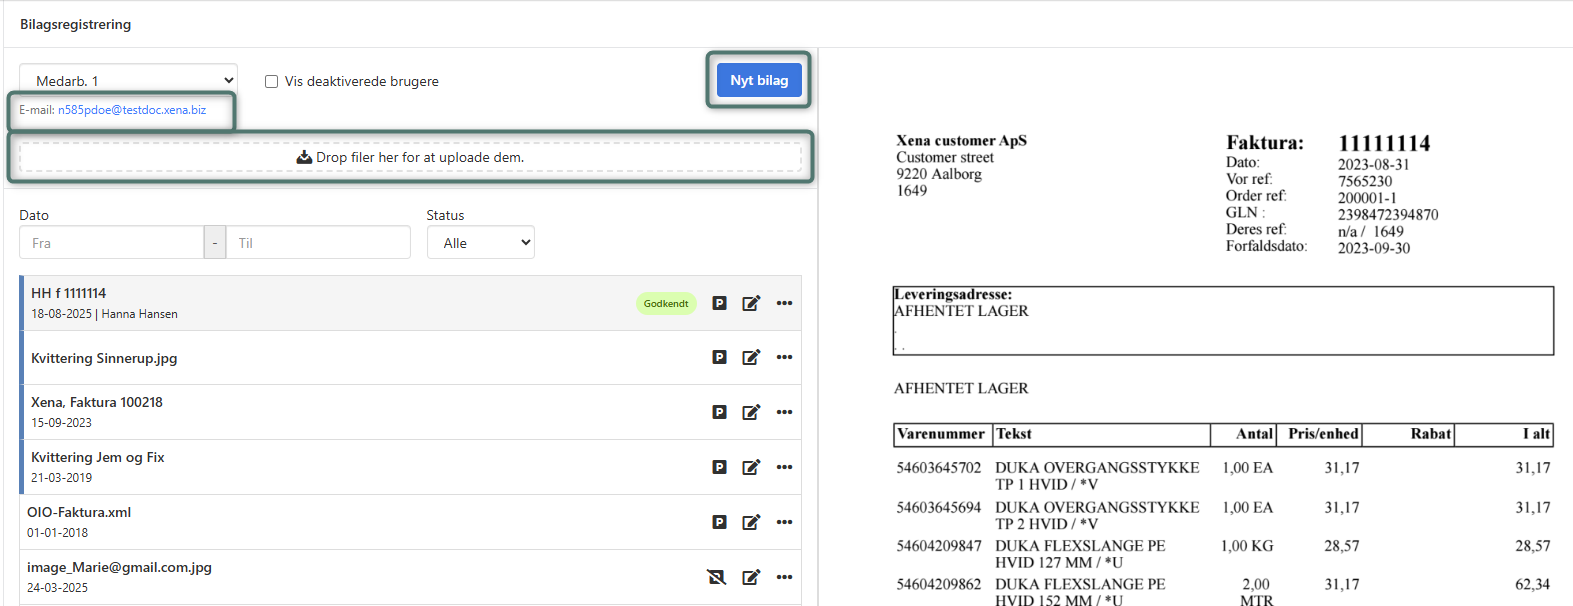
You can find the inbox in the menu Ledger > Voucher Registration, or by clicking the Inbox icon in the top right corner of the top bar.

There are several ways to add documents to the inbox:
- Via Email: At the top of the page, you'll find a unique email address associated with your Inbox. For example, you can take a photo with your phone and send it directly to this email address. The document will appear in the Inbox within seconds. Clicking the email address will open your default email client with the address pre-filled—simply attach the document and click Send.
- Drag and Drop: You can also manually add files by dragging them into the “Drop files to upload” box.
- Mobile app: You can use the app EG Xena Vouchers to quickly and easily send documents to the Inbox directly from your phone.
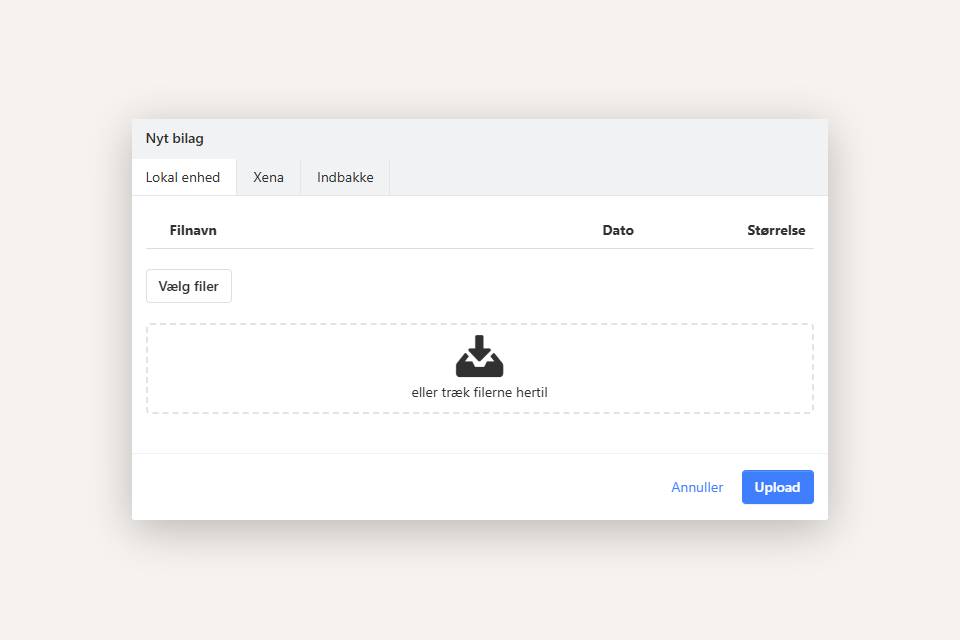
By clicking New Document, you see additional methods of uploading documents:
- Local Device: Upload files directly from your computer.
- Xena: Add a document that already exists in your accounting records—for example, a previously posted voucher.
- Inbox: View documents currently in an Inbox (your own or others).
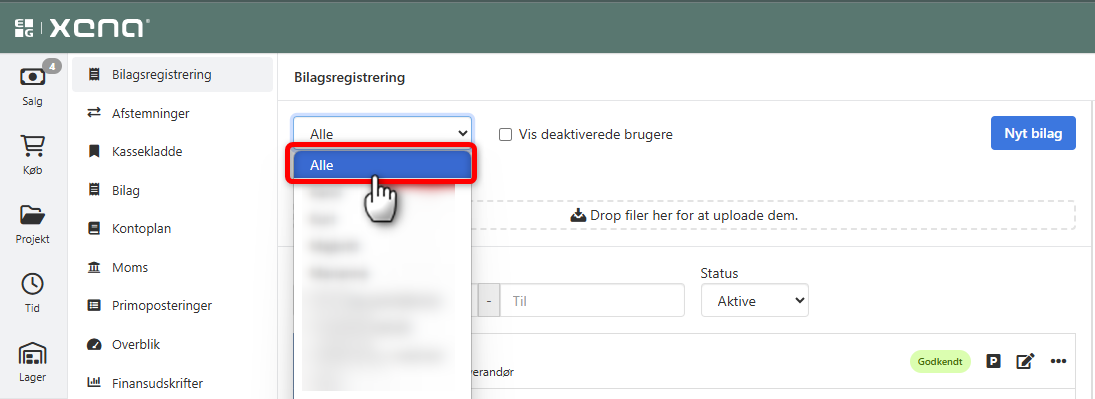
Inboxes
Users with Administrator or Bookkeeper roles can access an overview of all documents across all inboxes within the fiscal by selecting All in the inbox selector field. This will display all documents in the fiscal — regardless of which inbox they are stored in.
Parking and notes
You can enter internal notes on all types of documents. Notes are saved with the partner posting upon entry and are also visible under Purchases > Payments. By hovering over the note icon, a preview of the first lines is shown. To read the full note, simply click the icon.
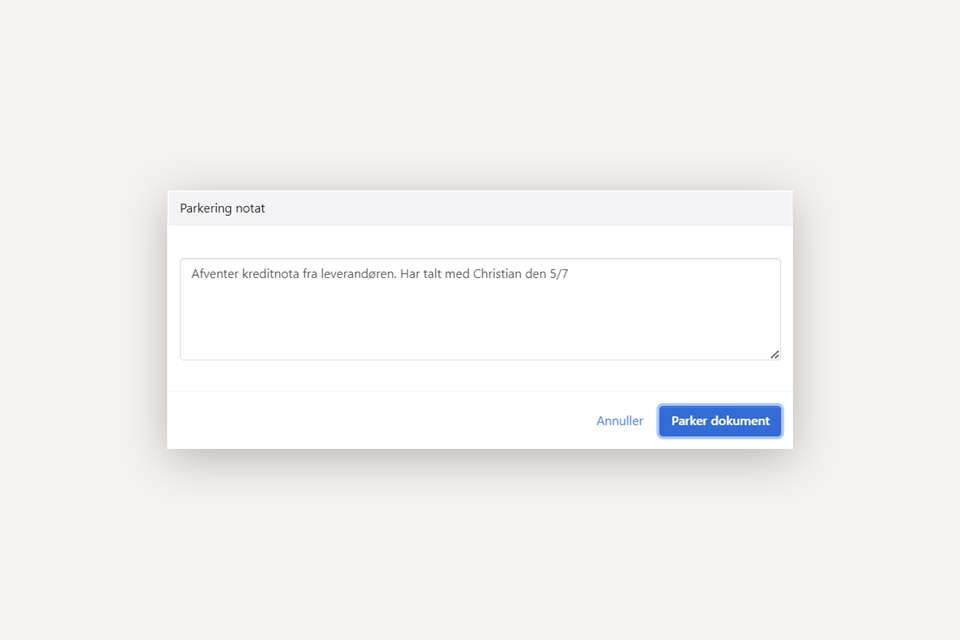
You can temporarily park a document if you don’t wish to process it immediately. Parked documents are excluded from the active document view.
- Click the P icon next to the voucher.
- Optionally, enter a note explaining the reason for parking.
- Click Park voucher. The icon will then change to a strikethrough version.
To reactivate the document, click the strikethrough icon and select Activate voucher.
➡️ Read about parking and adding notes to postings
Filters
The inbox allows you to filter documents based on:
Date:
Enter a date range. If you leave one field blank, documents without a date will also be shown. This is useful, for example, during VAT settlement when you want to ensure that all relevant invoices are posted within the reporting period.
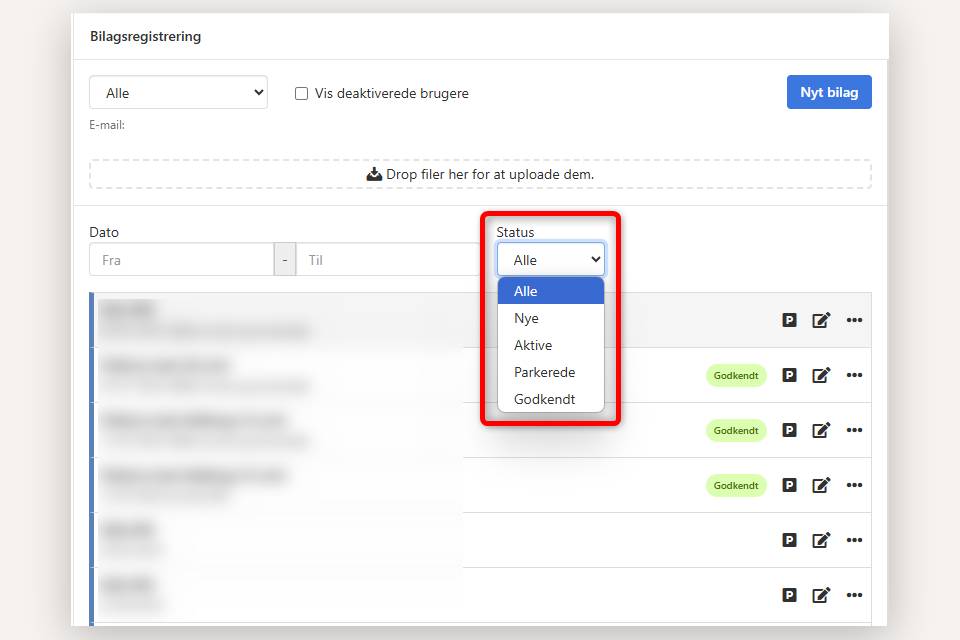
Status:
By default, only active documents are shown. You can choose between the following filters:
- All: Shows all documents in the selected inbox.
- New: Shows only documents marked as New.
- Parked: Shows only parked documents.
- Approved: Shows only documents where all order-related costs are approved (marked as Approved in the overview).
Other features
Preview:
Documents are displayed on the right side. Images can be rotated using the buttons above the preview.
Status marking:
New vouchers are highlighted with a color marker on the left side and placed at the top of the inbox. In the menu next to each voucher, you can mark it as either New or Seen (see below).
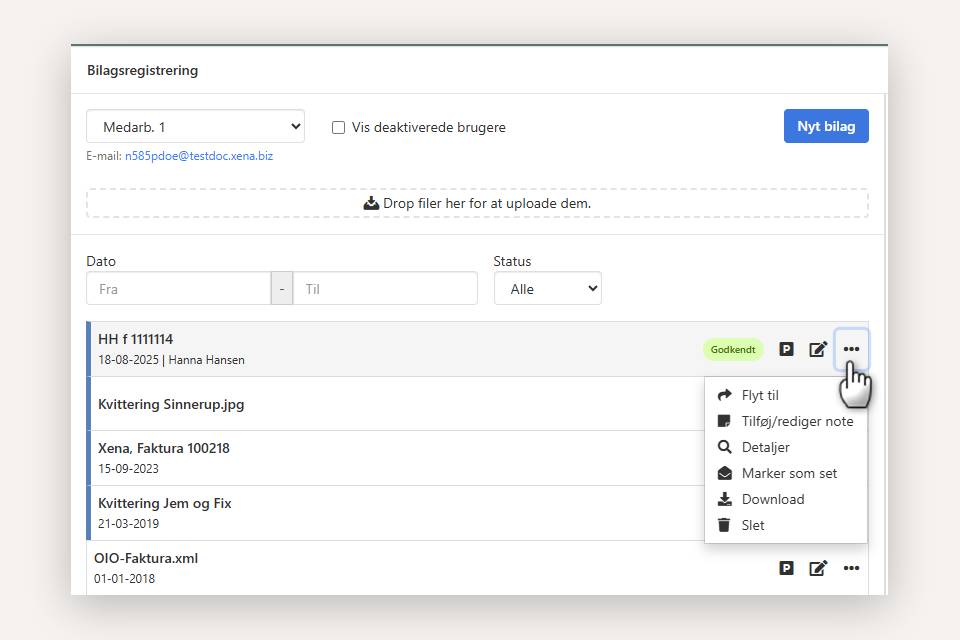
Actions:
By clicking the three-dot menu next to a document, you have several additional options:
- Move to: Transfer/add the document to an order or another user’s inbox.
- Add/edit note: You can add internal notes to vouchers.
- Details: View file name and where else the document has relations.
- Mark as New/Seen: Set the voucher as either new or seen.
- Download: Save the document locally.
- Delete: Remove the document from the inbox.
➡️ Go to this guide to learn how to bookeep via Voucher Registration
➡️ Document Management
- Updated