Bank reconciliation
Load your bank transactions into the bank reconciliation. Not only to reconcile the bank transactions you have already posted but also to avoid tedious data entry when posting to the bank.
Import bank entries into Xena to reconcile them against your posted entries – and transfer unposted bank entries directly to the cash journal for quick posting.
Bank reconciliation has two functions:
Reconciling the bank against entries already posted in Xena
Transferring unposted bank entries to the cash journal for quick posting
You should be as up to date as possible with invoicing and voucher registration before doing a bank reconciliation.
You can have bank entries fetched automatically on an ongoing basis by setting up an integration with your bank.
➡️ Get entries from the bank
Alternatively, you can export a file from your bank and import it manually. Read more below.
Exporting from the bank
All banks have a function to export bank transactions to a file (typically CSV format). You will usually find the function where you view the account's transactions. Ask your bank if you are unsure.
Save the file to your local computer.
It is recommended to export transactions up to and including yesterday, since today's transactions are provisional and may change. Xena ensures that the same bank entries are not imported twice. If you are unsure how much you have previously exported, it is better to include too many entries rather than too few.
Importing into Xena
Open Finance > Reconciliations, and select the Bank reconciliation tab
Select your bank account, and press Create (this is only done once per bank account)
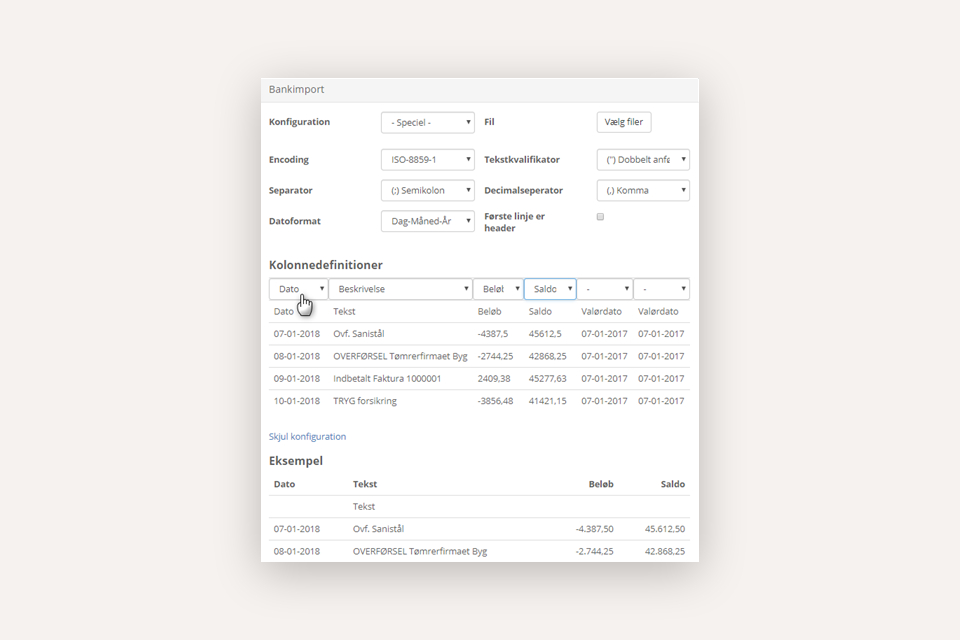
Press Import from file at the bottom of the screen
Select the file format that matches your bank file. Since many banks use the same formats, you choose between fixed, predefined formats instead of a specific bank
If the first line in your file is a column header and not an entry, you must select First line is header
Under column definitions, you must select at least:
Date
Description
Amount
Balance
If a column has been given an incorrect definition, you must first deselect the definition in the wrong column before you can select it in the correct column
Select the file from the bank and check that the preview looks correct. In the example at the bottom of the screen, data should be shown in the 4 mentioned columns (Date, Description, Amount, and Balance) – if data is not shown in all four, check the column definitions or the date format
Press Import
The first time after the update, you must select the correct format. After that, Xena will automatically suggest the same choice next time.
Step 1: Reconciliation
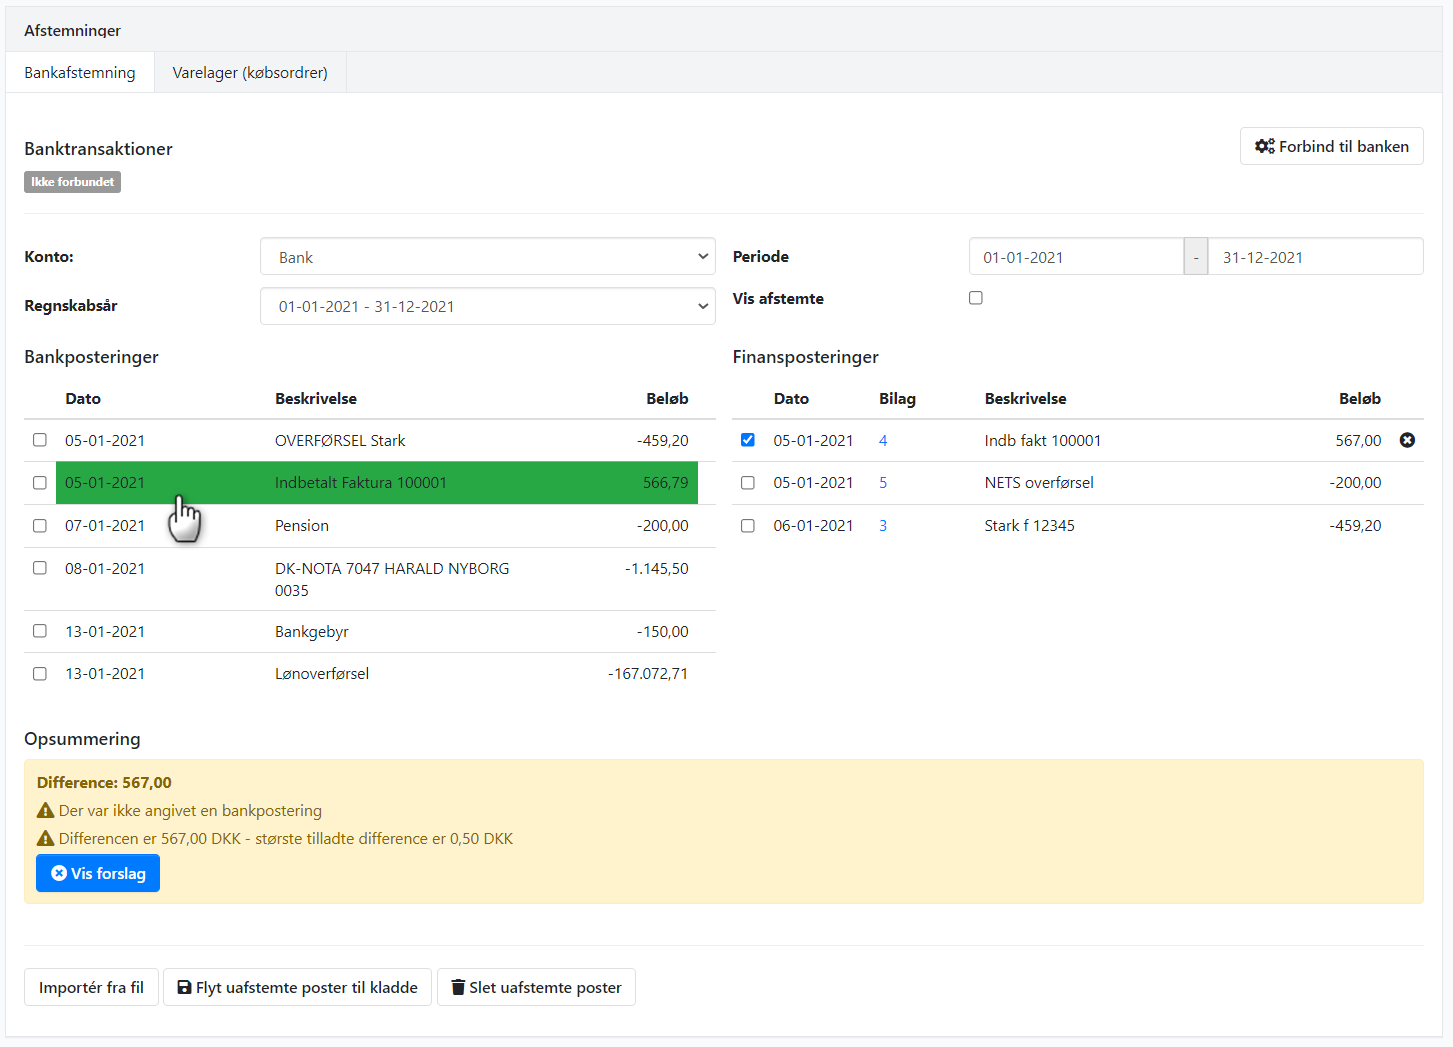
Once the import is complete, the imported bank transactions are shown on the left and your posted finance entries are shown on the right.
Select voucher
When you select a line on either the left or right side, the matching entries on the opposite side are highlighted in a colour. The darker the colour, the higher the probability of a correct match.
You can also press Show suggestions to see a combined list of the entries that match the selected one.
If you are unsure whether you have matched the correct entries, you can open the finance voucher by clicking the voucher number. You can open the link in a new tab by holding down the Ctrl key while you click.
➡️ Read more about keyboard shortcuts
Save reconciliation
At the bottom, the difference between the selected entries is shown continuously.
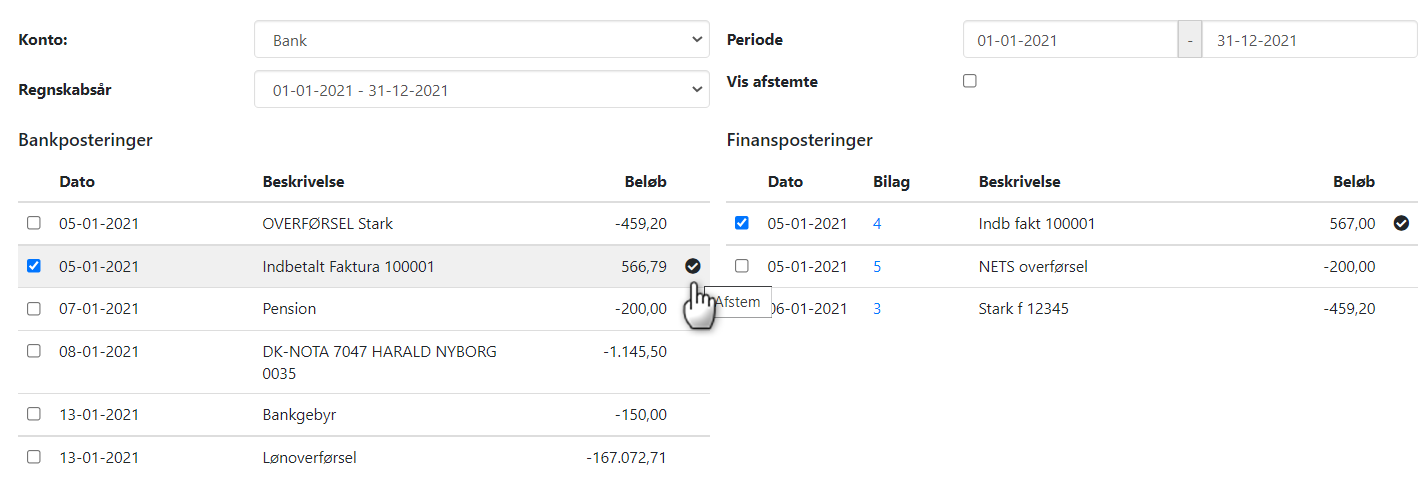
You can reconcile several entries at the same time – up to 50 at a time. When the selected entries are reconciled, a checkmark is shown. Press the save icon to save the reconciliation.
Undo reconciliation
If you want to undo a reconciliation, you must select Show reconciled at the top.
Press Show next to the entry you want to undo
Press Delete bank reconciliation in the dialog box
The entries can now be reconciled again
Step 2: Transfer bank entries to the cash journal
Once you have finished the reconciliation, there may be bank transactions left that you have not yet posted. You can transfer them to the cash journal and save time on manual entry.
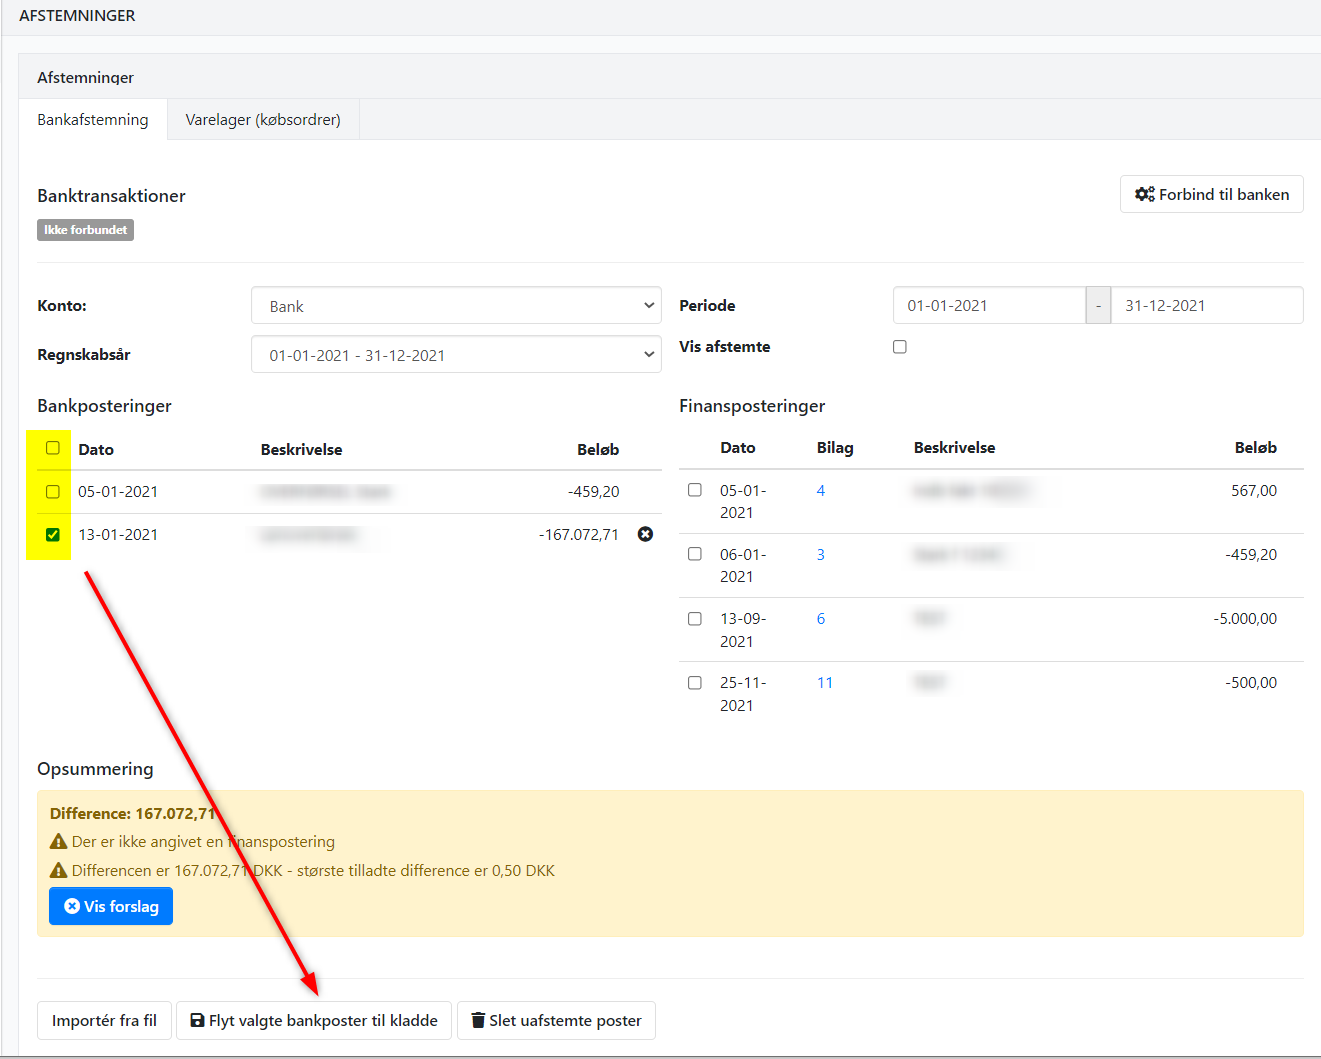
Select the bank transactions you want to transfer
Press Move selected bank entries to journal
Select the journal the lines should be transferred to
Press Transfer and go to journal
Step 3: Post bank entries in the cash journal
The cash journal opens automatically, but you must select the journal you transferred the lines to yourself. All the selected bank entries are shown here, ready for posting and account assignment.
When you post the journal, the bank entries are automatically marked as reconciled. If you delete a line in the cash journal, it is automatically returned to the bank reconciliation.
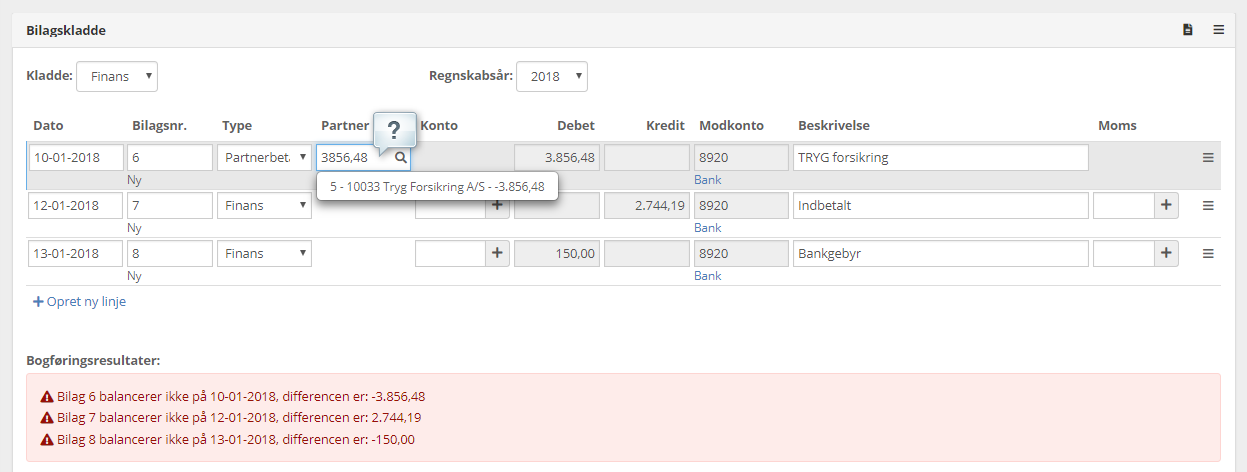
Tip: To find the correct partner (customer or supplier) for a payment in or out, select the type Partner payment and enter the amount in the partner field. The partners with an entry or balance matching the amount will then be shown.
You can also search by name and invoice number in the partner field.
➡️ Read more about the cash journal
Delete imported bank entries
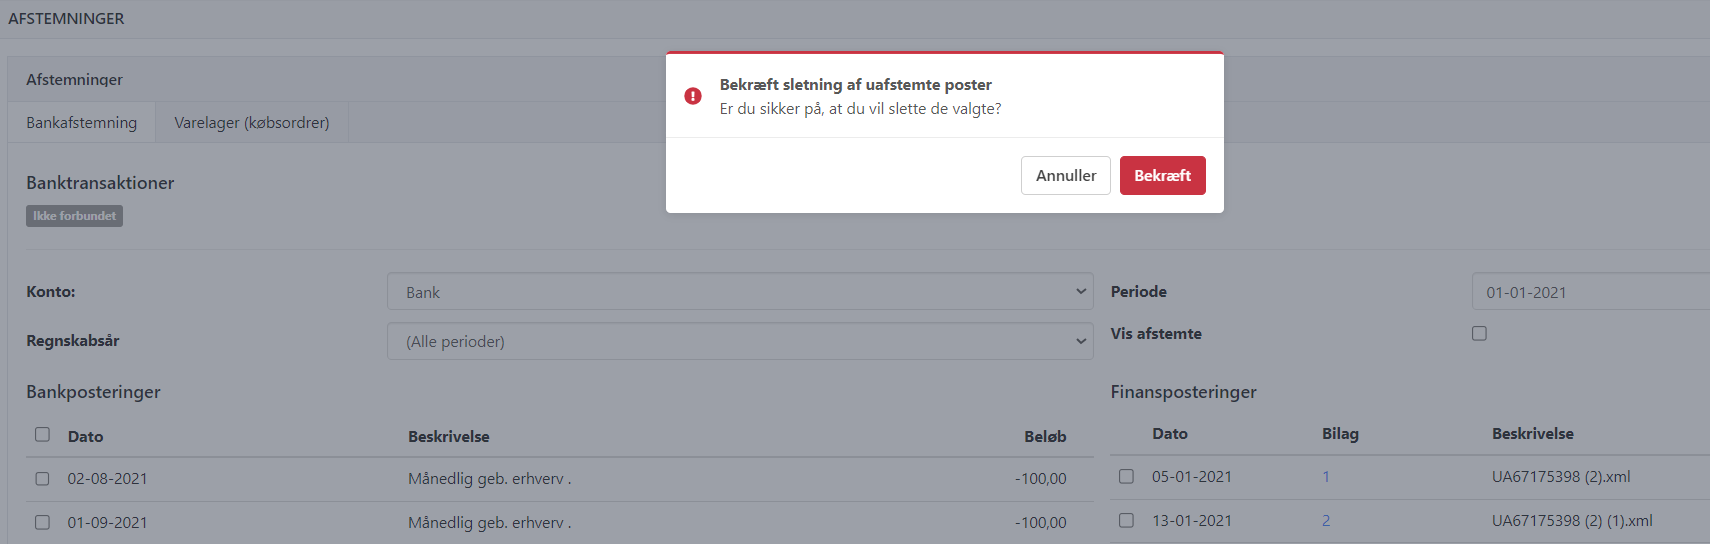
If you want to delete bank entries that have been imported into Xena, you must first set the date range at the top, so you only see the entries you want to delete.
Press Delete unreconciled entries
Confirm that you want to delete the bank entries
If you use a card terminal and are having trouble reconciling your card payments, this guide can help:
➡️ Reconciliation of Nets settlements
- Updated