Import to Cost Registration
You can import costs to your sales orders using a CSV file, for example, from EG Construction Site.
File Content Requirements
In Excel, you can arrange your data into the necessary columns and then save the file in CSV format.
- All columns must be present, but it is not necessary for all of them to contain data.
- Row 1 is used as column headers and is never loaded.
- The columns do not need to have names in the file.
See an example of an Excel sheet below. All the gray-highlighted data is not loaded into Xena. The explanation of the columns is provided below the image.

Column A: Date, which should be in format DD-MM-YYYY
Columns B and C: Employee number and employee name, linked to a user in Xena during import
Column D: Activity. Not loaded, but must be present in the file
Column E: Comment. Not loaded, but must be present in the file
Column F: Wage type, linked to an activity type in Xena during import
Column G and H: Project number and Project name, linked to a task in Xena during import.
Columns I: Hours loaded for employee lines (lines where Wage type is filled out)
Column J: Quantity loaded for standard lines (lines where Wage type is empty)
Column K: Cost number. Not loaded, but must be present in the file
Column L: Cost name, loaded for line type 'Standard', which typically is material registrations
Column M: Costs loaded for line type 'Standard' (cost price). For line type 'Employee', the cost price is always retrieved from the article number linked to the activity type. See 'Setup Requirements'.
Column N: Status. Not loaded, but must be present in the file
Setup Requirements
Before importing for the first time, ensure that all the activity types you are importing to also have an article number associated with them if you want the records to have a purchase price/sales price in Xena. You can find more information about setting up cost prices/sales prices for employees in the guide here.
Additionally, it's essential that the activity types also have a cost type added. Learn more about how to set up your activity types here.
Importing Records
You can access the import function under the Sales/Project menu > Cost Registration. Open the dialog to import by clicking the three dots in the top-right corner.
All configurations in each step are automatically saved for each user across all steps. This means that when, for example, you link an employee from the file to a user in Xena, we will save this configuration for your future imports.
The configuration is stored in each user's browser, so if multiple users utilize the import function, they will only see their individually saved configuration. Also, be aware that if a user clears their browser cache, the configuration will be reset.
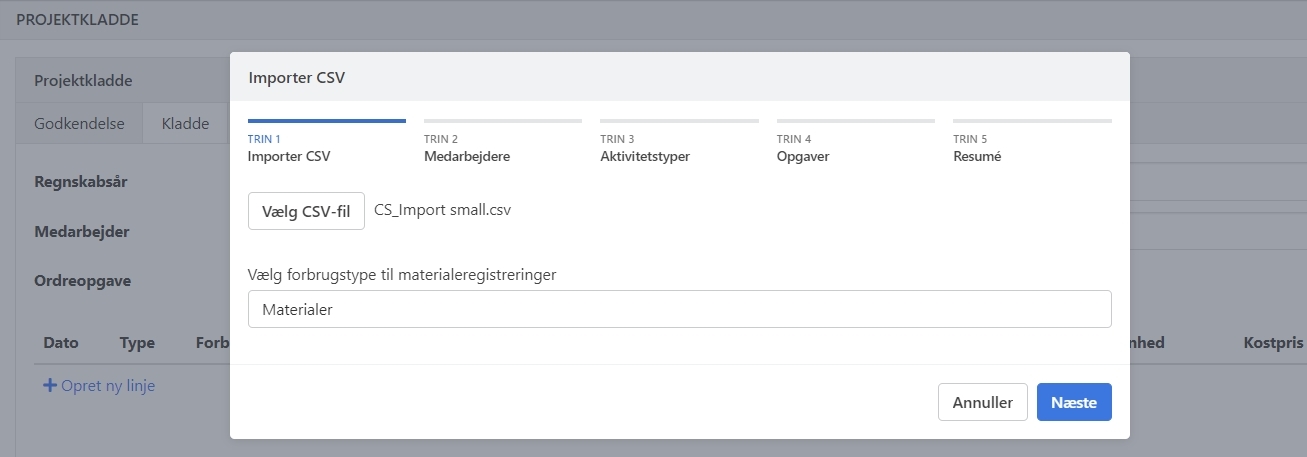
Step 1 - Import CSV
In this step, click on the 'Import CSV file' button and select your CSV file.
You also need to select a default cost type that will be applied to all 'Standard' lines (typically material registrations).
Press 'Next' to continue.
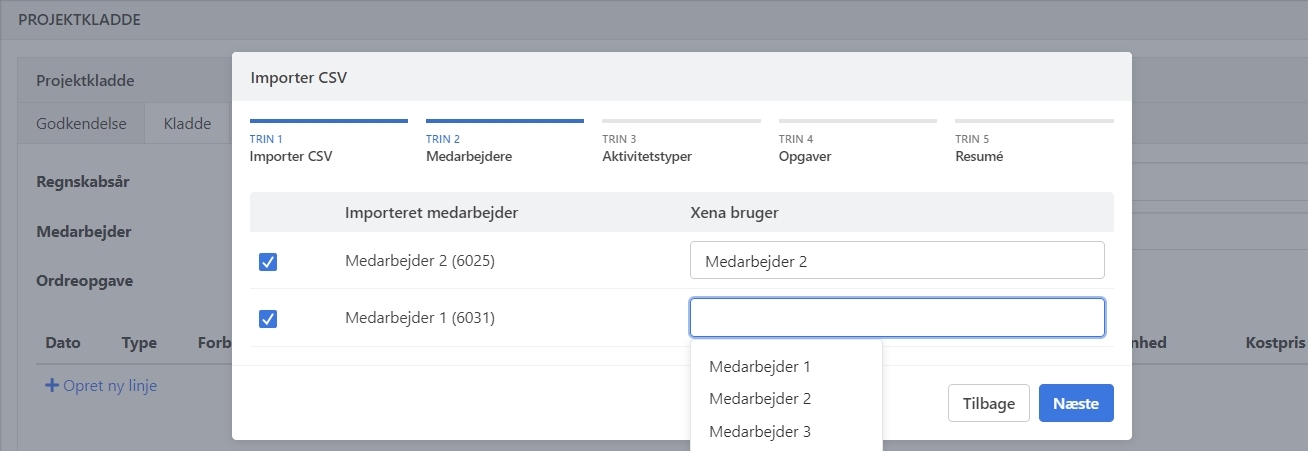
Step 2 - Employees
In this step, you need to associate the employees from the file with the users in Xena. If there is an employee you do not wish to import, you can uncheck the box next to that employee.
Press 'Next' to continue.
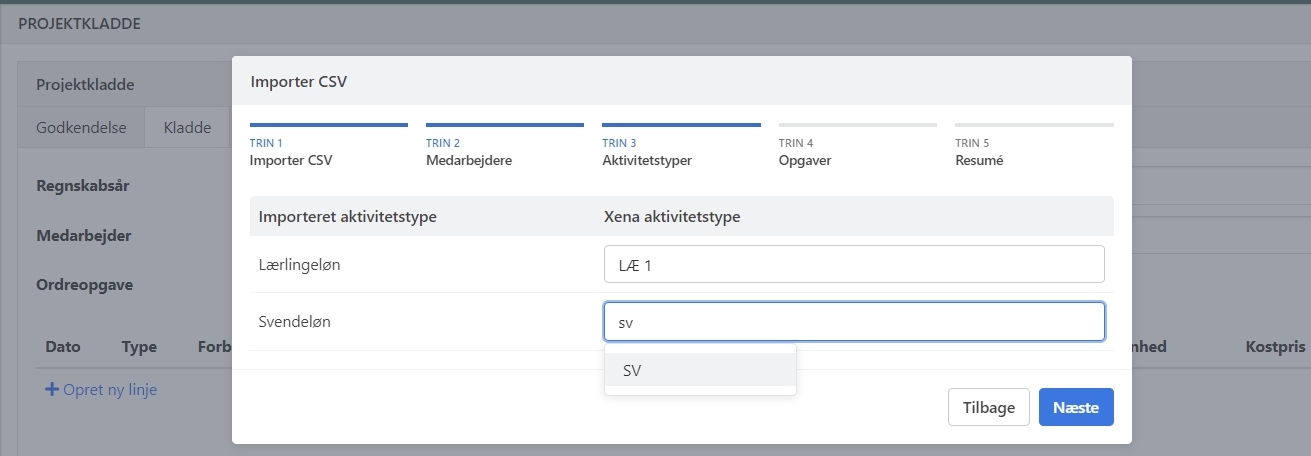
Step 3 - Activity types
In this step, you need to link the wage types from the file with the activity types in Xena. You must choose a corresponding activity type for each wage type to proceed to the next step.
Press 'Next' to continue.
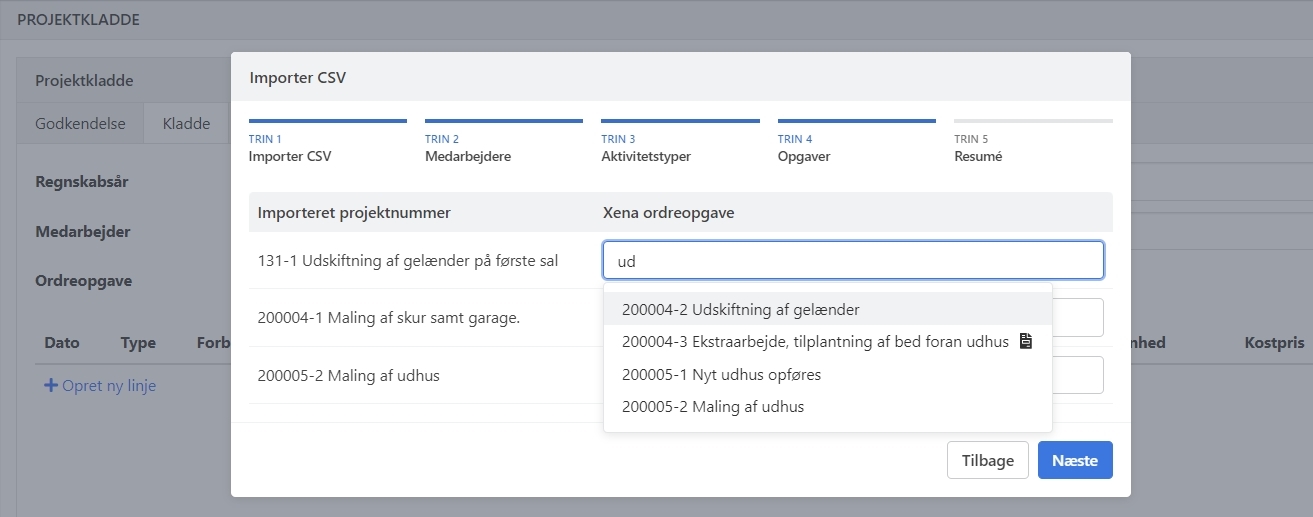
Step 4 - Tasks
In this step, you should link the project numbers from the file with the tasks in Xena. An task number will automatically be suggested if a match can be found. Lines where a corresponding task could not be found will be displayed at the top of the list. This makes it easier to identify the lines where you need to manually add a task.
You must select a corresponding task for each project to proceed to the next step. If you see an icon next to the Xena order task, it means that the task in question has been invoiced.
Press 'Next' to continue.
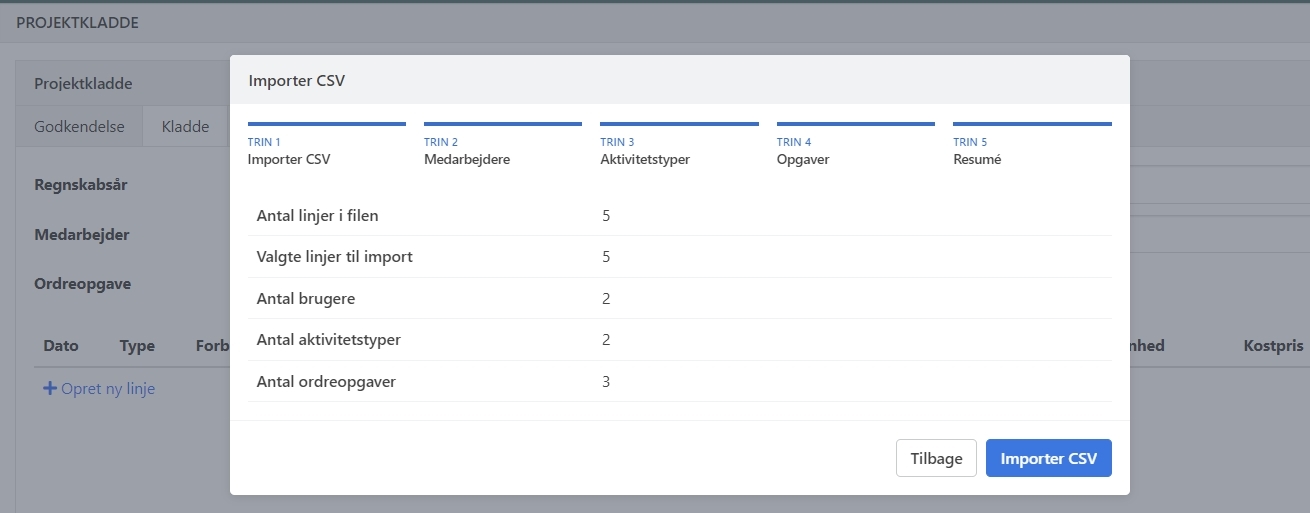
Step 5 - Summary
Here, you can see the number of lines in the CSV file compared to the number of lines that will be loaded into Xena. If you have removed some employees in Step 2, the number of lines to be imported will be less than the number in the file.
You can always click the 'Back' button to go back one step.
Click the 'Import CSV' button to start the import. If the file contains many lines, it may take some time to load them all.
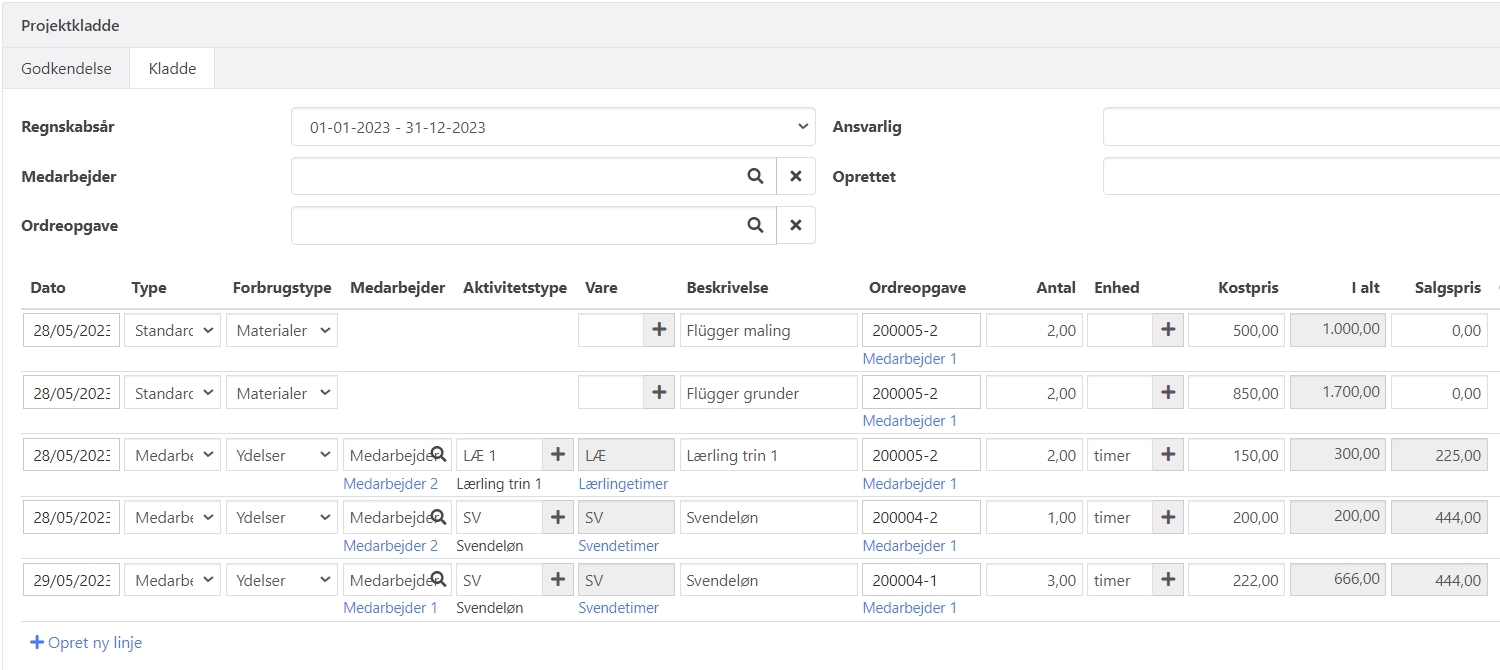
The registrations are now created in the Cost Registration and should be subsequently approved according to your normal procedures.
- Updated