Use barcodes
Scan barcodes for faster order line registration in Xena
In principle, a barcode scanner works like a keyboard, but it inputs data much faster and more accurately than manual entry.
Setup Barcode scanner
You can program a barcode scanner to "press" a specific code before and after reading the barcode; these are known as prefix and postfix.
To use a scanner in Xena, it needs to be set up to send an 'Enter' character as a postfix, meaning it should press 'Enter' after reading the barcode. Since this is a common default setting on most scanners, you can usually connect a barcode scanner to your PC, Mac, or tablet and start using it right away.
Once the scanner is set with the postfix, it also needs to be configured in Xena:
- Start by connecting the scanner to the device where you use Xena
- Go to the Setup > Hardware Setup menu
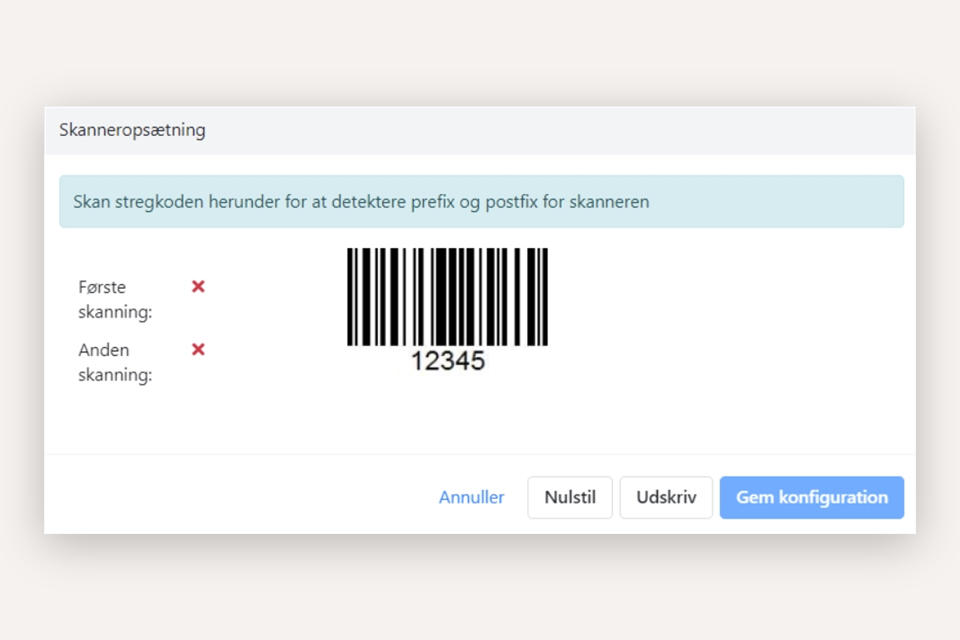
- If you've used a different scanner before, you can choose 'Reset Configuration'. If you're installing a new scanner, select 'Scanner Setup'
- Now, scan the barcode shown twice in a row. If you can't scan directly from the screen, you can print the barcode and scan it. Make sure you are in the scanner setup screen in Xena while scanning the barcode
Once you've scanned the barcode twice, it's ready to use in Xena. Click 'Save Configuration.'
Creating Barcodes for articles
To use a barcode scanner for registration in Xena, your articles must have barcodes associated with them. You can manually create barcodes for each article or import barcodes fromarticles.
Importing Barcodes
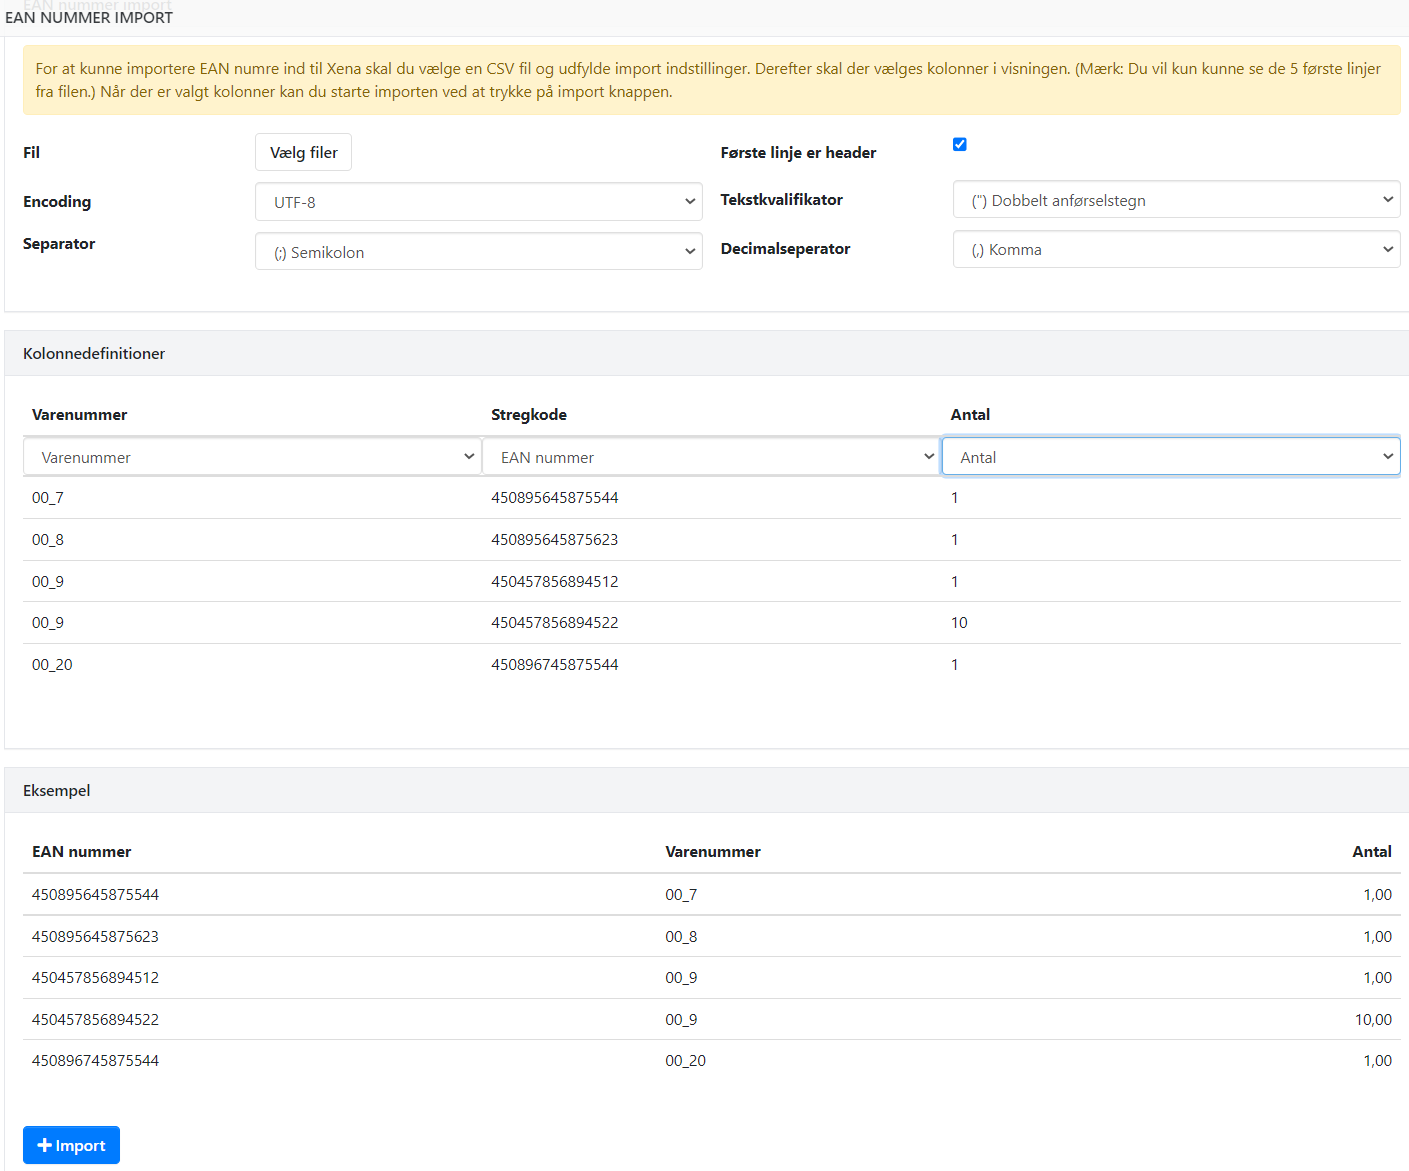
To import barcodes, the file must contain at least the article number and the barcode (EAN number). You can also import quantities if a specific barcode applies to a box containing multiple of the same article.
- Choose the menu Sales > Articles > Article Overview
- Press the menu icon (three dots) at the top right
- Select 'Import EAN Number'
- Choose your file and set the options at the top
- Identify the columns for 'Article Number' and 'EAN Number,' and optionally 'Quantity'
- Press the 'Import' button
Manually create Barcodes for an article
- Open the article via the menu Sales > Articles
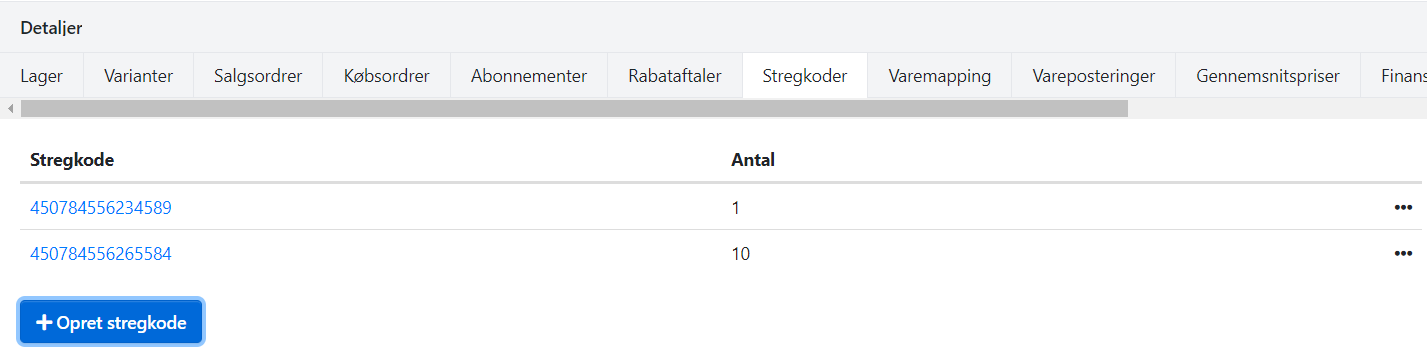
- In the 'Details' box at the bottom, select the 'EANNumber' tab
- Click 'Create EANNumber'
- In the 'EANNumber' field, you can manually enter the barcode or scan it from the article
- Adjust the quantity if the scanned barcode applies to, for example, a box of the article
- Click 'Create'
You can add multiple different barcodes that reference the same article The following barcode formats are supported for scanning in Xena:
- EAN-8
- EAN-13
- Code 128
Using Barcodes on an Order
Now you are ready to use barcodes on your orders.
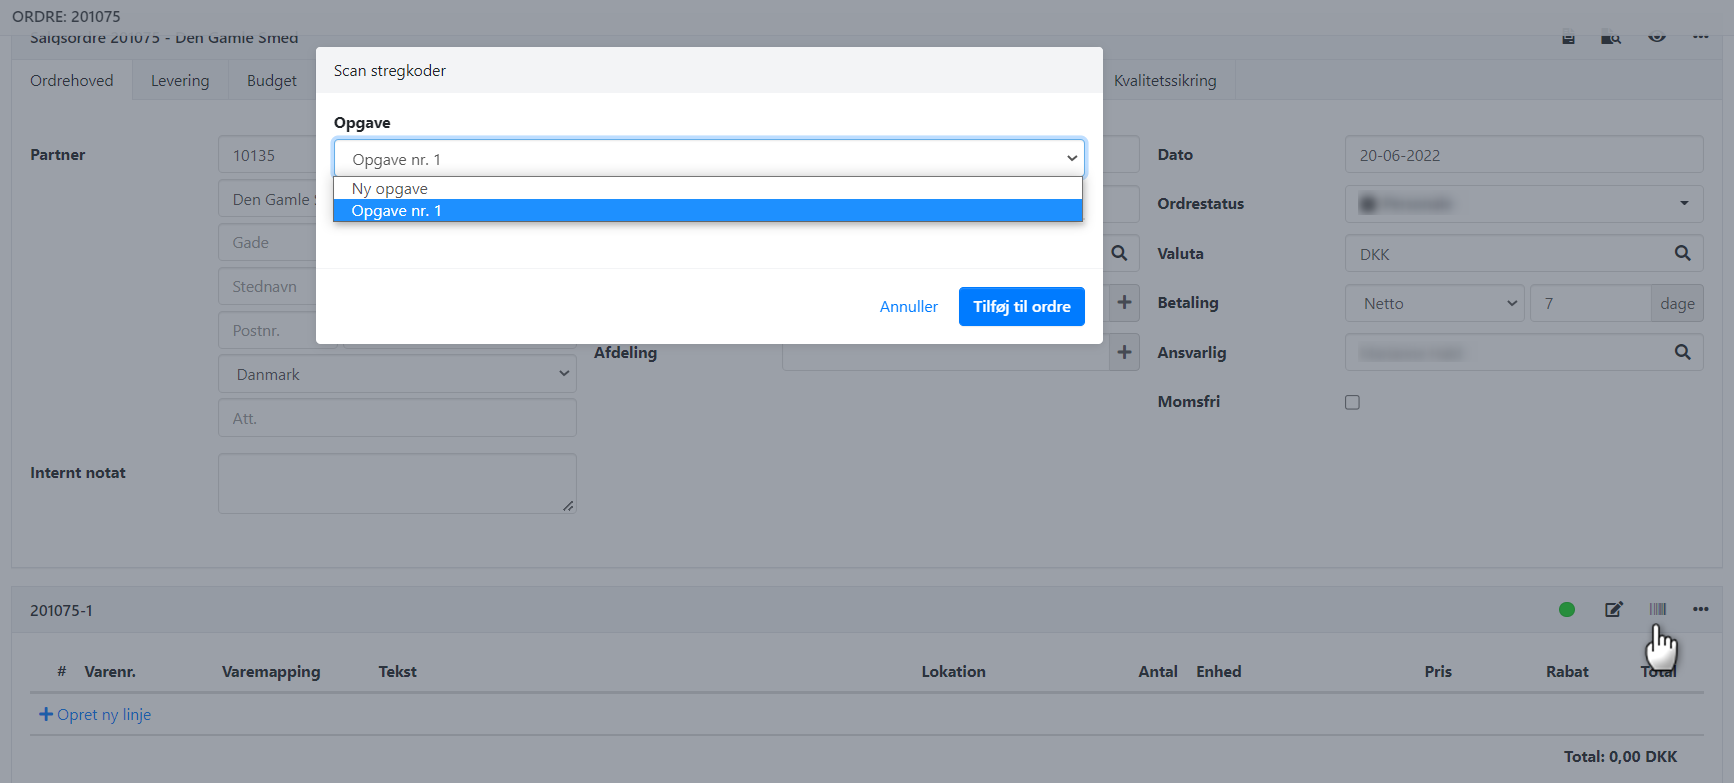
At each task on the order, there is a barcode icon. Click on this icon (or use the 'F10' key on the keyboard) to open the scanning dialog box.
If you scan the same article multiple times, the quantity will increase with each scan. Finally, click 'Add to Order' (or press F10 again).
Tip: In the scanning dialog box, you can choose which task the articles should be added to. By default, the first task will be suggested, or the task from which you click the barcode icon. Press 'New Task' if you want to create an entirely new task.
Xena becomes even more efficient with a barcode scanner
If you have over-the-counter sales or need quick article registration on an order, consider getting a barcode scanner and give it a try! It's a very efficient method. You can create a list of frequently used articles that don't have barcodes. If you have questions about using a barcode scanner in Xena, feel free to contact us via chat.
Note: We do not provide support for barcode scanners, but we have good experiences with common USB barcode scanners. Choose a supplier that can assist you if any issues arise with the scanner. You can find more information in our blog post about barcodes.
- Updated