Transfer payment to the bank
In the menu Purchases > Payments, you get an overview of invoices that need to be paid. With just a few clicks, you can export a payment file and post the payments in your fiscal.
Supplier setup
Before you can transfer payments to the bank, payment details must be registered for each individual supplier.
You can either:
- Enter the payment information directly on the supplier card, or
- Wait until you're ready to make the first payment.
How to Add Payment Information:
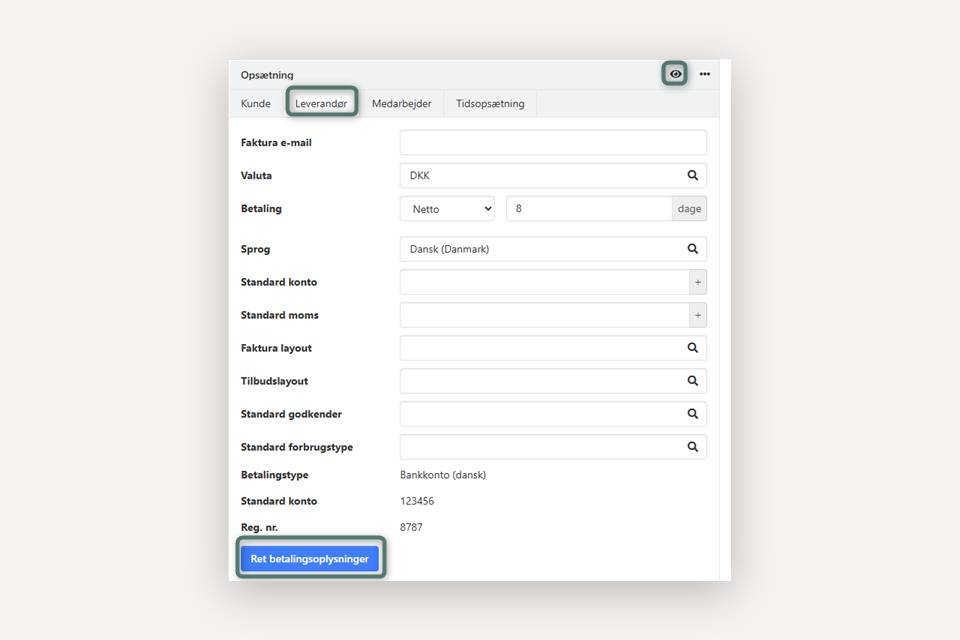
- Go to the supplier card and select the tab Setup > Supplier
- Click the edit icon or double-click the field
- Select Create payment information
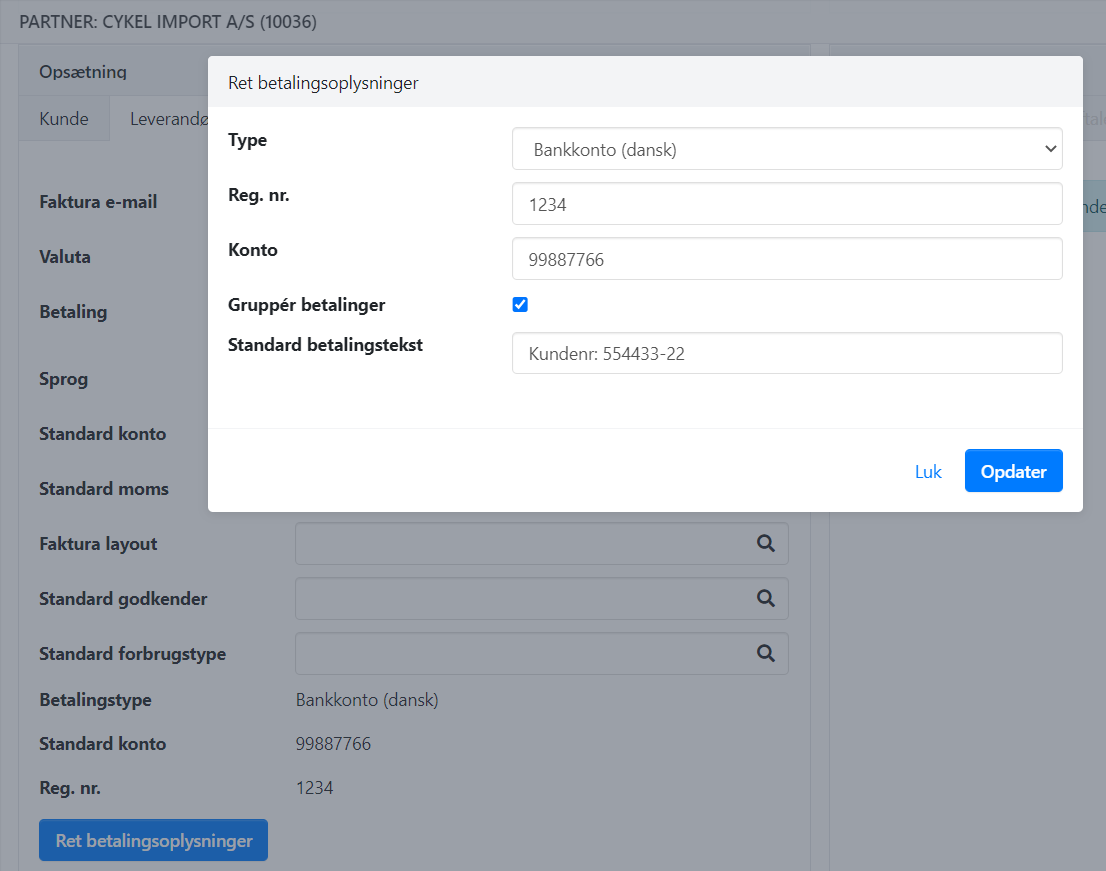
You must choose between payment type:
Bank Account:
- Enter the supplier’s bank registration number and account number
- Optionally, check Group payments and enter a default message, such as your customer number
FIK 71:
- Enter the supplier’s FIK number
- Optionally, check Group payments to use a single payment ID, for example from a bank statement
Prepare Payments
Go to Purchases > Payments
Filters:
In the field By due date, you can limit payments up to a specific due date. You can also choose to view selected suppliers only, and limit the view to documents that are not parked.
➡️ Learn more about parking and notes on vouchers
Required Information:
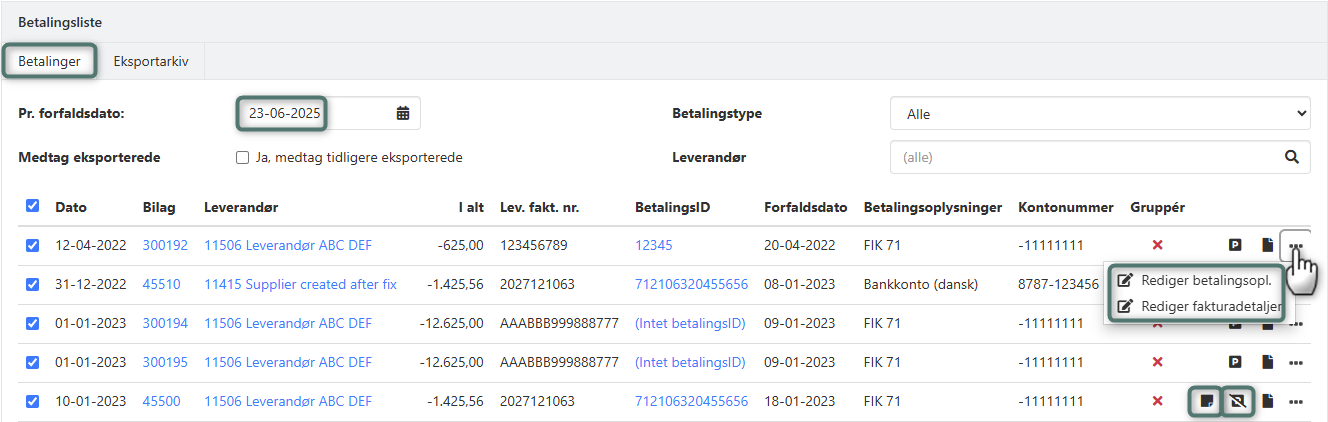
All invoices must have either an invoice number or a payment ID to be exported. You can edit this information via the menu (three dots) > Edit Invoice Details.
If payment information is missing for the supplier, you can enter it via the menu (three dots) > Edit Payment Info.
Grouped Payments:
If you choose to transfer payments in groups, special rules apply:
- You do not need to enter invoice/payment IDs per invoice. These can be added as static text in the supplier’s payment information, or entered at export
- If a supplier has multiple due dates, one payment is created per due date
- If the due date has passed, today’s date is used as the payment date
Handling Credit Notes
Credit notes can be handled in two ways:
Automatic Deduction:
Enable Group payments in the supplier's payment information. Credit notes will be automatically deducted from the total amount.
Manual settlement:
Match the credit note with one of the supplier’s outstanding invoices. The amount to be paid to the bank will be reduced accordingly.
➡️ Read more: Settlement of supplier transactions
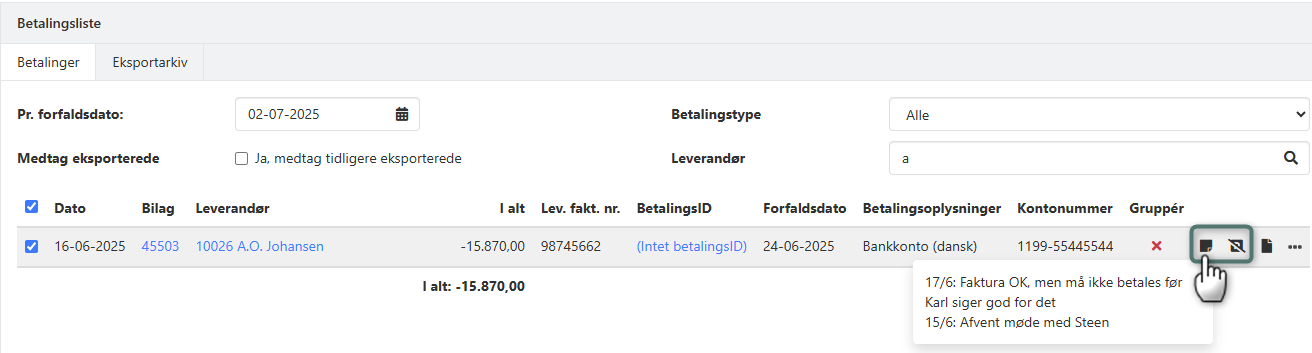
Parking Invoices
If you want to postpone payment of an invoice (e.g. due to uncertainty or pending approval), you can use the Park function. You can also add notes and change the due date.
You can do this by:
- Clicking the note icon
- Clicking the park icon
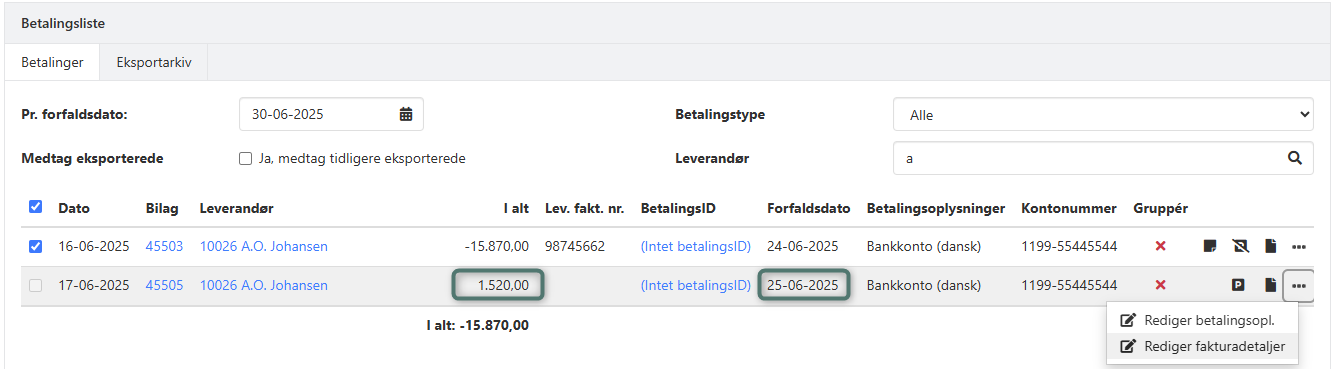
- Clicking the three dots and selecting Edit invoice details
All of these actions open the same editing dialog. Any changes made here will also be visible on the supplier transaction.
⚠️ Note: It is not possible to pay parked invoices via the payment list.
➡️ Read more: Parking and notes on supplier transactions
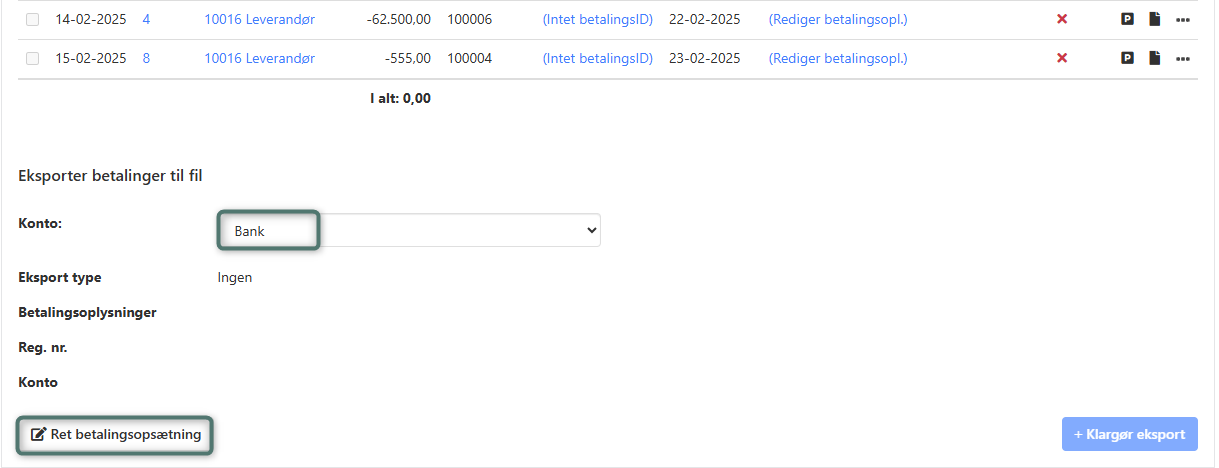
Prepare Export
- Click Edit payment setup (first time only)
- Choose your bank’s export format
- Enter your registration and account numbers
- Click Update to save
👉 List of formats and banks supported by Xena.
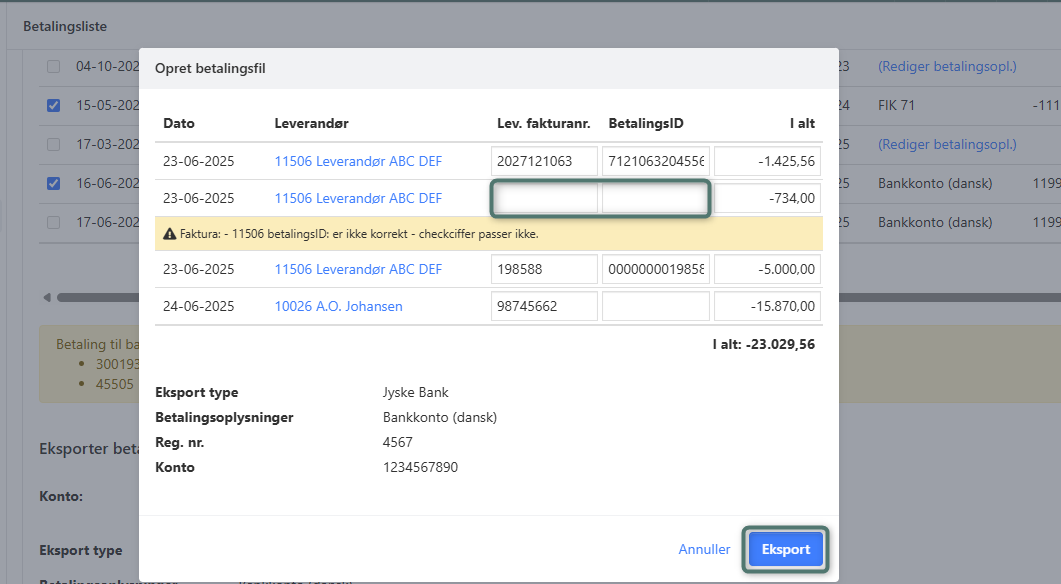
Export Payments
- Select the invoices you want to include in the payment. Unselected invoices will appear next time
- Click Prepare export
- A dialog will appear showing any errors or missing information, such as a missing payment ID
- You can correct the issue directly in the dialog or close it and fix it via the invoice list
- Once everything is correct, click Export
A CSV file with the selected payments will be downloaded and saved in your default downloads folder, e.g.:
27-06-2023_8920_bank_payments.csv
Import the file into your online bank as you would with manual payments.
⚠️ If the file fails to import in the bank: Try downloading it again via the Export Archive tab and repeat the import.
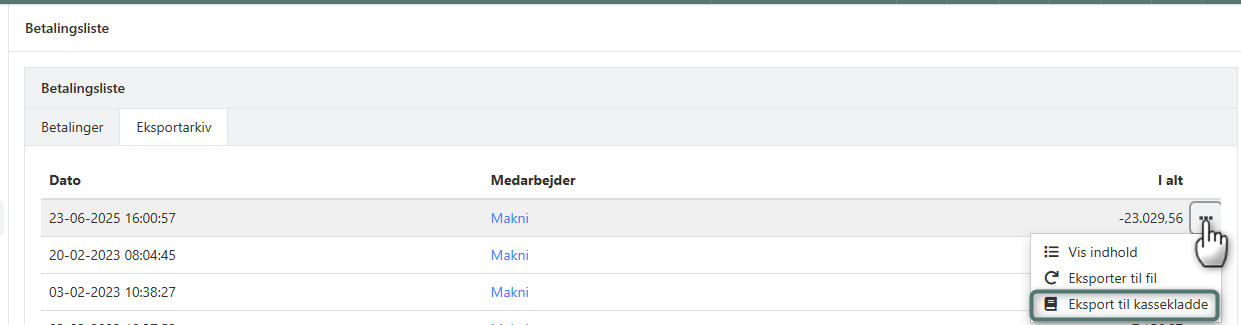
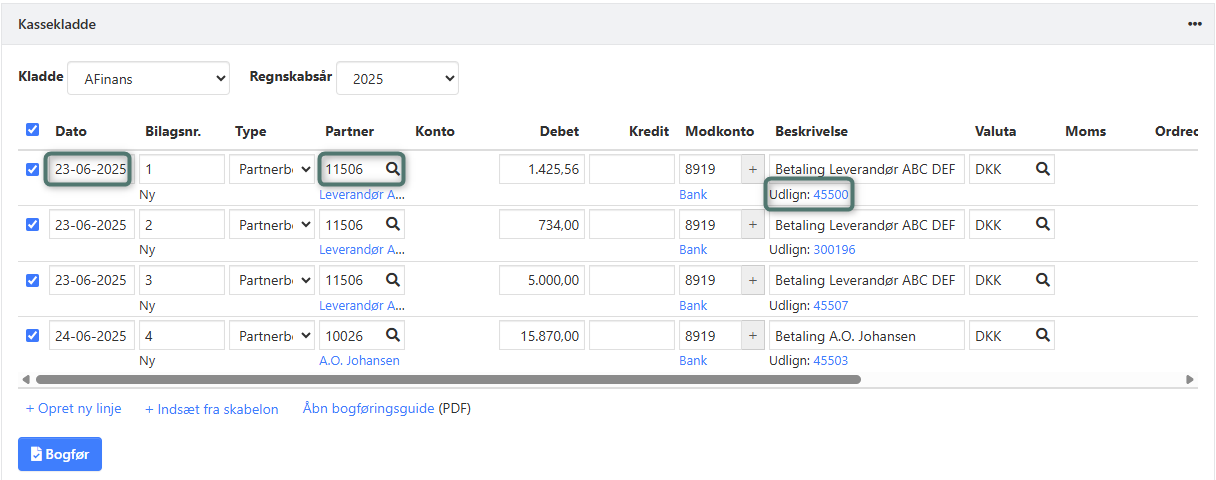
Transfer Payments to Ledger
After exporting payments to the bank, you can transfer the file’s data to a ledger journal:
- Go to Purchases > Payments > Export Archive tab
- Locate the relevant export (based on date)
- Select Export to ledger from the menu
- Choose the ledger and the offset account (bank account)
- Click Export to journal
The ledger will open automatically, and the payments will be ready for bookkeeping.
Re-export and History
You can re-export previously exported payments:
- Check the Show already transferred box to view previously paid invoices
- Edit and mark them as with new payments
- Under the Export Archive tab, you can find and re-export previous files directly from the menu
- Updated