Locations
Locations in Xena - A guide to creation and management
The Stock Management app includes Warehouses and Locations and can be installed via Xena App Store. This guide assumes that it is installed.
Locations refer to specific shelves or drawers in your warehouse where you store your articles. It is a convenient way to keep track of where the articles are located so you can easily find and manage them.
If you have the same article stored in multiple places, for example, in the main warehouse, remote warehouse, and the store, it can become complex to manage. Furthermore, if you have multiple warehouse buildings with nearly identical shelves and articles, it can be challenging to keep an overview.
Xena makes it easy for you to efficiently manage your locations and articles. You can create physical warehouses with different dimensions, such as Shelf and Rack, to organize your locations.
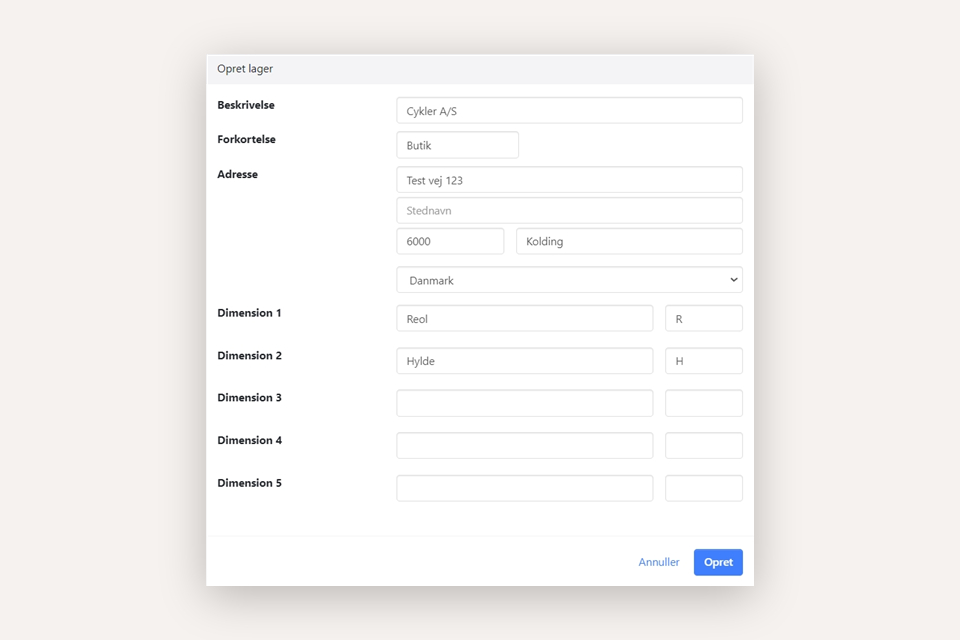
Create warehouses
If you have multiple physical warehouses, such as a store and a main warehouse, start by creating these warehouses:
- Go to the menu Setup > Stock Setup and select the 'Warehouses' tab
- Press 'Create warehouse.'
- Enter a description of the warehouse, an abbreviation, and optionally an address
- Define the dimensions, such as Shelf and Rack, that help identify the precise location of the articles in the warehouse
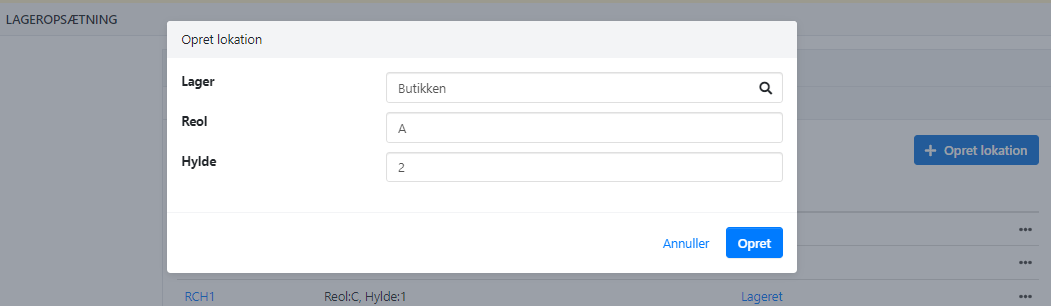
Create locations within warehouses
It is a good idea to create a logical system for your shelves/racks. So, you may start by creating a drawing that illustrates each of your warehouses and thus name the shelves and racks.
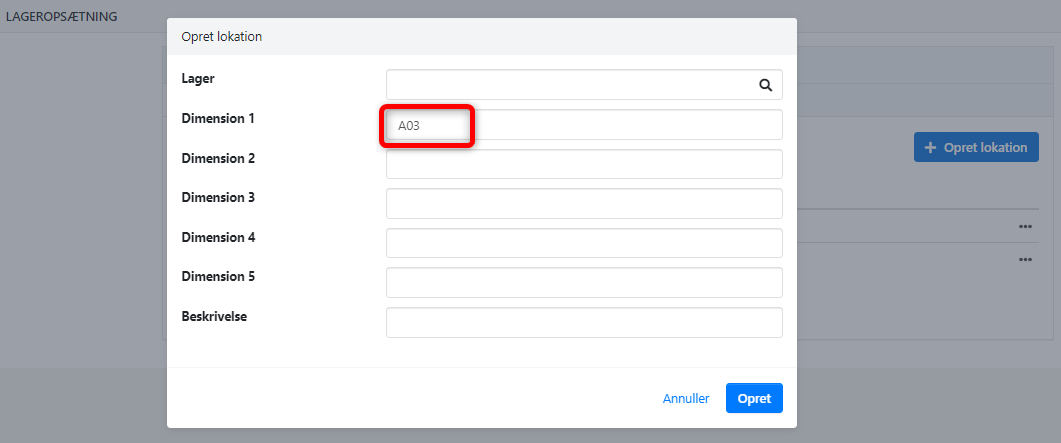
Now you can define each individual location within the created warehouses:
- Go to the menu Setup > Stock Setup and select the 'Locations' tab
- Press the 'Create location' button
- Select the relevant warehouse from the dropdown menu
- Choose the first rack within this warehouse
- Below, choose the first shelf on this rack
- Continue creating all the shelves on this rack within this warehouse
Once all the shelves on this rack within this warehouse are created, continue in the same way with the next rack.
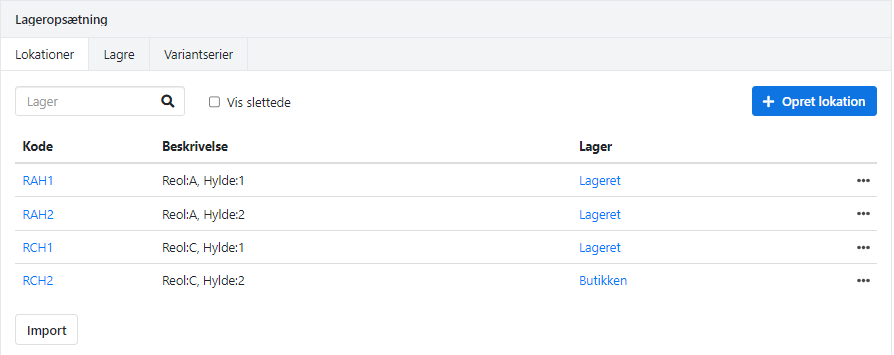
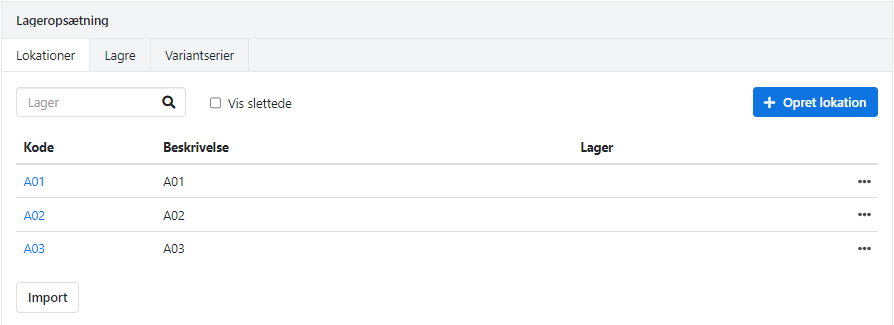
The list of locations looks like this - with a warehouse added:
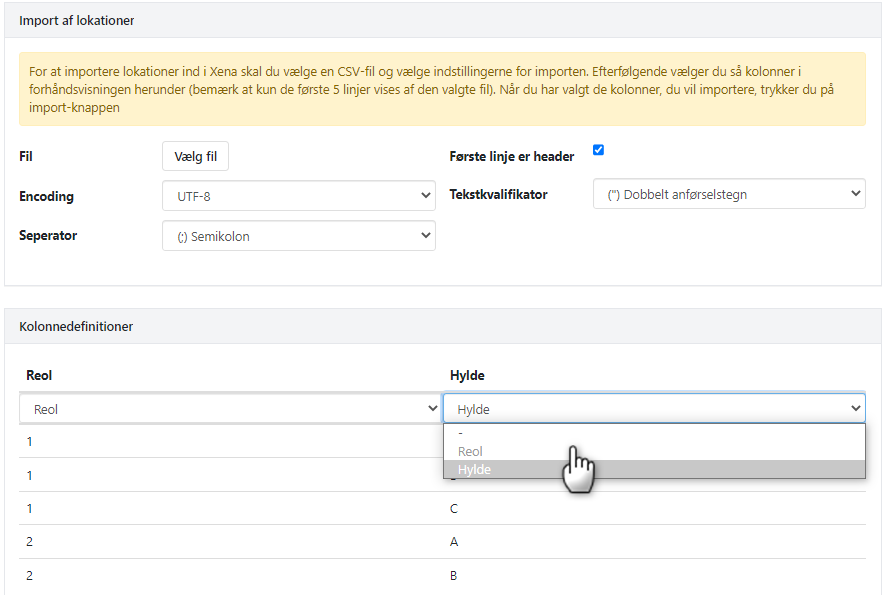
Import locations within warehouses
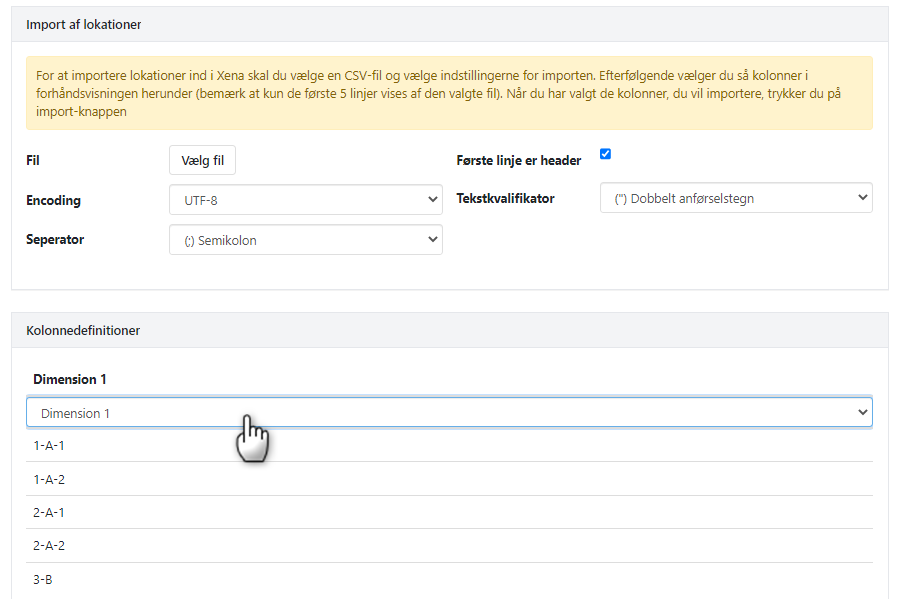
You can also import locations per warehouse using a CSV file containing the necessary dimensions as columns, in the example above, one column with Shelf and one column with Rack:
- Select the menu Setup > Stock Setup, choose the 'Warehouses' tab
- Open the warehouse you want to import locations to
- At the bottom, press the 'Import' button
- A new screen opens, where you select the file at the top
- For each column in the file, choose the dimension that matches it
- Press the 'Import' button to start the import
Create locations without warehouses
If you do not have multiple physical warehouses, you can proceed directly to creating locations without defining dimensions beforehand.
- Go to the menu Setup > Stock Setup and select the 'Locations' tab
- Press the 'Create location' button
- Name your locations
Example of a location created without a warehouse:
The list of locations looks like this - without a warehouse:
Import locations without warehouses
You can also import locations without warehouses using a CSV file with named locations:
Select the menu Setup > Stock Setup, choose the 'Locations' tab
At the bottom, press the 'Import' button
A new screen opens, where you select the file at the top
Choose the column in the file to be saved as Dimension 1 in Xena
Press the 'Import' button to start the import
Associate articles with Locations
Once the locations are created, you can now associate articles with them. The same article can easily have a stock in multiple different locations.
Create articles on locations
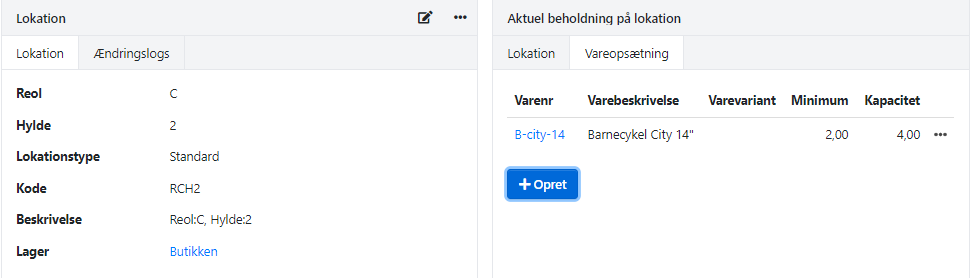
Open the location to see the articles placed there, along with their current stock and movements.
To create an article on a location, select the 'Article Setup' tab in the box on the right
Press the 'Create' button
Fill in information about the article number, optionally minimum, and optionally Capacity
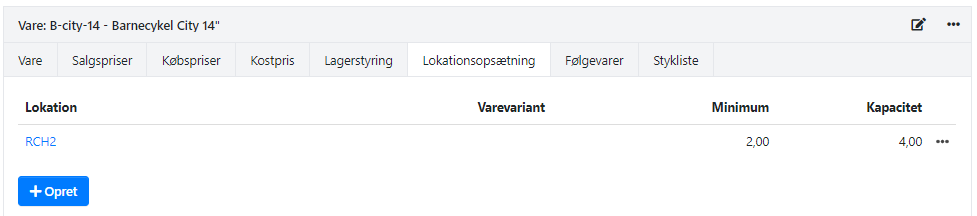
Create locations on articles
If you open the article itself, you can see which locations this article is placed in, along with the current stock.
- To create a location on an article, select the 'Location Setup' tab in the box at the top
- Press the 'Create' button
- Fill in information about the Location, optionally minimum, and optionally Capacity
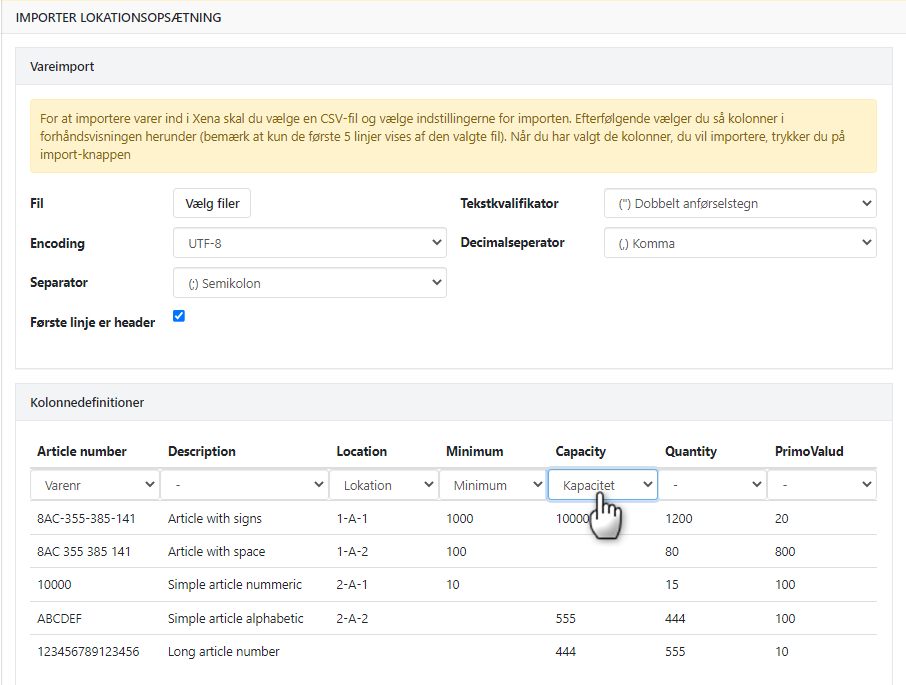
Import location setups
You can also import location setups per article using a CSV file.
The import file should be saved in CSV format and should contain the columns:
- Article Number
- Location
- Minimum
- Capacity
The file is imported as follows:
- Select the menu Stock > Import > Import Location Setup
- A new screen opens, where you select the file at the top
- For each column in the file, choose the dimension it should be saved as in Xena
- Press the 'Import' button to start the import
- Updated