Expanded budget from calculation
The integration between Visual Calculation/EG Malerkalk and Xena has been expanded, and it is now possible to transfer a much larger amount of data.
The app 'Calculation Import' is installed via the Xena App Store. This guide assumes that it is installed in your accounting system.
Calculations created in EG SmartKalk, EG Visual Calculation & EG Visual Malerkalk can be transferred to a project.
The automatic creation of orders and tasks is based on the imported data
Calculation Import
You still need to follow the same simple procedure from Visual Calculation/EG MalerKalk when sending data to Xena. If you're unsure how to do this, it is described here.
Once the calculation is transferred to Xena, the numbers will be displayed on the project's 'Calculation' tab.
All lines are created with the texts from the calculation as headings and subheadings. The calculated figures are distributed across the consumption types chosen during the transfer.
NOTE: You have the option to delete the uploaded calculation as long as you haven't created orders on any of the subheadings. So please make sure everything is in order before starting the order creation process via the calculation!
If the calculation cannot be transferred
If you have previously transferred a calculation to a project, it is blocked from transferring a new one on top of it.
To transfer a new calculation, you need to delete the current one by clicking the red 'Clear table' button. You will find the button at the top right of the screen.
Now, the tab will look as shown below, and the project is ready for you to transfer a new calculation.

Order creation from the calculation
Based on your calculation, you can create orders and tasks associated with the project. The headings become orders, and the subheadings become tasks. On the tasks, you can also choose to create the agreed sales prices from the calculation for each subheading.
NOTE: It is important to create the orders on the project directly through the calculation (as described below) so that you are able to track the realized figures in the calculation.
Orders (and associated tasks) are created as follows:
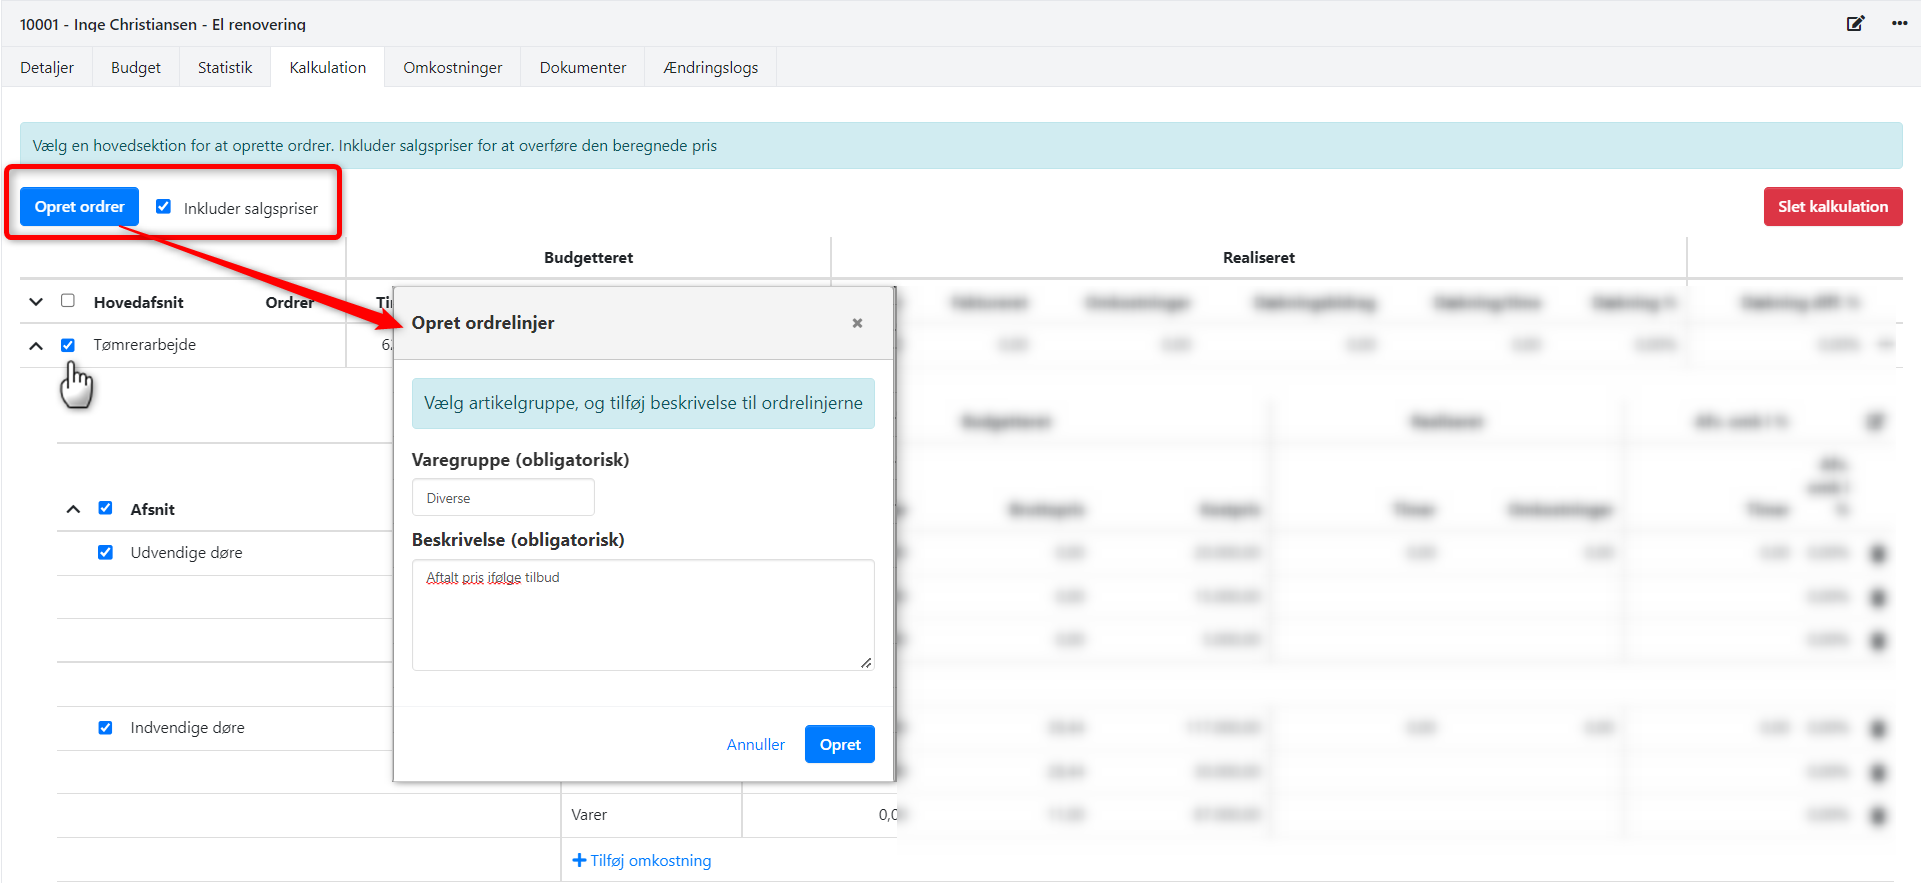
- Select the headings for which you want to create orders. You can create orders for only some of the headings at a time.
- Choose if sales prices per subheading should be transferred to each task as the basis for pay-on account/invoicing.
- Click on the 'Create Orders' button.
- In the displayed dialog, choose a product group to be selected as the basis for all invoice lines created for the invoice.
- In the dialog, enter a description for all these sales prices for the order.
- Confirm by clicking the 'Create' button.

If the orders have already been created for the heading, and you subsequently want to create the sales prices as well, you can choose the 'Create Order Lines' menu item from the menu next to each heading.
Here's an example of a calculation where order number 201560 has been created for the first heading:

To open the associated order, you can do so through the heading's menu (as shown above), or you can find the overview of all orders associated with the project by scrolling to the bottom of the page.
NOTE: Remember that if you press the Ctrl key while clicking on the link to the order, the order will open in a new tab, allowing you to continue working with the calculation without switching away from the screen.
Viewing calculation details
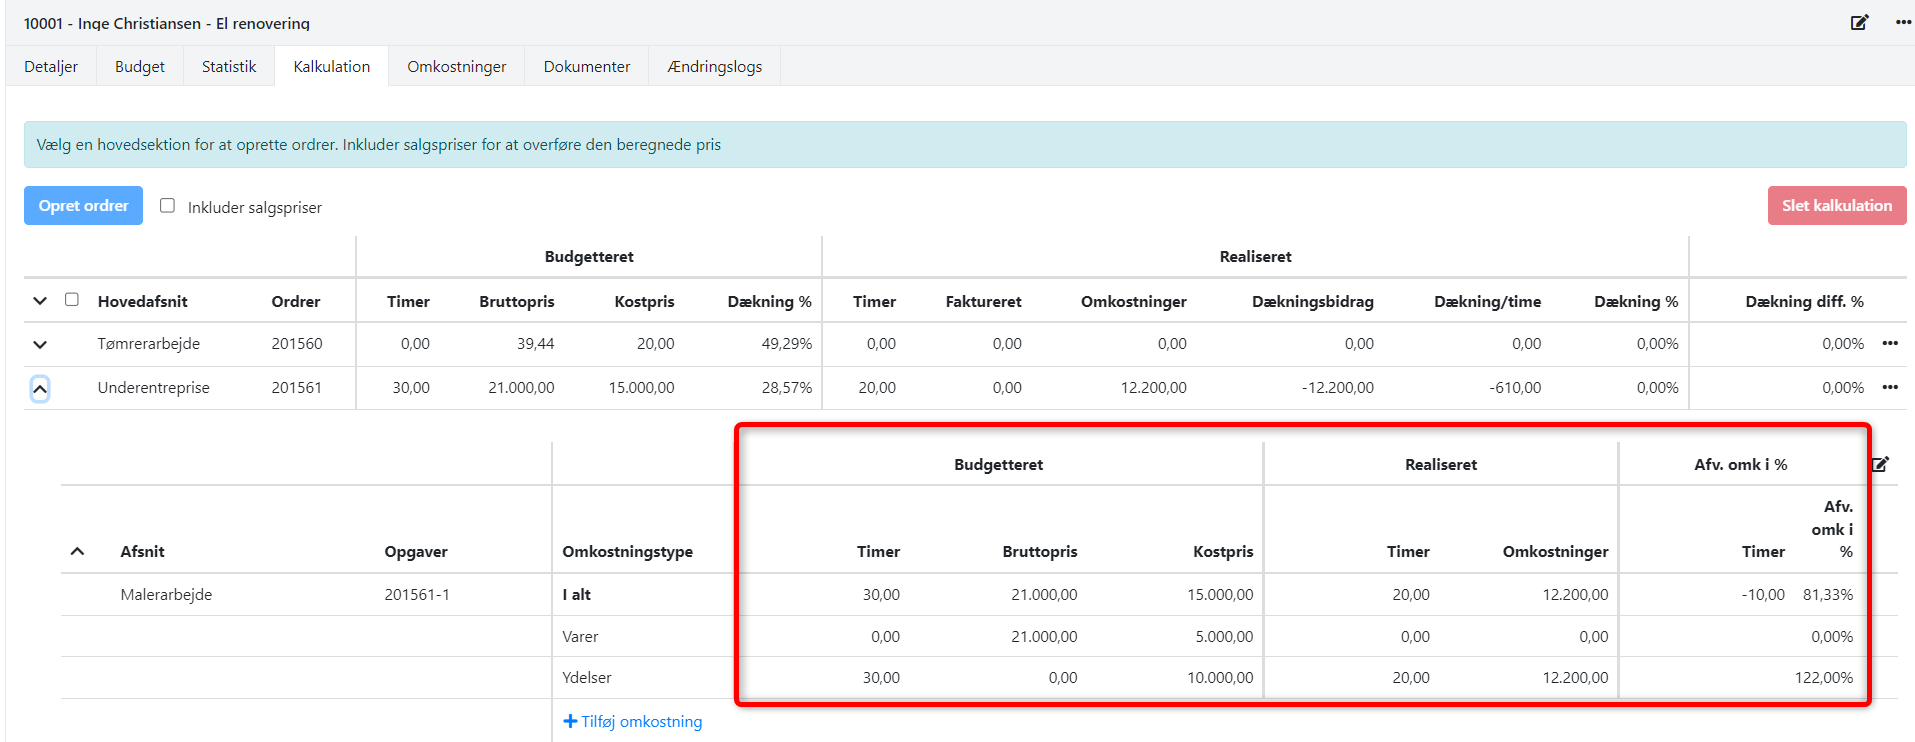
When a heading is expanded, you will see the attached subheadings.
If you also expand the subheading, you will see the budget figures for the subheading, distributed across consumption types.
Once costs, time, and materials are registered on the tasks, the realized figures and deviations will be displayed in the calculation.

Edit Calculation
You have the option to edit the uploaded calculation figures or add new headings, subheadings, and budget figures.
Add New Headings/Subheadings
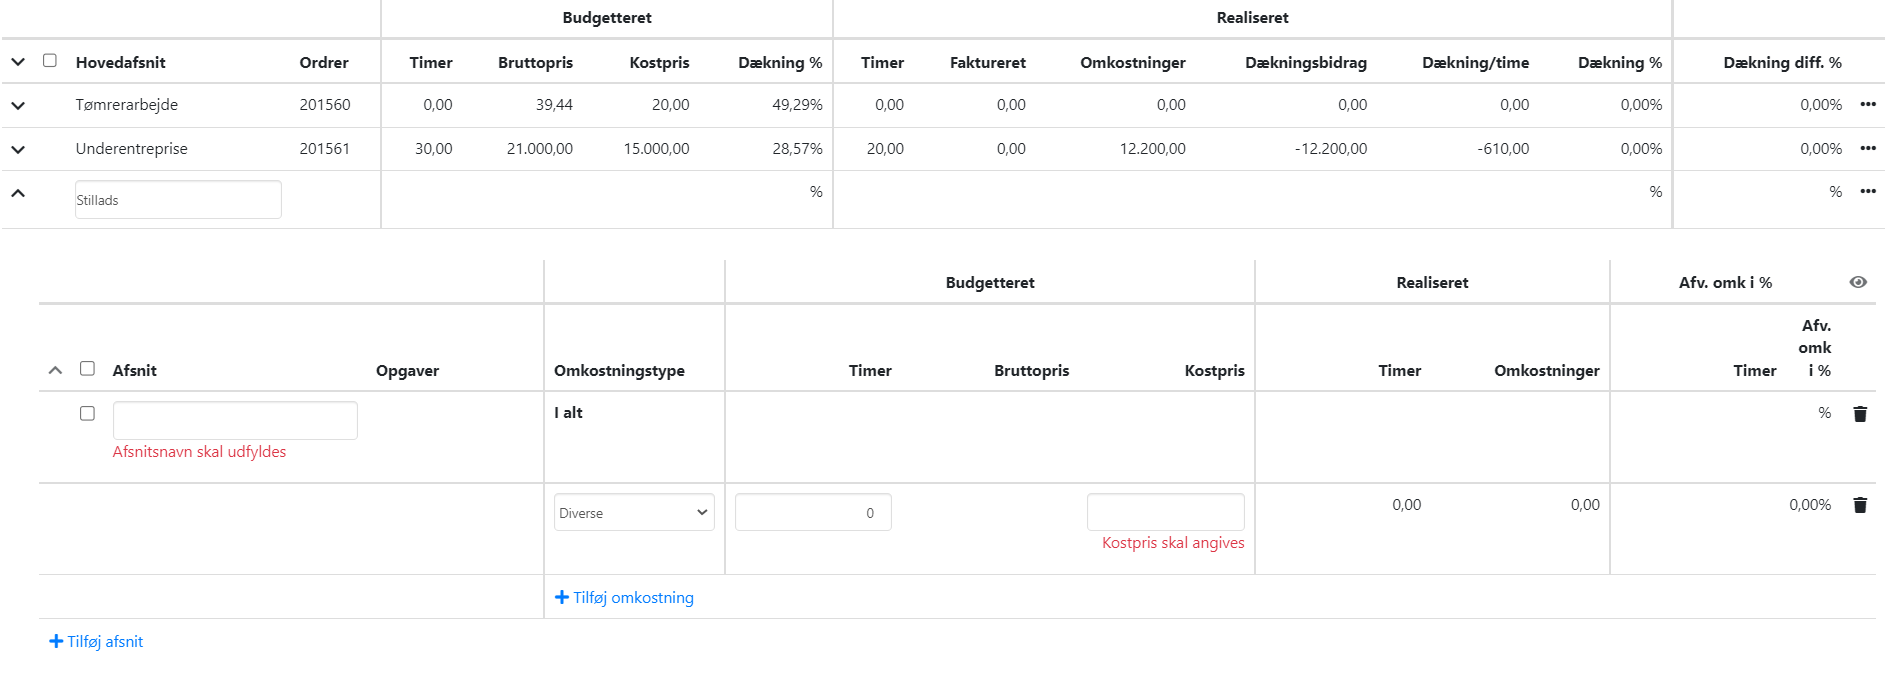
Simply click on the '+Add main section' link.
Once the Heading is created, a link to create subheadings will automatically appear.

Add Budget Figures
Once the subheading is created, you can also add budget figures.
- Select an expense type.
- If it is an expense with a budgeted time consumption, you can enter the number of budgeted hours.
- In the Cost column, enter the total budgeted cost for this expense type.
- When you are finished editing, click on the eye icon in the top right corner, and the statistical figures will be recalculated.

Edit Existing Subheadings/Budget Figures
To edit already created subheadings/budget figures, click on the pencil icon on the far right.
Now you have the option to make changes to all the uploaded texts and budget figures. Please note that if you have already created associated orders for the calculation, you cannot reload the calculation afterward.
Therefore, it is important that you ONLY make edits to the calculation if you are certain that the change is a genuine adjustment to the budget.

To use this integration, you need to have EG Visual Calculation version 7.08.01.01, version 7.08.01.02, or newer.
If you would like more information on this, feel free to contact our support. The integration is free and ready for installation in the Xena App Store.
- Updated